Download
1 / 24
240 likes | 380 Views
Braking 101. FOR OFFICIAL USE ONLY Note: This Slide is Mandatory. The information presented here is for informational use only Many references were used to develop this presentation Not all possibilities are covered Use the given information with proper respect to ORM

E N D
FOR OFFICIAL USE ONLYNote: This Slide is Mandatory • The information presented here is for informational use only • Many references were used to develop this presentation • Not all possibilities are covered • Use the given information with proper respect to ORM Note: Do Not Remove “For Official Use Only” From Any Slide
OVERVIEW • Motorcycle Braking systems • Application
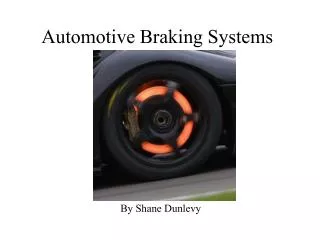
BRAKING SYSTEMS • Motorcycle braking systems • Designed to slow front and rear of the motorcycle independently • Disc or drum design • Disc is rotor attached to wheel, caliper attached to fork or swing arm • Caliper has pads which press against rotor, creating friction • Drum is attached to the wheel over a plate with a shoe inside • Shoe is pressed outward to drum creating friction • Both may be operated by hydraulic or cable controls
Cable operated going away Drum is cheap to produce, sealed against containments Shoes are inside drum press inside out to create friction and stopping power Unable to shed heat quickly Disc is open to more containments Caliper has pads which press against rotor Rotor thickness critical Integrated / Linked Designed for application of both front and rear brake systems with one control Different for each manufacturer Anti-Lock Systems (ABS) Different for each manufacturer Based on automotive designs Sensitive to angles and traction during cornering and braking BRAKING SYSTEMS
BRAKING SYSTEMS • Brake lines • Special rubber to not react with brake fluid • Degrade over time • Brake fluid • Water absorbent • Corrosive • Master cylinder • Holds piston which displaces fluid through line to caliper/brake cylinder in drum • Lever • Connected to master cylinder Front Rear
BRAKING SYSTEMS • Disc System • Rotor • Attached to wheel and spinning at wheel speed • Caliper • Attached to fork or swing arm rigidly • Inside caliper has pistons) which press against pads when hydraulic pressure is applied • Pads press against rotor, generating friction and heat
BRAKING SYSTEMS Fork Rotor Caliper/pads
BRAKING SYSTEMS • Drum brakes • Same as disc until brake cylinder • Press shoe into drum • Creates friction and heat
BRAKING SYSTEMS • Disc and drum generate same amount of friction • Friction creates heat which is absorbed by rotor, pad/shoe, brake fluid • Heat degrades braking performance • Disc brakes dissipate heat better then drum • Maintenance • Brake fluid • Type, age • Pads / shoes • Type, min. material thickness • Rotor / drum • Width / inside diameter, cracks, warpage
REVIEW • Brake Systems • Two basic types • Hydraulically operated • Front / rear separate • Maintenance • Brake fluid • Pads / shoe • Rotor / drum
APPLICATION • Front and rear together • Maximizes force • Slows both ends of motorcycle at same time • Maintains control • Front • Smooth, progressive squeeze • Weight transfer forward, able to apply more force • Rear • Smooth press down on lever • Weight transfer forward, light reduction in force • Comes with time and practice
APPLICATION • Clutch • Squeeze in and hold • Gear shift • Downshift to first gear • Head and eyes up • Left foot to the ground upon complete stop, keep clutch lever in
APPLICATION • Front skid • Over application of front brake • Less squeeze • Tire regains traction • Reapply • Rear skid • Keep pressed down • Do not let up until complete stop • Head and eyes will maintain directional control
APPLICATION • Roadway designed for 11.2 ft/sec braking action • Top motorcycle racers can stop at 32 ft/sec • Average roadway user can reach 20 ft/sec • Average motorcyclist is 15 ft/sec • Most car users are 9.8 ft/sec • 60 mph = 88 ft/sec. 60-0 stopping time • Average roadway design is 7.9 sec, • Racer is 2.75 sec • Possible 4.4 sec • Motorcyclists 5.9 sec • Car 8.9 sec
APPLICATION • Perception • Ability to perceive that a braking action is required • Reaction • Physical movement of hand /foot from at-rest position to control • Application • Action of squeezing brake lever and pressing on rear brake
APPLICATION • Perception of the need to stop • Usability, Hick’s Law • Determines the time it takes to make a decision is roughly proportional to entropy of decision (number of alternatives) • Alternatives • Training • Experience
APPLICATION • Total stopping distance Perception Reaction Application
APPLICATION • Braking exercise • Requires 2 people • Approval to use large area • Ensure area is free of rash, dirt, rocks, etc. • Three part exercise • Designed for dry roadway surface, adjust if damp Finish Start 100’ 90’ 80’
APPLICATION • Part 1: • Start at 10 mph, 1st gear • Head and eyes up • Front tire crosses 80’ mark come to smooth controlled stop • Self assessment: • Head and eyes stay up until stopped • Left foot to the ground first • No excessive front fork dive • 4th and later stops not to exceed 90’ mark 100’ 90’ 80’
APPLICATION • Part 2 • Start at 20 mph, 2nd gear • Head and eyes up • Front tire crosses 80’ mark come to smooth controlled stop • Self assessment: • Head and eyes stay up until stopped • Left foot to the ground first • No excessive front fork dive • 4th and later stops not to exceed 95’ 100’ 90’ 80’
APPLICATION • Part 3 • Partner moves closer and farther between each run • Start at 20 mph, 2nd gear • Head and eyes up • Come to smooth stop next to partner • Self assessment: • Head and eyes stay up until stopped • Left foot to the ground first • No excessive front fork dive 100’
Review • Key Points: • Head and eyes up • Smooth squeeze on front brake • Lock front tire, release and reapply • Light pressure on rear • Lock rear tire, keep locked until complete stop
REFERENCES • How to ride a Motorcycle • Motorbooks Int’l; Pat Hahn, 2005 • Sport Riding Techniques • David Bull publishing; Nick Lenatsch, 2003 • Proficient Motorcycling • Bowtie Press; David Hough, 2000 • Green Knights M/C Club, Hanscom Chapter • http://greenknights5.com/; Gil Besana, President • Minnesota Motorcycle Safety Center • http://www.dps.state.mn.us/mmsc/latest/MMSCHome.asp?cid=1; Joan Rasmussen, director Get the best from your bike, don’t let the bike get the best from you