Download
1 / 45
510 likes | 724 Views
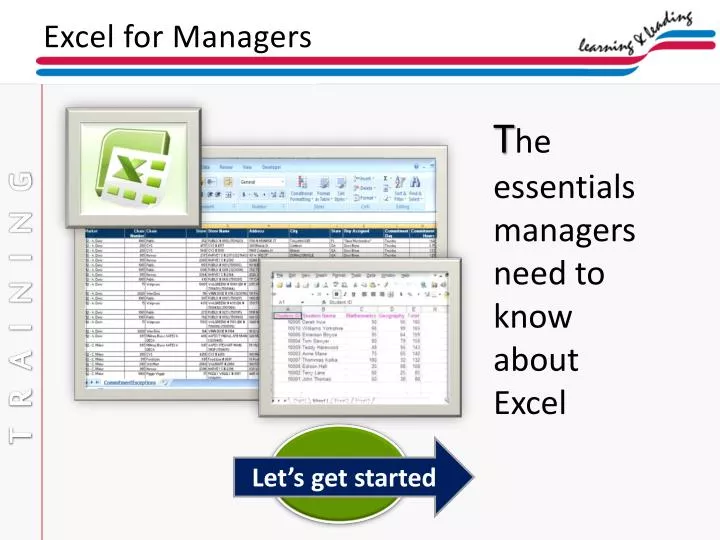
Excel for Managers. T he essentials managers need to know about Excel. TRAINING. Let’s get started. Excel for Managers. As an SMS Manager, you often use Excel reports downloaded from the IVR and BizTracker or emailed to you from your supervisor. This lesson includes:

E N D
Excel for Managers The essentials managers need to know about Excel TRAINING Let’s get started
Excel for Managers As an SMS Manager, you often use Excel reports downloaded from the IVR and BizTracker or emailed to you from your supervisor. This lesson includes: Freezing the header row for easier viewing Filtering and sorting information for your territory Adding a column and row to the report Adding a formula to calculate visits greater than 1 hour Formatting report text Copying the report information Previewing and printing the report TRAINING
Excel for Managers Q: What if I don’t have Microsoft Excel on my computer? A: Download the free version of Open Office here. This should allow you to perform all the actions you need in Excel. If you already have Excel 2003 or 2007, you are ready to begin. TRAINING
Excel for Managers First, download and save the Excel file to your computer. Now you can begin the process… we are going to use a sample report to learn how to use Excel. TRAINING
Excel for Managers First, let’s take a quick tour of the Excel window: A: File name B: Ribbon area (toolbars in Excel 2003) C: Formula Bar D: Column Heading E: Row Heading F: Active Cell G: Tabs to access more worksheets A B C D TRAINING E F G
Excel for Managers First, a handy Excel tip. Sometimes when you perform an action in a worksheet, you make a error and want to “undo” the last action. Well, Excel does have an undo button. To undo your last action, click the Undo button in the top left above the Ribbon. Note: Depending on the number and type of actions you perform, you may be able to undo several steps. TRAINING The undo button
Excel for Managers Freezing the top (header) row Most Excel files contain a lot of information making it hard to see the column headings when scrolling down the sheet. This is easy to remedy. • To freeze the top row, click on the View tab, click on Freeze Panes button, and then choose Freeze Top Row. This keeps the top row stationary no matter how far down you scroll. TRAINING
Excel for Managers • Filtering and Sorting • Many reports often contain more information than you need. Filtering and sorting make it more manageable. • Filtering displays only certain information by using the drop-down arrows, hiding the rest of the data in • the worksheet. • Sorting allows you to group like items together, while still displaying all the information in the worksheet. TRAINING
Excel for Managers To filter: In this case, we are filtering by Division. Click to highlight the header row by clicking once on row 1 at the top left of the spreadsheet. 1. Click here TRAINING
Excel for Managers These are drop-down arrows To filter: Click the Data tab in the menu and click on Filter. This will add drop-down arrows next to each heading. These arrows can be used to filter information. TRAINING 2. Click here … and then here
Excel for Managers To filter: To filter by Division, click the drop-down arrow next to the column heading and check the boxes next to the person or people you want to see. You can do this quickly by un-checking the Select All box and then checking only the person or people you want. Now click OK and the filter is complete. 3. Click here TRAINING … then here …and here
Excel for Managers To filter: In this example, only the box for Rosemarie Pinto was checked. Now entries with her name are displayed for the Divisions column on the sheet. The drop down arrow also now has a filter indicator. Note: This action temporarily hides all entries except for the selected ones. To display all again, click the drop-down arrow , and then click to reselect Select All. Info is now filtered by “Rosemarie Pinto” TRAINING
Excel for Managers • Sorting: • For example, to sort by Exception Type: • Click at the • top left of the spreadsheet to highlight the entire spreadsheet (including header row). • Click on the Data tab. 2. Click here 1. Click here TRAINING
Excel for Managers • Sorting: • Click on Sort. • Make sure that the “My data has headers” box is checked. 3. Click here ... And click here TRAINING
Excel for Managers • Sorting: • Click on the drop-down arrow next to Sort By and choose Exception Type (or whichever column you want to sort by). • Then click OK. • Note: You can sort • by more than one • criteria by clicking • Add Level. TRAINING 4. Click here ... And here
Excel for Managers Adding a Column Sometimes you need to have a place to calculate information in the report. You can do this by adding a column. With just a few clicks, you can insert a column into your spreadsheet. We will use this column later to add a formula to calculate visits greater than 1 hour. TRAINING
Excel for Managers Insert a Column: Click on a column heading to highlight and select the whole column. For this example Exception Type column (Column O) is chosen. Then right click the column heading. 1. Click here TRAINING
Excel for Managers Insert a Column: Select Insert. A blank column will be added. Note: This will insert a column to the left of whatever column is highlighted. TRAINING 2. Click here Blank column
Excel for Managers • Insert a Column: • Now click in the top cell of the new column and type Visits > 1 Hour and hit the enter key. • The column is now ready for you to enter a formula to calculate visits greater than 1 hour. 3. Type the column heading here TRAINING
Excel for Managers • Q: What if I want to insert a blank row? • A: It’s very similar to inserting a column. • Click on the row heading to highlight and select the whole row, in this case Row 3. TRAINING 1. Click the row heading
Excel for Managers • Then right click the row heading and select Insert from the menu. • A blank row will be • added above • whatever row • was highlighted. 2. Click Insert TRAINING New blank row
Excel for Managers Formulas Excel does a great job calculating numbers. With just a few clicks, you can add a formula to perform any mathematical operation(s) you can do with a calculator plus much more. For this example we will use the blank column just added to calculate service visits greater than 1 hour. TRAINING
Excel for Managers Insert a formula: This formula calculates the difference between the budgeted hours and the actual hours. The results tells you how much time over/under budget the visits were. Click in the cell where you want your formula to begin. In this case, the cell right under the heading just created . Type equal (=) sign. Start here, type = TRAINING
Excel for Managers Insert a formula: Click on cell M2 (right under Column M (Commitment Hours). TRAINING 2. Click cell M2
Excel for Managers • Insert a formula: • Next, type a minus • (-) sign on the keyboard in the formula column. • Then, click on cell N2, under Column N (Actual Hours). 3. Click cell N2 TRAINING
Excel for Managers • Insert a formula: • Finally, hit the Enter key. • The result (-1.69) is • now calculated in cell • O2. • What does the negative • number mean? In this • case, it means actual hours • are more than commitment • hours. TRAINING 4. The result is calculated here
Excel for Managers • Copying the formula: • To copy the formula down through the rest of the column: • Click on the cell containing the formula you want to copy, in this case O2. 1. Click the cell with the formula you want to copy TRAINING
Excel for Managers Copying the formula: Move your pointer arrow toward the bottom right-hand corner of the cell. Double click on the small black box in the bottom right-hand corner of the cell. The calculation now fills the rest of the column. 2. Double click here to fill in the rest of the column TRAINING
Excel for Managers Formatting The format of a cell determines how the labels and values look --for example, whether the contents appear boldfaced, italicized, or have a text color other than black. Formatting changes only the appearance of a value or label; it does not alter the actual data or calculations in any way. To format a cell or range, first select it and then apply the formatting by using formatting buttons in the Ribbon area or choose format on the right click menu. TRAINING
Formatting buttons are located here Excel for Managers TRAINING You can also right click on a cell and then choose Format Cells from the menu
Excel for Managers Format: For this example, we are going to change the color of the text in a cell: Click on the cell or click and drag to select a range of cells to be formatted. In this case the cell with Walgreens is selected. Note: You can also right click on the cell and choose Format from the menu. TRAINING 1. Click on a cell to select it
Excel for Managers Format: Click on the desired format command. In this example, we are clicking on the Text color button. Click on the desired text color, in this case red. The word Walgreens is now red. 2. Click here to change text color TRAINING 3. Click on red Now the text is red
Excel for Managers Copying a worksheet Once you’ve filtered, sorted, and customized the information in a report, you may want to place that information on a new sheet. It just takes a few clicks to copy and paste your work to another sheet. TRAINING
Excel for Managers Copy a worksheet: Right click the tab for the worksheet you want to copy. In this case we are copying the worksheet called Daily Report. Choose Move or Copy from the menu. 1. Right click the tab TRAINING 2. Click Move or Copy
Excel for Managers Copy a worksheet: Select Create a copy. Then click OK. Excel creates another worksheet exactly like the one you copied and puts (2) behind the name to designate the copy. 3. Select Create a copy TRAINING Here’s the original sheet tab This is the tab for the copy of the sheet
Excel for Managers Copy a worksheet: Excel creates another worksheet exactly like the one you copied and puts (2) behind the name to designate the copy. To finish, it is recommended you give the new tab a unique name. To rename the worksheet tab, right click the tab, then select Rename and type in your desired name. Click away from the tab to finish. Right click the tab to open the menu then click rename. TRAINING The tab is ready for you to type the new name Renamed tab
Excel for Managers Printing: If you plan on printing a worksheet, do a print preview to see how it will look before sending it to the printer. To print preview, click the Microsoft Office Button, click the arrow next to Print, and then click Print Preview for Excel 2007. For Excel 2003, click File on the menu bar and then select print preview. This is the print preview window TRAINING
Excel for Managers Printing: Click here to print preview next page Click Next Page and Previous Page to view all the pages of the Worksheet that will print. When you are finished with print preview, click print or close to exit. Note: Next Page and Previous Page are available only when a worksheet contains more than one page of data. TRAINING
Excel for Managers Printing: Tip: In Excel, it’s best to have the paper orientation set to Landscape rather than the default setting Portrait. This allows you to fit more columns onto the paper. To change the setting while in the Print Preview, click on Page Setup. On the Page tab, choose Landscape. 1. Click Page Setup TRAINING Then choose Landscape
Excel for Managers Printing: To print: Click on the print button, opening the print window. In the print window, you can choose to print several copies. How many copies? TRAINING
Excel for Managers Printing: You can also choose to print the entire workbook (all the worksheets) at one time. When you are ready to print, click OK to close the print window. TRAINING Choose what to print here Done? Click OK
Excel for Managers Printing: Other adjustments: Sometimes your spreadsheet is just a little bit too large to fit all the columns onto one sheet of paper when you print. You can adjust or “scale down” the size of the printing by adjusting the scaling (reducing the size) in the Page Tab of the Page Setup window. TRAINING
Excel for Managers Printing: To change the scaling on spreadsheet: Open the print preview and click the Page Setup button. Under Scaling, click the down arrow to change the number from 100% to a smaller number. Click OK to go back to the Print Preview to see if it needs further adjustment. Note: If you go below about 70% your information may be too small to read. Adjust the scale here TRAINING
Excel for Managers Printing: Don’t want to print in color? Open the print window and click on Properties. On the Color tab, select Print in Grayscale. Then click OK to go back to the print window. TRAINING Click Grayscale
Excel for Managers Review Want to go back to a previous section? Click on your choice: Freezing header row Filtering Sorting Adding a column Adding a formula Formatting Copying a worksheet Printing Resources For more information on using Excel 2007, click here. For more information on using Excel 2003, click here. TRAINING