Download
1 / 35
350 likes | 467 Views
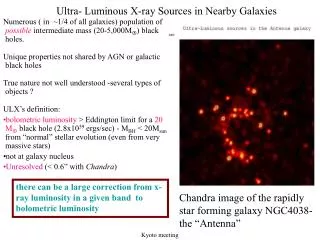
Nearby Galaxies (mostly) at mm and IR wavelengths. Adam Leroy (MPIA Heidelberg) Christof Buchbender (IRAM Granada). Liberally plundering .ppt by: P. Hily-Blant. Topics. A Broad Look at Nearby Galaxies Observing Nearby Galaxies at Millimeter Wavelengths

E N D
Nearby Galaxies (mostly) at mm and IR wavelengths Adam Leroy (MPIA Heidelberg) Christof Buchbender (IRAM Granada) Liberally plundering .ppt by: P. Hily-Blant
Topics A Broad Look at Nearby Galaxies Observing Nearby Galaxies at Millimeter Wavelengths Mapping nearby galaxies with the IRAM 30m Working Group: Mapping the bulk distribution of molecular gas in a bright nearby spiral galaxy.
Mapping Nearby Galaxies With the 30m • Mapping with single dish telescopes. • Mapping modes. • References & Sampling. • Basic reduction procedures. • Some specifics of using the 30m. • HERA and EMIR. • Strategy and syntax.
Observing a Single Point A galaxy OFF position at location known to be free of emission. ON position at region of interest • Look at an ON position containing signal of interest. • Look at an OFF position known to be free of signal (over velocity range of interest). • Synthesize science spectrum by subtracting ON - OFF. • More frequently switching, smaller throw better matched spectra stabler baselines.
Observing a Single Point A galaxy OFF position at location known to be free of emission. ON position at region of interest • Sensitivity considerations: radiometer formula: • Because the spectrum we use is ON-OFF: • Best SNR per time if tON = tOFF (clear, but we’ll see this in a moment).
Observing a Single Point A galaxy OFF position at location known to be free of emission. ON position at region of interest • Practical considerations for observing galaxies: • Frequency switching is generally not an option. Extragalactic lines are too broad. • Wobbler switching is very often an option: Hubble flow + rotation curves keep OFF clean. • Lines can become very wide: many hundreds of km s-1. Baseline stability (good ref) important.
Raster Mapping A galaxy 1 2 3 4 5 6 7 OFF position at location known to be free of emission. A grid of ON positions • Map many positions at once: • Observe a series of ON positions followed by a single look at the OFF (tracking each position). • 1,2,3… then 7; then a look at the next row, then 7 (doesn’t have to be row-by-row). • Can look at OFF longer than each ON but still be more efficient than individual position switching.
Raster Mapping One key choice when using this observing strategy is how to balance time ON and OFF. • As before, science spectrum is ON - OFF, so: • We spend tROW on a row (N ON measurements + an OFF of different length) and a total of tspec per point (including time on the off): • Noise in each science spectrum is: • We want to maximize spec for a given tspec, so substitute for tON… • Now have spec in terms of , look for minimum…
Raster Mapping A galaxy 1 2 3 4 5 6 7 OFF position at location known to be free of emission. A grid of ON positions • Other considerations: • Overhead vs. stability and uniformity: hit each position frequently and return to OFFs frequently? • More frequent OFFs mean better stability. • More frequent sampling means uniform data quality. • Both have an associated overhead cost. • Grid spacing.
On the Fly Mapping A galaxy 1 1 2, 4 3 3 5 5 OFF position at location known to be free of emission. ON positions read out as the telescope slews across the source • Map a large part of the sky at once: • Have the telescope integrate as it slews across the source, dumping data as it goes. • Each ON spectrum is an integral over a (small) part of the source (dump < beam). • Same advantages as Raster mapping but lower overhead because you don’t need to hit a specific position. • Potentially rapid coverage of the field, giving very uniform data (good for maps).
On the Fly Mapping A galaxy 1 1 2, 4 3 3 5 5 OFF position at location known to be free of emission. ON positions read out as the telescope slews across the source • Considerations: • Same reference idea as Raster mapping. But dumps may not be independent (and you almost always average several for each “real” ON), so tOFF > 10 tON is always a good idea. • This isn’t hard because about tON is usually 1s or less at the 30m. • Good atmospheric stability required (usually some time between OFFs).
On the Fly Mapping A galaxy OFF position at location known to be free of emission or from signal free ends of scan legs. ON positions read out as the telescope slews across the source • Considerations: • Many fast maps (cover entire source quickly) preferable to single slow map. Reasons: uniform data quality, less time between ON and OFF, systematics may be averaged out or solved for. • In addition to spacing: advisable to cover source with multiple strategies (two orthogonal scan directions is a good idea for the 30m). Isolate systematics, allow clever post-processing. • For galaxies: scan may overshoot the target and OFF can be constructed from ends of the scan. See: Mangum+ ‘07, Emerson & Greves ‘88
Sampling and Aliasing What drives your grid for a raster or OTF map? • Information on the structure of your source can be thought of as knowing the power in the various spatial frequencies that make up the source (that is, as knowing the Fourier transform of the source). • The telescope itself is only sensitive to a certain range of spatial frequencies:No matter what your observing mode you will observe the source distribution convolved with the response of the telescope. • With the mapping modes described, you are also sampling this distribution (measuring it at regular intervals). This sampling affects your ability to measure power at high spatial frequencies. In order to avoid losing information, you need to sample at the critical frequency, / 2 D, or higher.(slightly higher is actually somewhat better for your signal-to-noise ratio, but not a big deal).
Sampling and Aliasing (1D example) Information on the structure of your source can be thought of as knowing the power in the various spatial frequencies that make up the source (that is, as knowing the Fourier transform of the source): Fourier Transform of “Source” Made up 1d “Source”
Sampling and Aliasing (1D example) The telescope itself is only sensitive to a certain range of spatial frequencies: No matter what your observing mode you will observe the source distribution convolved with the response of the telescope. FT of Beam (N.B., a bit loose with the x-scale here; a Gaussian of width w transforms to a Gaussian with width w-1) A 1d Gaussian “Beam” Source convolved with beam FT of Source+Beam
Sampling and Aliasing (1D example) With the mapping modes described, you are also sampling this distribution (measuring it at regular intervals). A Comb “Sampling” Function spacing Fourier Transform of a Comb is a Comb spacing -1 Source+Beam FT of Source+Beam Sampled Source+Beam FT of Sampled Source+Beam sampling ~ multiply by comb times comb = convolve source by FT of comb)
Sampling and Aliasing (1D example) • So in the Fourier domain, sampling gives you repeating signals spaced by -1. • Your telescope allows you to measure frequencies up to D / . • To recover all the spatial information you can you want these signals not to overlap. • If sampling rate () is too low signals will overlap in FT domain. • In this (undersampled) case you lose high frequency info (and more, due to overlap). • Critical sampling rate is related to highest frequency you can measure: need twice the maximum frequency between samples in FT domain-1 = 2 max freq. = 2 x D / = / 2 D = 2.4 HPBW critical sampling rate
Sampling and Aliasing (1D example) Properly sampled case: FT of source -1 Undersampled case: Wikipedia Image Bad! • “Twice as bad as you think”… • Fail to recover the highest spatial frequencies measurable by the antenna. • Power from these frequencies is aliased back onto the highest frequencies in your data, corrupting them. • If source structure matters to you, think carefully before undersampling. • Okay to: matching a lower resolution telescope, detection experiments
Basic Reduction Procedures P. Hily-Blant Record Number (each record = 1 data dump) Velocity (Frequency) Axis • OTF mapping generates a lot of data: • e.g., HERA at the 30m dumps 18 spectra every 0.5s, ~105 spectra per hour. • Data need to be handled either graphically (in large groups) or automated way. • Typical processing that needs to be done before synthesizing a map: • Data flagging : identify and remove pathological data • Baseline subtraction : fit and remove (low order) residual baseline
Basic Reduction Procedures P. Hily-Blant Record Number (each record = 1 data dump) Velocity (Frequency) Axis • Baseline fitting : • necessary due to receiver and atmospheric instability • very much second order to reference subtraction • low order preferable (avoid fake sources) • avoid fitting source (id region of likely emission or iterate reduction) • Data flagging : • failure of baseline fit (identified via residuals) • visual inspection (especially useful to flag large blocks, eye good at seeing patterns) • other statistic of merit (e.g. “platforming” from finding discontinuities)
Basic Reduction Procedures Circles: desired regular grid Crosses: actual observations Common gridding kernels (left) and their FT (right) • Gridding : • observations give you a series of irregularly positioned spectra • want spectra organized into a regular grid • procedure: define grid define a “gridding kernel” (often ~1/3 to 1/2 the HPBW) at each grid point convolve the observed spectra with the gridding kernel • gridding kernel degrades your resolution (slightly), filters spatial information (Mangum+ 07 discuss optimal choices; simple/standard choice is Gaussian with 1/3 HPBW)
Basic Reduction Procedures • “Plaiting” : • often baseline ripples (due to either receiver instability or atmosphere) persist along a whole scan. • these can defy basic baseline fitting and data flagging, leaving you with “scan noise” or “striping.” • scanning in different directions means this noise is not coherent across maps. • simple averaging reduces it significantly. • “plaiting” or “basket weaving” is even more powerful. • basic idea: FT of a stripe is a low (or 0) frequency component along the corresponding row/column of the 2D FT.Corresponds to a band in the Fourier plane.The bands depend on the scanning direction.
Basic Reduction Procedures • “Plaiting” : • Make maps scanning in two orthogonal directions. • Take FT of each map. • Down-weight low frequency part of FT corresponding to stripes along the scanning direction. • Combine images in Fourier domain. • Transform back. • Essentially: only use data on low spatial frequencies obtained perpendicular to scanning direction. • Increases noise at low spatial frequencies but should not corrupt any astronomical signal.
Basic Reduction Procedures “Plaiting” : example RA Scanning DEC Scanning “Plaited”
Line Mapping With the 30m: HERA & EMIR Heterodyne mapping at the 30m: Basically, where you can use HERA it is usually preferable (9 beams is a lot). EMIR is your only option at 3, 2, or sub-mm (and it can, e.g., look at 3 and 1 mm simultaneously). EMIR also makes up ground if you want to map multiple lines that you can catch in the wider bandpass and it can use summer time better than HERA. If in doubt, do the calculation…
Mapping with HERA: the 30m Receiver Array • Beam print of HERA on the sky: • 9 pixels, 2 polarizations (18 spectra) • Individual HPBW 9 - 12” • Pixels spaced 24” • One pointing undersampled. • Mapping with HERA: • “tilt” the array relative to the scan direction • pixels now spaced perpendicular to scan • magnitude of tilt sets the spacing • pictured at left: equally spaced pixels • pixel separation 7.6” (~3/4 HPBW) • maps made in this way will be undersampled scanning direction
Mapping with HERA: the 30m Receiver Array • Beam print of HERA on the sky: • 9 pixels, 2 polarizations (18 spectra) • Individual HPBW 9 - 12” • Pixels spaced 24” • One pointing undersampled. • Mapping with HERA: • “tilt” the array relative to the scan direction • pixels now spaced perpendicular to scan • magnitude of tilt sets the spacing • pictured at left: equally spaced pixels • pixel separation 7.6” (~3/4 HPBW) • maps made in this way will be undersampled scanning direction
Mapping with HERA: the 30m Receiver Array • To make a critically sampled map: • smaller tilt (9.5) • pixel spacing now ~4” • but array now has gaps perpendicular to scanning direction • have to repeat the scan with the array offset by 12” • N.B., if you are going to cover your source several (4 or more) time, you don’t usually lose much by making the map critically sampled. The main cost is that it makes the script more complex. scanning direction gap: No coverage here on first scan along this direction
Mapping with HERA: the 30m Receiver Array • A practical example: • Fully sampled map: each scan leg is followed by a parallel leg offset by 12”. • After each back and forth (< 2min) visit the nearby reference. • Cover the galaxy many (20) times, alternating scanning between two perpendicular directions. • Every 10 to 15 minutes take a calibration. Image: atomic gas (HI) … a reasonable proxy for the ISM distribution
Mapping with HERA: the 30m Receiver Array (x1, y1) A bit of NCS syntax: OTFMAP: X0 Y0 X1 Y1 NOTF times STEP X Y added to X0, Y0, X1, Y1 TOTF time for leg (speed = distance / TOTF) REF Xref Yref TREF time on reference CRO control loop (e.g., ROOR = ref-on-on-ref) ZIGZAG? Turn around (swap 1 and 0) for successive legs Observing mode: SWTOTAL total power mode (or freq switch if line narrow, strong) TPHASE dump time, needs to be high enough to ensure proper sampling (x1 + stepX, y1+stepY) (x0, y0) (x0 + stepX, y0 + stepY)
Mapping with HERA: the 30m Receiver Array • Standard Reduction for OTF maps : • MIRA used to solve and apply nearest CALibration • MIRA used to build and subtract OFF from ON several options on how to combine nearby OFFs into a reference spectrum e.g., average all data, weight by time, use only nearest, etc. • MIRA writes data to CLASS (.30m) format • CLASS used to fit baselines for bright sources, important to have a guess as to where the line may be systemic velocity or local HI allow guess, iterative reduction can help • CLASS used to flag bad data high residuals, noise pathologies, bad fourier modes, etc. • CLASS used to grid spectra into a data cube • CLASS used to export data cube to .fits or to perform analysis
Mapping with HERA: the 30m Receiver Array What Comes Out :
Mapping with HERA: the 30m Receiver Array Ideally suited for comparison to maps galaxies at other wavelengths:
Mapping with HERA: the 30m Receiver Array Ideally suited for comparison to maps galaxies at other wavelengths:
Wrap Up • Using the 30m to Map Nearby Galaxies: • Observing modes: single point raster map OTF map • Observation design: ON/OFF balance sampling • Reduction: automated spectra handling gridding plaiting • 30m: EMIR and HERA mapping with HERA