Download
1 / 71
710 likes | 895 Views
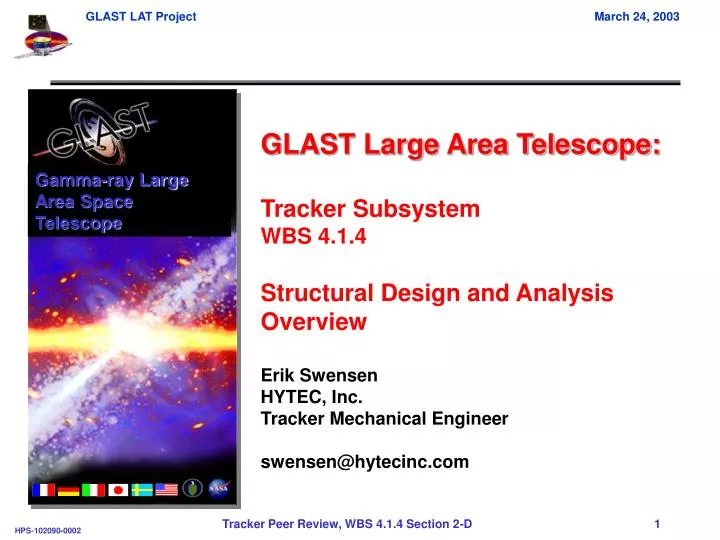
Gamma-ray Large Area Space Telescope. GLAST Large Area Telescope: Tracker Subsystem WBS 4.1.4 Structural Design and Analysis Overview Erik Swensen HYTEC, Inc. Tracker Mechanical Engineer swensen@hytecinc.com. Presentation Outline. Design Requirements Historical Perspective

E N D
Gamma-ray Large Area Space Telescope GLAST Large Area Telescope: Tracker Subsystem WBS 4.1.4 Structural Design and Analysis Overview Erik Swensen HYTEC, Inc. Tracker Mechanical Engineer swensen@hytecinc.com
Presentation Outline • Design Requirements • Historical Perspective • Tower Structural Design Overview • Material Selection & Allowables • Tower Structural Analysis Overview • Attachment Component Design & Analysis Overview • Flexures • Thermal Straps • Testing • Completed & In-progress tests • Scheduled tests • Open Issues
Design Requirements: Quasi-Static Loads • Static-Equivalent Accelerations Source (1) “Summary of the GLAST Preliminary CLA Results,” Farhad Tahmasebi, 11 Dec 2001. (2) 433-IRD-0001, “Large Area Telescope (LAT) Instrument – Spacecraft Interface Requirements Document,” May, 2002. (3) “LAT Tracker Random Vibration Test Levels,” Farhad Tahmasebi, 27 Feb 2002.
Design Requirements: Grid Motion • Tracker-to-Grid Maximum Interface Distortion • Superimposed on MECO design limit loads • NOT superimposed on vibration analysis or testing Source: LAT-SS-00788-01-D4, “LAT Environmental Specification,” 15 Nov 2002.
Design Requirements: Flexure Loads • Corner Flexure Maximum Design Limit Loads • Maximum from two CLA cycles Source: LAT-SS-00788-01-D4, “LAT Environmental Specification,” 15 Nov 2002. • Side Flexure Maximum Design Limit Loads • Maximum from two CLA cycles Source: LAT-SS-00788-01-D4, “LAT Environmental Specification,” 15 Nov 2002.
Design Requirements: Sine Vibe Source: LAT-SS-00788-01-D4, “LAT Environmental Specification,” 15 Nov 2002.
Design Requirements: Random Vibe • GEVS General Spec applied along all three axes independently Source: GEVS-SE Rev A, “General Environmental Verification Specification for STS & ELV Payloads, Subsystems, and Components,” June 1996, Section 2.4.2.5. * Pending approval from GSFC & SLAC program offices.
Design Requirements: Dynamic Clearance • Maintain positive clearance between adjacent TKR tower modules (tower-to-tower collisions) (Source: Tracker-LAT ICD) • Maintain minimum allocation of 1.5mm for dynamic response of towers • After fabrication/assembly tolerances, alignment, EMI shielding, static response, & thermal distortion are considered • Maximum dynamic response goal <145 µm RMS (Acceptance) • Assumes adjacent towers are out-of-phase • Maintain positive clearance between adjacent trays (tray-to-tray collisions) • Maintain minimum clearance of 2mm between adjacent trays • Silicon-to-silicon clearance • Minimum frequency goal of 500 Hz • Fixed base boundary conditions at tray attachment locations • Assumes adjacent trays are out-of-phase
Design Requirements: Temperature • Tracker Temperature Requirements • Maximum heat load = 8.7W • Maximum Temperature @ top of tower module = 30°C • Tracker-to-Grid Interface Temperatures Source: LAT-SS-00788-01-D4, “LAT Environmental Specification,” 15 Nov 2002.
Additional Requirements • Stay Clear Dimensions (Source: Tracker-LAT ICD) • Straightness ≤ 300 µm from top to bottom • Maximum outside dimensions (x & y) ≤ 371.7 mm • Maximum height ≤ 640 mm above grid surface • Launch Pressure (Source: LAT Environmental Specification) • Shall survive the time rate of change of pressure per the Delta II Payload Planner’s Guide, Section 4.2.1, Figure 4.2. • Extreme pressure conditions are experienced in the first 70 sec of fairing venting. • Venting (Source: Tracker-LAT ICD) • Sufficient venting of all TKR components is required to allow trapped gasses to release during launch. • EMI Shielding (Source: Tracker-LAT ICD) • Each TKR tower shall be covered on all 6 sides by at least 50 µm of aluminum electrically connected to the Grid.
Historical Perspective • Build-Test-Build Design Approach • Limited schedule and budget to do all the analysis and material testing judged necessary • Tracker Tower ’01 Prototype was viewed as an engineering evaluation model to reduce risk to the E/M Tower Testing • Identify weaknesses in design early to allow for modifications • Compressed schedule after E/M testing made it crucial to insure against failures at that juncture
Full-scale tray prototypes 14+ trays total (3 top/bottom, 7 thin-converter, 4 thick-converter) Full-scale tower prototype 10 composite trays w/ silicon payload 9 aluminum mass mockups YS-90A Sidewalls Prototype Tower Function Test component fabrication/assembly procedures Test tray assembly tooling Test tower assembly procedures Validation of finite element models Test to environmental requirements at the tray and tower level Reduce risk to E/M by identifying weaknesses at prototype level Hist Persp: Mechanical Prototypes
Qualification level random vibration testing performed along the lateral and thrust axes to GEVS general specification Prototype activities have a silver lining No evidence of structural damage @ -6dB (1.25dB below proposed spec) Established manufacturing and assembly procedures for flight articles Minimizes risk of E/M tower by exposing weaknesses early Failures during 1st RV test Thermal gasket plastically deformed @ -12dB Loss of thermal interface Loss of preload in sidewall fasteners @ 0dB in thrust direction @ -3dB in lateral direction Hairline fracture identified in one corner after 0dB lateral test Hist Persp: Random Vibration Testing
Tracker Tower Mechanical Configuration • 5 Tray configurations supported by Thermal/Mechanical sidewalls • 16 Towers separated by 2.5mm Thermal/Mechanical Sidewalls (4) {Not Shown for Clarity} Top Tray (1) Thin-Converter Trays (11) Thick-Converter Trays (4) Standard Trays, No Converter (2) Bottom Tray (1) Thermal Straps - Copper (4) Tower-to-Grid Flexure Attachment (8)
Full coverage Gr/CE tower sidewalls used for heat removal, stiffness, EMI shielding Radial blade flexure configuration for CTE mismatch with the Al grid Copper heat straps to conduct heat away from the tower and into the grid Tracker Tower Configuration
Thermal/Mechanical Sidewalls • Laminate Design • [0/90fabric, 0, 157.5, 22.5, 45, 90, 135|s • 50 µm Aluminum layer for EMI shielding on outer surface • Material • Baseline @ PDR was YS-90A/RS-3 • Changed to K13D2U/RS-3 for improved thermal performance • Function • Heat transfer: conduct tray heat to bottom tray and grid • Stiffness: support individual trays, transfer load to bottom tray • K13D2U material testing • Material order is in-progress • Expected completion by June ‘03 Sidewall Outside Surface Sidewall Inside Surface
Sidewall Mounting • All trays except bottom tray attachment • M2.5, CRES A286 fasteners • NO metallic inserts in sidewall • Bottom tray attachment • M2.5 & M4, CRES A286 fasteners • Metallic top-hat design inserts in sidewall View of Bottom Tray Sidewall Inserts M4 M4 M4 Bottom Sidewall Section (M2.5 fasteners unless marked otherwise)
Tray Sandwich Structure • Lightweight 4 piece machined closeout frame, bonded to face sheets and core to form a sandwich structure Gr/CE Face Sheet C-C Structural Closeout Wall Thermal Boss 1 lb/ft3 Aluminum Honeycomb Core C-C MCM Closeout Wall
Tray Configurations • Thin-Converter and No-Converter trays are structurally identical • Machined C-C closeout walls • 1 lb/ft3 core • Two 4-ply facesheets • Balanced about the tray neutral axis • Top tray uses a modified C-C closeout • Machined C-C closeout walls • 1 lb/ft3 core, ¾ thickness • Two 4-ply facesheets • Thick-Converter Trays use the same C-C closeout • Machined C-C closeout • 3 lb/ft3 core • Two 6-ply quasi-isotropic facesheets Thin-Converter Tray Prototype Top Tray Prototype
Machined Closeout Wall Prototypes • Closeout frame is machined from 3D C-C material into the net shape • Metallic inserts are bonded in frame for sidewall fasteners • The frame is bonded in the four corners and mechanically connected using a mortise and tenon joint Outside Outside Inside Inside Structural Closeout Wall MCM Closeout Wall
Tracker Tray with Payload • Tray payload is bonded to the sandwich structure using epoxy, with the exception of silicone used to bond SSD’s • Silicone decouples the thermal/mechanical effects from the tray SSD’s Bias-Circuit Structural Tray Converter Foils Bias-Circuit TMCM SSD’s
Top Tray Configuration • Uses same materials as the thin-converter trays • ¾ thick honeycomb core vs. thin-converter trays Top View (illustration of lifting features) SSD’s Converter Foils Gr/CE Facesheet Bias-Circuit 1 lb/ft3 AluminumHoneycomb Core C-C Closeout Frame TMCM
Bottom Tray Sandwich Structure • Lightweight 4 piece C-C & M55J machined closeout frame, bonded to face sheets and core to form a sandwich structure 3 lb/ft3 Aluminum Honeycomb Core 6-Ply Gr/CE Face Sheet Structural Closeout Wall Thermal Boss Titanium Corner Reinforcement MCM Closeout Wall
Bottom Tray Closeout Walls • Bonded M55J/RS-3 internal frame for strength and stiffness • Machined C-C outside laminate for thermal transfer of MCM heat M55J/RS-3 Internal Frame C-C Outside Laminate MCM Closeout Wall Typical Closeout Wall Cross-Section (not to scale) Structural Closeout Wall
Corner Joint Details Pins (Reinforce Butt-Joint) Sandwich Structure w/ Reinforcement Brackets (Typ, 4 places) MCM Closeout Wall Bonded Butt-Joint Corner Reinforcement Bracket (Bonded) Structural Closeout Wall
Corner Reinforcement Bracket • Machined Titanium Reinforcement Bracket • Strength & Stiffness Sandwich Structure w/ Reinforcement Brackets (Typ, 4 places) Typical Machined Taper (Reduce Peel Stress) Corner Block (Shear Reinforcement) Slots for M55J Closeouts (Bonded Interface) Corner Flexure Mounting Slot (Press Fit, 2 Pins, 1 Fastener) Inside View of Corner Reinforcement Bracket
Bottom Tray with Payload • Payload attached to top side only • Tray payload is bonded to the sandwich structure using epoxy, with the exception of silicone used to bond SSD’s • Silicone decouples the thermal/mechanical effects from the tray below SSD’s Bias-Circuit Structural Tray TMCM
Analysis FS & MS Requirements • Factors-of-Safety on static loads/stresses • Factors-of-Safety to Yield = 1.25 • Factors-of-Safety to Ultimate = 1.4 • Factors-of-Safety on random vibration loads/stresses • Factors-of-Safety to Yield = 1.00 • Factors-of-Safety to Ultimate = 1.12 • Lower Factors-of-Safety on RV vs Static • 3σ on GEVS general spec is conservative • Used lower damping (Q = 10) vs test results indicate (Q ~7) • Higher amplification of tower response → higher loads/stresses • Margins-of-Safety • Margin-of-Safety Equation = Sallowable/(FS * Smax) – 1 • All Margins must be above 0.00 Reference: NASA-STD-5001
Tower Finite Element Modeling Element/Node Count Number of Grids = 227653 Number of BAR Elements = 1038 Number of Spring Elements = 63316 Number of Solid Elements = 120628 Number of Plate Elements = 56442 Number of Rigid Elements = 219 Mass Properties of FEM Mass = 32.48 kg Center of Gravity Location: Xcg = -1.06E-5 m Ycg = -4.26E-7 m Zcg = 0.2623 m
Tower Finite Element Modeling (Con’t) Model Checks • Free-Free Modal and Rigid Body checks were run on the stiffness matrix • No model grounding or ill-conditioning of the stiffness matrix
“CLA” Finite Element Model • Reduced model delivered to SLAC early March ‘03 Element/Node Count Number of Grid Points = 991 Number of BAR Elements = 740 Number of Spring Elements = 48 Number of Mass Elements = 8 Number of Plate Elements = 644 Number of Rigid Elements = 24 Mass Properties Mass = 32.50 kg Center of Gravity Location: Xcg = 4.4E-8 m Ycg = 3.9E-8 m Zcg = 0.26 m
Tower Modal Analysis 1st Bending Mode - Y Direction – 182.1 Hz 2nd Bending Mode - X Direction – 183.6 Hz
Tower Modal Analysis (Con’t) 1st Axial Mode - Z Direction – 379.0 Hz 1st Torsional Mode - About Z – 461.8 Hz
Tower RV Analysis: Accelerations • Equivalent quasi-static accelerations from random vibration input 19th Tray Response 10th Tray Response Bottom Tray Response
Tower RV Analysis: RMS Displacements • Maximum RMS Response to Acceptance Level RV Input • Min MS is +0.23
Tray Finite Element Modeling • Tray FE models were constructed for all five tray types • Modal and random vibration analysis performed • Results are summarized in HTN-102070-0005 Detailed HYTEC Tray FEM (Top, Thin-, No-Converter) Detailed INFN Tray FEM (Thick-Converter)
FE Modal Analysis Results • Fixed Base Boundary Conditions • Simply supported at sidewall attachment locations • Payload stiffness effects include Tungsten and bias-circuits • Silicon applied as mass only Typical 1st Mode Shape of the Thin-Converter Tray
Bottom Tray Finite Element Modeling • Fidelity of FEM is sufficient to calculate stresses • Analysis in tower configuration • Static analysis to estimate stresses during design phase • Equivalent static accelerations calculated to simulate 3σrandom vibe environment • Random Vibe Analysis to calculated RMS stresses to finalize design
Tension Zero Compression Bottom Tray Margins: Design Limit Loads • Liftoff & Transonic Minimum Margin-of-Safety • Minimum Margins & Failure are shown MS= 9.95 Ply Failure MS= 10.38 Core Crush MS= 10.77 Ply Failure MS= 7.18 M55J Flatwise Tension MS= 7.32 Ti Ftg Bond Shear MS= 7.21 M2.5 Bolt Shear MS= 5.20 M4 Bolt Shear
Tension Zero Compression Bottom Tray Margins: Design Limit Loads • Main Engine Cut-Off (MECO) Minimum Margin-of-Safety • Minimum Margins & Failure are shown • Grid Distortion included MS= 3.28 Ply Failure MS= 2.78 Core Crush MS= 3.59 Ply Failure MS= 1.41 M55J Flatwise Tension MS= 6.12 M2.5 Bolt Shear MS= 2.64 Ti Ftg Bond Shear MS= 6.13 C-C Flatwise Tension MS= 3.45 M4 Bolt Shear
Tension Zero Compression Bottom Tray Margins: Random Vibrations • RMS stresses calculated from random vibration analysis • 3σ stresses used in margin calculation • Sandwich structure Minimum Margin-of-Safety shown MS= 1.13 [RV in X] Ply Failure MS= 1.36 [RV in X] Ply Failure MS= 0.84 [RV in X] Core Crush
Tension Zero Compression Bottom Tray Margins: Random Vibrations • RMS stresses calculated from random vibration analysis • 3σ stresses used in margin calculation • M55J/RS-3 Closeout Frame Minimum Margin-of-Safety shown MS= .40 [RV in X] Flatwise Tensile MS= 1.40 [RV in Y] M55J IL Shear MS= 2.44 [RV in Y] M55J Ply Failure
Tension Zero Compression Bottom Tray Margins: Random Vibrations • RMS stresses calculated from random vibration analysis • 3σ stresses used in margin calculation • C-C Closeout Frame Minimum Margin-of-Safety shown MS= .47 [RV in X] C-C IL Shear (Near Bolt) MS= 1.65 [RV in Y] C-C IL Shear (Boss transition)
Tension Zero Compression Bottom Tray Margins: Random Vibrations • RMS stresses calculated from random vibration analysis • 3σ stresses used in margin calculation • Closeout Frame Assy Minimum Margin-of-Safety shown MS= 2.18 [RV in X] M55J to CC Bond Shear MS= .51 [RV in X] Ti Ftg Bond Shear MS= .34 [RV in Y] M2.5 Bolt Shear MS= .54 [RV in Y] Flexure Bond Shear
Tension Zero Compression Bottom Tray Margins: Random Vibrations • RMS stresses calculated from random vibration analysis • 3σ stresses used in margin calculation • Ti Corner Bracket Minimum Margin-of-Safety shown MS= 3.40 Max VM Stress [RV in Y]
Tension Zero Compression Side Wall Margins of Safety • Insert MS is calculated using the interaction of the vertical and lateral loads M4 Side Wall Insert Shearout Side Wall Ply Failure MS= .40 M4 Side Wall Insert Shear [RV in X] • Basic Interaction Eqn: MS = 1/sqrt[Rx^2+Ry^2] –1 • (Where: Rx = σx/ σallowable)
Tension Zero Compression Tray’s 2-19 Minimum Margins M2.5 C-C Shearout M2.5 C-C Shearout C-C Section Stress w/SC Factor of 2.0 M2.5 C-C Shearout (Bottom Tray Not Shown)