Download
1 / 86
910 likes | 1.03k Views
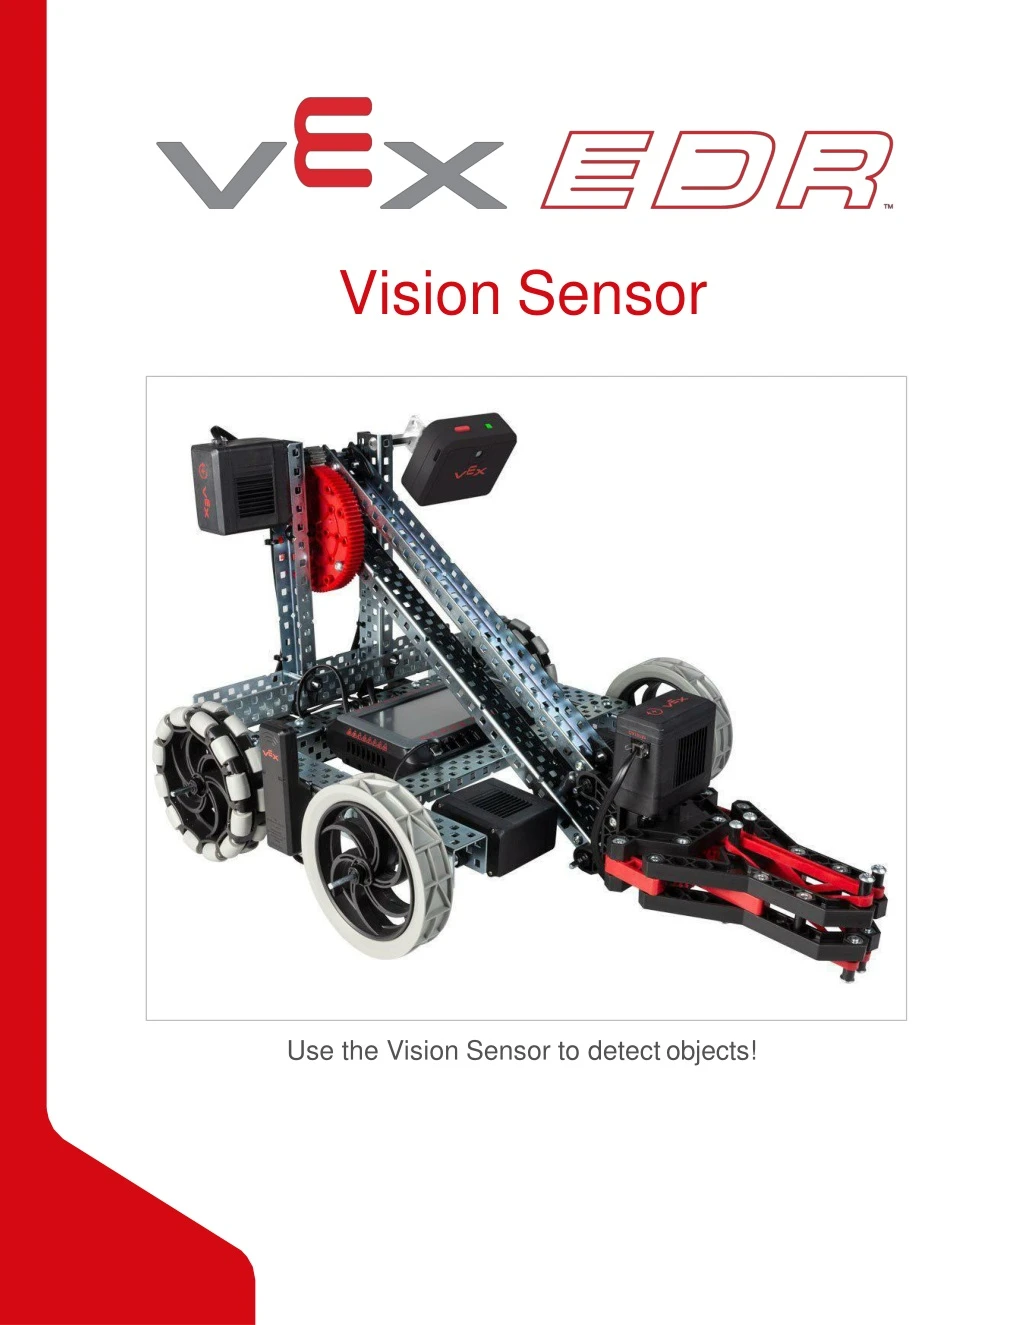
Vision Sensor. Use the Vision Sensor to detect objects!. Discover new hands-on builds and programming opportunities to further your understanding of a subject matter. The Completed Look of the Build. Completed VEX EDR V5 Clawbot

E N D
VisionSensor Use the Vision Sensor to detectobjects!
Discover new hands-on builds and programming opportunities to further your understanding of a subjectmatter.
The Completed Look of theBuild Completed VEX EDR V5Clawbot The VEX EDR V5 Clawbot is an extension of the VEX EDR Speedbot that can be programmed to move around and interact withobjects.
Parts Needed: Part 1 • Can be built with: • VEX EDR V5 Classroom StarterKit
Build InstructionTips • Check the Appendix for info on how to use the new Hex NutRetainers. • Step 4: The green icon indicates that the build needs to be flipped over (upsidedown). • Step 6: Only one of the two sub-assemblies made in this step is used right now. The other will be used later in step9. • Step 7: Make sure your Smart Motors are oriented in the correct direction (screw holes facing the outside of the build and the shaft hole towards theinside). • Step 10: Make sure your Smart Motors are oriented in the correct direction (screw holes facing the outside of the build and the shaft hole towards theinside). • Step 18: The green icon indicates that the build needs to be rotated (180degrees). • Step 20: The blue call out shows what the orientation of the Robot Brain should be if the build were flipped right side up. Make sure the 3 wire ports on the Robot Brain are facing the V5Radio!
Step 22: The green call outs indicate which port on the Robot Brain to plug each device into using their respectivecable. • Step 29: Be sure to make two assemblies in thisstep! • Step 30: This step adds onto the two assemblies started in Step29. • Step 31: Make sure to add this to only one of the two sub-assemblies you justmade. • Step 39: Make sure the 12- tooth gear is installed on the right side of theclaw. • Step 41: Make sure that the port on the Smart Motor is facing the right side of the robot when the claw is installed (the same side as the V5Radio).
Adding the VisionSensor After the Clawbot has been assembled, use the building instructions below to add the Vision Sensor.