Download
1 / 41
420 likes | 593 Views
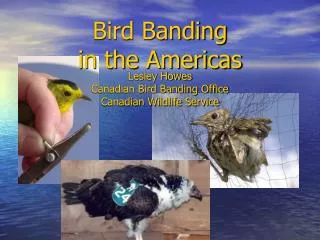
Bird banding 101. Designed to give you an introduction to bird banding before assisting in the field* Created by Kira Krend, University of Hawaii, 2007 * You are not expected to remember everything or even all that much, it’ll make more sense when you see it in person. Things to bring.

E N D
Bird banding 101 Designed to give you an introduction to bird banding before assisting in the field* Created by Kira Krend, University of Hawaii, 2007 * You are not expected to remember everything or even all that much, it’ll make more sense when you see it in person
Things to bring • Sturdy shoes, cleaned of seeds • Lots of water • Lunch • Sun protection (hat, sunscreen) • Rain gear • Book or other distraction for downtime • Optional: mosquito protection, binoculars, camera
Setting up- nets • Teles = telescopic fishing poles with spikes attached • Poles= metal conduit • Nets: come in 6, 9, or 12 meters • Rope and stakes: used to stabilize teles and poles • Don’t forget to tie down net • Will be shown how to properly set up and secure nets
Setting up- nets Pole net up Tele net up
Humans • Warning sign put at each end of nets, to prevent people from running into net or trying to “help” stuck birds • Will have people on trails- make sure to engage, tell them what’s going on, and escort them past nets if necessary • Be especially aware if they have dogs with them and will be passing directly by pole nets
Setting up- banding station • Where we band & process birds • Tarps- one for ground, one for shade/raincover • Net bag= black&red bag with nets and bird bags • Navy blue bag (swag bag)= has rope, stakes, mallets, duct tape • Kit= banding kit, a tackle backpack, with all banding supplies • Book= yellow notebook where data is recorded • First aid kit is in Kira’s backpack if ever needed
Net checks • Number of nets open ranges from 4-8; usually open from ~8am-4:30pm • All nets checked every 20 min (sometimes called ‘check time’ or ‘net run’) • More often if gusty or rainfall • Carefully scan entire area of net, if any part not clearly visible, go over and look; check bottom line in pole nets specifically for birds by tugging • Wiggle pole slightly to check for stability- reset if loose • If net is caught in vegetation, loosely try to pull free and readjust net. If doesn’t come out, leave and tell to Kira or trained person upon return
Net checks- there’s a bird! • If there is a bird in the net: call Kira or trained person on walkie right away • ALWAYS bring a walkie if alone- in a pinch, yelling “bird!” will work too • State what net you are at (nets will be identified as P1, P2, etc beginning of the day) how many birds are in it, and species if you know • You will be given instructions to either come back and help at the banding station, or to continue checking the rest of the nets
Extracting a bird • Only Kira and fully trained banders may take birds out unsupervised- others will be observed once they have volunteered a few days and watched extractions • Getting a bird out of a net (for volunteers with some experience only) • First: figure out what side of net the bird flew in- this is vital • Get a good grip on bird, and begin “backing” them out- usually tail first, then feet, wings, and finally head- more of an art than a science • Keeping the bird from bending into unnatural positions, and careful movements are key to preventing injury • Lots of nasty ways a bird can be caught: thighed, tongued, backpacked, double bagged • If having trouble, always acceptable to let an experienced bander take over, particularly if you’ve been working for a while and/or bird seems stressed (eyes closing, lethargy, open mouth) • Lots of practice is the only way to learn this skill, don’t get frustrated if it is difficult at first
The grips • 2 most common: • The banders grip= neck between pointer and index finger of non-dominant hand, bird resting in palm • The photographers grip=pointer and index behind bird’s thighs, with thumb for support, dominant hand • In large birds, occasionally use ice cream cone grip, which is just like it sounds
The 2 main grips Bander’s grip Photographer’s grip
Bird banding • After extracted, bird placed into bag, carried back to banding station • Native birds processed first, then in order of capture for introduced birds- stressed birds can move up in the order • Waiting birds hang from branches, or are on someone’s lap- NEVER lay a bag with bird in it on ground, even for a moment • Every bird, native or introduced, gets processed
Native Forest Birds of Oahu Oahu Amakihi- OAAM (female) Apapane- APAP Oahu Amakihi- OAAM (male) Others unlikely to catch: Oahu Elepaio and Iiwi
Introduced Oahu Forest Birds Japanese white eye: JAWE Red-whiskered bulbul: RWBU Common Waxbill:COWA Red-vented bulbul: RVBU
Introduced Oahu Forest Birds House finch: HOFI White-rumped shama: WRSH Red-billed Leothrix: RBLE Japanese Bush-warbler: JABW
Introduced Oahu Forest Birds Red-crested cardinal: RCCA Northern Cardinal: NOCA Nutmeg mannakin: NUMA Chestnut Munia: CHMU
Introduced Oahu Forest Birds Zebra Dove: ZEBD Common Myna: COMY Spotted Dove: SPDO Yellow-faced grassquit: YFGR
WEIGHT • Done first- turn scale on, zero if needed. Check to be sure in grams • Balance bird in bag on scale- record in WEIGHT column on second page • After processer has removed bird from bag, weigh bag, and record in WEIGHT column as what should be subtracted to get bird only weight • (Bird+bag) – bag = Bird weight (calculated later) • Example in book: 45.1 – 32.7
Bird banding- data collection • First column: SPE/CAP • SPE: Species. Every bird has a standard 4 letter code, i.e. OAAM, JAWE, RBLE. If don’t know the code, ask. • CAP: Capture. • I= initial capture, never been banded • R=recapture, already has a band • D= daily double, bird caught for the second time in a day. D also stands for dumb bird • Example in book: JAWE / I
NET/TIME/OBS • Next column after SPE/CAP • Net: which net bird caught in: P1, P2, etc. Ask if you didn’t see which net it came out of • Time: time of net check that bird came from: round to closest 10min, use military time,i.e. 1:40pm is 1340. • Obs: Observer, the initials of the person processing the bird. Kira=KLK, Sam=SAB, Mark=MCD. If you don’t know/remember, just ask. • Example in book: P2/1020/KLK
The Band • We call it ‘banding’ referring to the uniquely numbered aluminum band put on each bird. • To get a band ready to put on a bird: find appropriate size band- here are the most common birds’ band sizes: • 0: JAWE, COWA, NUMA, CHMU • 1: OAAM, APAP, HOFI • 1B: RBLE • 1A: RWBU, WRSH • 2: RVBU • If you don’t know, or are even a little unsure, just ask!
The band • Once you have the band, place band onto prongs of banding pliers so the edges line up with the opening (makes no sense until you see it). • Squeeze pliers slowly band opens evenly • Place band in other pair of pliers in appropriate hole, hand to bander
Banding the bird • For volunteers with some experience only: • When placing band on, supporting leg is key- in banders grip, hold toes with index and pointer, and tarsus joint with ring finger and thumb. • Either leg is fine, whichever is more comfortable in your grip • Place band around thin side of leg, turn 90 degrees, watch edges come together • A well banded bird has no overlap and no space between matching edges
Recording banding info • Once the band is on the bird (and not before, that’s bad luck) the bander will read aloud the band number • Bander will give a 3 or 4 number PREFIX, pause, and then give a 5 number SUFFIX, i.e., “okay, band num is 1601, 66482, on the left” • Recorder records each in the appropriate column, and reads back the suffix while the bander is looking at the band to double check • LF and RT columns refer to which leg the band is placed on, and will say “on the left” or just ask. Put AL (for aluminum) in either LF or RT, and a dash in the other. • When putting a set of color bands on, they each have codes (i.e. DB= dark blue) and will be given to you specifically, with which leg and in what order (we don’t do this much) • Example from book: 1601 66482 AL –
Other band number info • Important: record the SUFFIX in the first column of the next page, to keep birds straight. • Each bird has 1 line that spans 2 full pages. • Always good to watch if suffixes are in order- if using the same size band, they should be- alert the bander if not, to look for skipped or possibly dropped bands.
Blood sample • Done by trained person, generally the last thing to be learned • Do this after weighed and banded • Set up: helper/recording can put the following items on the BLOOD BLOCK • Qtip, dipped in water on one end • Needle, taken out of package and ‘unlocked’, set in cap • Capillary tube • Tube of buffer, opened
Blood sample • To take blood sample from brachial vein (note: for experienced banders only) • Place hand with bird on lap or knee for balance • Extend wing with index and forefinger, use qtip to expose brachial vein • Once can easily see and have a clear shot, take needle, bevel side down, and nick vein at approx 45 deg angle • Remember, don’t want to poke through entire vein, just puncture • Going slower can help prevent hemotomas • If no blood comes out, you either missed, or bird has shut down peripheral circulation. If you think you missed and just moved around skin, try again. But if you know you hit and there was no blood, give up, or let Kira try on the other side. • Once blood flows, use capillary tube to suck up- gravity can help. If getting little blood, try pumping wing a bit • Place capillary tube into buffer, cover wound with dry qtip end. • After sample taken, check to see if bird is bleeding a lot, or after pressure has been placed • If yes, treat with styptic powder
Blood sample • Helper/recorder finishing the blood sample: • Open blood blower, place over capillary tube, and turn to push blood into buffer • Can go up and down a few times to get all blood out of tube • NOTE: do NOT get blood into blower- will cause contamination of samples. If you do by accident, alert experienced person who will take it apart and sterilize it • Close buffer tube (make sure fully closed) and shake well • Label with top and side (textured area) with blood log number • Put capillary tube and CLOSED needle into sharps container, used qtips and needle packaging into trash
Recording blood info • On second page of record, BLOOD LOG/AMT • BLOOD LOG is a letter (based on site) and number code- go with the next number. If first of the day, ask experienced person to look up the last one • AMT is the amount of blood, measured by the proportion of the capillary tube filled, can be anywhere from 0.1 to 2.0 (if fill up 2 cap tubes) • Example from book: HON178/0.7
BP/CP/M/F • Next column, beginning of second half of first page • Note: scoring info for semi-experienced volunteers only- don’t get overwhelmed. If you are recorder, a bander will just tell you the number to record in the BP column. • BP= Brood patch • 0: No brood patch at all- breast and abdomen area has feathers on it • 1: Area is smooth and without feathers, and a distinct ‘outline’ of the area is present • 2: Area is becoming vascularized • 3: Area looks nasty, like a blister • -1: Like a 1, but “coming down” at the end of breeding season
BP/CP/M/F • CP= Cloacal protuberance • 0: pointing down, no swelling • 1: pointing up, swelling at base • 2: pointing up, swelling throughout • 3: pointing up, swelling at top • If not sure, ask, or check again at end, could be fecal matter • M= CP metric. Using ruler, measure length of CP only, not feathers on it.
BP/CP/M/F • F= Fat, looking into at the furcular hollow (wishbone area)- birds skin is see through, can see yellow fat when present • 0: No yellow at all • T: stands for trace- can see yellow, but does not connect to make the whole area coated with yellow • 1: yellow across whole hollow, but does not fill in, still hollowed out • 2: yellow fills up hollow until it is full and straight across • 3: yellow across bows out of hollow- a real fatty • As a record, you will something like this: “Ok, BP zero, CP zero, met of 2.5, and Trace of fat” • Which you will then record as 0/0/2.5/T.
AGE/B • Next column says AGE/B, the age of the bird, and B referring to ‘by’ as in how we determined age or sex • Age • AHY: After Hatch Year. An adult bird • HY: Hatch Year. A juvenile bird • AHYQ or HYQ: Q refers to question, if bander is unsure because it is unclear • Determining age- B • P: Plumage- young birds tend to have different plumage patterns than adults • R: Reproduction- only AHY birds will have BPs or CPs, indicating reproductive activity • G: Gape- young birds often have fleshy extra skin around the edges of their bills • Example from book: AHY/P
SEX/B • Next column is SEX/B, which is the sex of the bird, and how it was determined • Sex • M: Male • F: Female • U: Unknown- in HY birds or in species where males and females look alike, and there’s no evidence of CPs, sex is unknown • FQ or MQ: Questionable identification, if it isn’t clear to the bander • Determining sex- B • P: Plumage-some species males and females have different plumage patters • R: Reproduction- only male birds have CPs- both sexes can have BPs. • M: Metric- in a some species, males and females are different sizes • Example from book: M/P
DISEASE • This column refers to any evidence of past or present pox infection, usually showing as swelling on fleshy body parts (most common on legs, feet, toes, but also check edge of bill and around eyes), or deformities from past, healed infection • L or R: Leg with disease • SW, SO, M, D: What’s wrong: Swollen, Sore, Missing, Deformed • T,C: Toe, claw • Toes labeled 1-4, counting from the inside, ending with hind • Example from book “Left Missing Toe 3” = LMT3
MOLT • Molt is when new feathers are growing in, identified by their cylindrical sheaths • We record were molt is located on a bird: • HD=head, BR=breast, AB=abdomen, VT=vent, TTC= top tail coverts, UTC=under tail coverts, TG=thigh, FK=flank, BK=back, RP=rump, TWC= top wing coverts, UWC=under wing coverts, RETS=retrices (tail feathers) P= Primaries, S= Secondaries • Wing feathers are counted out, starting with the outermost Primary= 9, then 8…1, then the next feather is Secondary 1….9. L or R also noted, i.e. LP6= left primary 6. • When recording, the bander will say the regions, and if you don’t know the code, just ask them to say that as well • Example from book: BR,BK,UTC,LS6,RS4 • If all doesn’t fit into molt box, put an elipsis (…) and then in the NOTES section, put M= and then continue listing molt regions
ECTO/COL • Ectoparasites are lice and mites in the feathers of birds- we record their presence in the same regions (and using same codes) as molt • If any ectos, Y in Ecto column, and then turn to NOTES section. If no ecto, N. • E= eggs. Light colored, dandruff looking specks that stay on feathers when you blow on them or try to move them • ASL=adult stage lice. Difficult to id from eggs without a hand lens, but can sometimes see them crawling. When in doubt, call it eggs • ASM= adult stage mites. Larger and faster than lice, and tend to climb onto your hands from the bird • If a bander says “we have eggs on head, and adult lice on primary wing barbs” the example in the book would be Y in ECTO column, and in the notes E=HD, ASL=PWB • If a sample of ectos are collected, a code will go in the COL column, i.e. E37. If ectos are many body areas, write in the notes where the sample came from: E37= HD
MORPHOMETRICS • The last thing we do is take measurements of the bird. All are in mm. • WING/TAIL: wing measurement, pushing down to flatten wing,and length of longest tail feather • L BILL: Long bill, or bill length • D/W: Depth and Width of bill • TARSUS: from notch in ankle to top of foot- seeing it will make more sense
STRESS BARS • When birds are nutritionally stressed during molt, the result can be horizontal bars on flight feathers that lack pigment • When surveying for molt and ecto, the bander may say “Two faint stress bars on Tail” • Recorded in the NOTES as “2 faint SB on T”
Releasing a bird • Before letting go, the bander will ask, “is this bird done?” and the recorder will look back at the entry and make sure all spaces are filled in, and if yes, bird is done • To safely let go of a bird, put in bander’s grip and turn bird right side up in your other palm, and release grip • This gives the bird a place to sit for a moment if needed without falling. If they don’t fly away, move hand up and down slightly