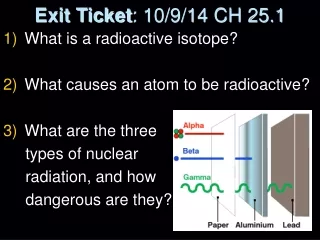
Download

1 / 22
220 likes | 326 Views
Exit Ticket. Download student app: ExitTicket Access website: exittix.com or exitticket.org. Student Directions. We are going to walk through the steps you will tell your students to follow. Download app or go to www.exittix.com or www.exitticket.org

E N D
Exit Ticket Download student app: ExitTicket Access website: exittix.com or exitticket.org
Student Directions We are going to walk through the steps you will tell your students to follow. • Download app or go to www.exittix.com or www.exitticket.org • Click on Class Code. Use this class code to create an account. Give students class code. T • - Yours for today’s training is viy234225 Each class will have a different code. Teachers can access this code after setting up their first class.
Student Directions Enter code and click Go! Click “I’m new. I need an account”
Student Directions Student username should be his/her AD ID. 3 letters of last name, 3 letters of first name Last two numbers of soc.security # Click Continue Student password should be his/her lunch number. Click Continue.
Student Directions Do not fill in a Student ID number. Click Continue. Fill in first and last name. Click on “Create my Account!”
Student Directions The page that opens will list assessments that have been assigned to you. Click Start to begin. Click then to exit after finishing the assessment.
Teacher Directions - Setting up Account Go to www.exittix.com or www.exitticket.org Complete all info. Username must be your email. Click “Create Account”. Click on “Get a Free Teacher Account”
Teacher Directions - Setting up Account Type in Daviess County in the “Let’s start with finding your organization” box. A list of schools will pop up. Choose your school by clicking “Link School”.
Teacher Directions - Setting Up Account If you receive this notification, you have been successful!
Teacher Directions - Setting Up Classes From the homepage, select “+ New Class” Complete information. No need for a Class ID #. Click Save.
Teacher Directions - Setting Up Classes To find the Class Code, click on “View” or “Edit Class” for your particular class. Each one you make has its own code. Now, click on “+Add Students”.
Teacher Directions - Setting Up Classes Now you should see a pop-up window that you can show the students the first time they log into your class. You are almost ready!! Now we need to create an assessment.
Teacher Directions - Create Assessment From the homepage, select “+ New Assessment”. This drop-down box will appear. You can hover over the ? to find out more info about each of these types. The S means it is scored. The BP button is a resource for ways to use this type of assessment.
Teacher Directions - Create Assessment • You must give a Title. • Choose from options. • Set Publish Date (To/From) • Choose class and set status to “visible” if you are ready for students to take the assessment. • Next, click on “Questions” to create first question.
Teacher Directions - Create Assessment • Choose from a variety of question formats. • Free Response is Short Answer...one or two words works best. • Item Bank has several questions from the “public”. Always preview them to ensure accuracy.
Teacher Directions - Create Assessment • Type in a general “Descriptive Title Tag”. • Choose level of difficulty • Decide to randomize answer choices or not. • Type in your Question in the box provided. • Now you should scroll down the page to create answer choices.
Teacher Directions - Create Assessment • Fill in the answer choices and choose which one is correct by clicking the circle beside the choice. • You can preview it. • Be sure to Save. • Add next Question.
Teacher Directions - Create Assessment • For a Free Response, enter question in box. • You need to type in the answer. You can have multiple correct answers by separating them with a semicolon. For example, 42;forty-two. Allow for possible mispellings.
This is the type of report you will obtain. Basically, you see the averages for each assessment for each student. Teacher Directions - Results - Method 1 From the Classes page, click on “Reports” under the chosen class.
This report lists each assessment and gives the average for each. Click on the Result of the assessment for which you would like a report. Teacher Directions - Results - Method 2 From the Classes page, click on “Assessments”
This page gives you each students score listed in different formats. Click each of these for the different formats. Teacher Directions - Results - Method 2 Get this report by clicking on the question buttons. It also has optional views. The bar graph shows the number of correct/incorrect. You can also export result to Excel.
From the Classes page, find the assessment for which you would like to view results from the right-side panel and click on the average. Teacher Directions - Results - Method 3 This will take you to the same overview as in Method 2.