Download

1 / 13
130 likes | 200 Views
Vermilion Parish Science In-Service Using the GLX. January 23, 2010. Do some students in your class look like this?. Have you ever had days like this?. We must increase student engagement!. In a science classroom, there a number of ways this can be achieved! Competition Movement Technology

E N D
Vermilion Parish Science In-ServiceUsing the GLX January 23, 2010
We must increase student engagement! • In a science classroom, there a number of ways this can be achieved! • Competition • Movement • Technology • Today we will concentrate on Technology by introducing you to the GLX!!
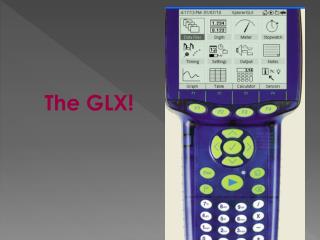
We will now review the most frequently used buttons on the GLX!
Function Keys (F Keys) Check & Arrow Keys Home Start & Stop Power On/Off (not shown)
Using the GLX Simulator! • When Data Studio is loaded on your computer, a GLX Simulator is part of the package. • The icon will be on your desktop. • Turn on the GLX & plug it into your computer. • Double click the icon & the simulator will open up! • Click on “Show Large Screen.” Now your students can see what buttons to press & what the screen should look like!
Connecting a Sensor to the GLX! • If you have a PASPORT sensor, plug it into one of the PASPORT ports on the GLX. • If you have a temperature probe (fast-response or stainless steel), plug it into one of the temperature ports on the side of the GLX. • If you have a voltage probe, plug it into the voltage port on the side of the GLX. Task result: The GLX detects the sensor and adds it to your experiment.
Let’s Plug In A Temperature Sensor! • Notice the GLX is “Plug & Play!” • Now, let’s start an experiment!
Starting A New Experiment! • Press to open the Home screen. • Use the arrow keys to highlight the Data Files icon and press. • Press to open the Files menu. • In the Files menu, use the arrow keys to highlight New Files and press . • Press to return to the Home screen. You are now ready for any experiment.