Download
1 / 37
390 likes | 514 Views
UNIT-IV MULTIMEDIA. Learning objectives • To know about popular web audio and video formats and editors, Microsoft media formats, animation software. • To know about the web authoring tools and players. • Creating simple web animations using Flash.

E N D
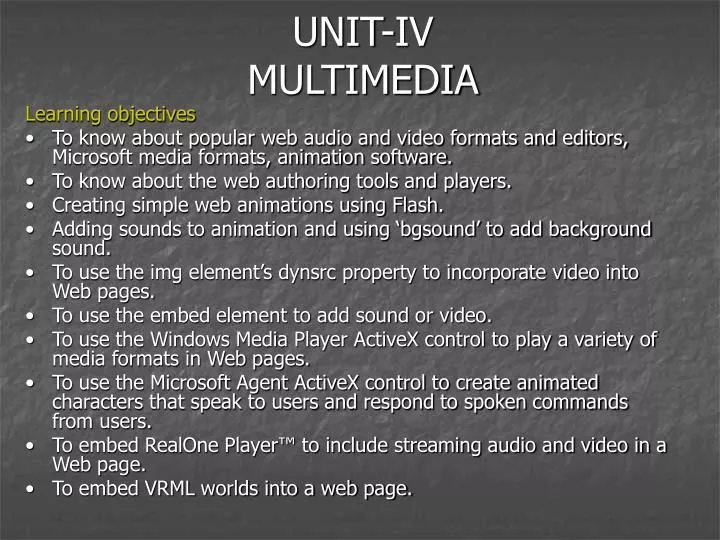
UNIT-IVMULTIMEDIA Learning objectives • To know about popular web audio and video formats and editors, Microsoft media formats, animation software. • To know about the web authoring tools and players. • Creating simple web animations using Flash. • Adding sounds to animation and using ‘bgsound’ to add background sound. • To use the img element’s dynsrc property to incorporate video into Web pages. • To use the embed element to add sound or video. • To use the Windows Media Player ActiveX control to play a variety of media formats in Web pages. • To use the Microsoft Agent ActiveX control to create animated characters that speak to users and respond to spoken commands from users. • To embed RealOne Player™ to include streaming audio and video in a Web page. • To embed VRML worlds into a web page.
Media editing software and file formats Audio editing: Audacity, Real Producer Video editing: Avid Express, QuickTime Pro, Pinnacle Studio, Adobe Premiere Sound Formats for the web: MIDI Format: The MIDI (Musical Instrument Digital Interface) is a format for sending music information between electronic music devices like synthesizers and PC sound cards. MIDI files do not contain sampled sound, but a set of digital musical instructions (musical notes). The downside of MIDI is that it cannot record sounds (only notes). Or, to put it another way: It cannot store songs, only tunes. Real Audio, AU, AIFF, SND, WAV, mp3 MP3: The MP3 encoding system combines good compression (small files) with high quality.
Media editing software and file formats Video Formats for the web: AVI Format: The AVI (Audio Video Interleave) format was developed by Microsoft. Videos stored in the AVI format have the extension .avi. Ex., Windows Media Format, MPEG, QuickTime, RealVideo, ShockWave Web Animation Formats: Ex., After Effects, Photoshop, Flash, Ulead GIF Animator 5, CoffeeCup GIF Animator. Web Authoring Tools: WYSIWYG Editors: Microsoft Front Page: Microsoft FrontPage lets you see a graphical map of your site, and you can easily add pages to it from there. Microsoft FrontPage lets you use any combination of text- and graphics-based layouts and navigation tools.
Media editing software and file formats Web Authoring Tools: WYSIWYG Editors: Macromedia DreamWeaver: For hand-coding, Deamweaver calls up an external HTML source editor. A quick click of Dreamwaver’s External Editor button, and you are editing source code. Switch back to Dreamwaver, and it integrates your changes into the WYSIWYG view automatically. Program based authoring tools: Flash: •Flash is a tool for creating interactive and animated Web sites. Flash is a multimedia graphics program specially for use on the Web • Flash enables you to create interactive "movies" on the Web • Flash uses vector graphics, which means that the graphics can be scaled to any size without losing clarity/quality • Flash loads much faster than animated images
Media editing software and file formats Program based authoring tools: Flash: • Flash allows interactivity, animated images do not • Flash does not require programming skills, java applets do Windows Media Formats: ASF, ASX, WMA, WMV etc., Audio and Video Players: QuickTime: QuickTime supports a wide range of media formats including MPEG-2 and MPEG-4 video, QuickTime VR, AVI, and DV. Video compressors and decompressors optimise the quality of streaming video for a wide range ofbandwidths. RealOne: RealOne player supports a wide range of media formats including streaming RealVideo, downloaded QuickTime, Windows Media or MPEG audio/video files and audio formats such as MP3.
Media editing software and file formats Audio and Video Players: Windows Media Player: Windows Media player supports a wide range of media formats including ASF (Advanced Systems Format - its native format), Windows Media Audio (WMA), Windows Media Video (WMV), WAV, AVI, MPEG, QuickTime, Macromedia Flash and others. It can be used for playing anything from low-bandwidth audio to full-screen video, including streaming video. Flash: Flash movies can include text, animation, interactivity, audio and video. As Flash uses efficient compression methods and vector graphics, the files produced tend to be of a small size. Shockwave: Shockwave player handles web content created with Macromedia Director. This can includes interactive audio, video, bitmaps, 3D vectors, text and other rich media. Cosmo Player: Cosmo Player is a universal player for content created in the virtual reality modelling language (VRML). WinAmp: WinAmp offers support for audio formats including MP3, Windows Media Audio, WAV and CD audio, as well as video formats including MPEG, AVI, WMV and ASF (Windows Media streaming format).
Creating Clippings • Types of Web Animation: • The basic animation techniques supported in flash are • Frame by frame animation • Key frame or tweened animation • Motion tweening • Shape tweening • Onion skinning Flash Work Environment:
Creating Clippings Flash Work Environment: When creating and editing movies, you typically work with these key features: • The Stage, the rectangular area where the movie plays • The Timeline, where graphics are animated over time • Symbols, the reusable media assets of a movie • The Library window, where symbols are organized • The Movie Explorer, which gives an overview of a movie and its structure • Floating, dockable panels, which enable you to modify various elements in the movie and configure the Flash authoring environment to best suit your workflow
Creating Clippings Flash Work Environment:
Creating Clippings Flash Work Environment: Symbols and Instances: Symbols are reusable elements that you use with a movie. Symbols can be graphics, buttons, movie clips, sound files, or fonts. When you create a symbol, the symbol is stored in the file's library. When you place a symbol on the Stage, you create an instance of that symbol. Library: The Library window is where you store and organize symbols created in Flash, as well as imported files, including sound files, bitmap graphics, and QuickTime movies. Scenes: you might use separate scenes for an introduction, a loading message, and credits.
Creating Clippings Flash Work Environment: Tool Box: The tools in the toolbox let you draw, paint, select, and modify artwork, and change the view of the Stage. The toolbox is divided into four sections: >The Tools section contains drawing, painting, and selection tools. >The View section contains tools for zooming and panning in the application window. >The Colors section contains modifiers for stroke and fill colors. >The Options section displays modifiers for the selected tool, which affect the tool's painting or editing operations. Movie Explorer: The Movie Explorer provides an easy way for you to view and organize the content of a movie and select elements in the movie for modification. It offers many features to streamline the workflow for creating movies.
Creating Clippings Flash Work Environment: Movie Explorer: The Movie Explorer provides an easy way for you to view and organize the content of a movie and select elements in the movie for modification. It offers many features to streamline the workflow for creating movies.
Creating Clippings Creating a Frame by Frame animation: Frame-by-frame animation changes the contents of the Stage in every frame and is best suited to complex animation in which an image changes in every frame instead of simply moving. When you create frame-by-frame animation, every frame is a keyframe. Steps: >Click a layer name to make it the current layer, and select a frame in the layer where you want the animation to start. >If the frame isn't already a keyframe, choose Insert > Keyframe to make it one. >Create the image for the first frame of the sequence. You can use the drawing tools, paste graphics from the Clipboard, or import a file. >Click the next frame to the right in the same row and choose Insert > Keyframe
Creating Clippings Creating a Key-Frame animation: In keyframe (tweened) animation, you define keyframes at important points in the animation and let Flash create the content of frames in between. Flash displays the interpolated frames of a tweened animation as light blue or green with an arrow drawn between keyframes. Flash distinguishes tweened animation from frame-by-frame animation in the Timeline as follows: Motion-tweened keyframes are indicated by a black dot and intermediate tweened frames have a black arrow with a light blue background. Shape-tweened keyframes are indicated by a black dot and intermediate frames have a black arrow with a light green background. A dashed line indicates that the final keyframe is missing.
Creating Clippings A single keyframe is indicated by a black dot. Light-gray frames after a single keyframe contain the same content with no changes and have a black line with a hollow rectangle at the last frame of the span. Creating a Key-Frame animation: Step 1:Open Flash and size the work area from Modify >Movie choosing 300 x 200 for this example. Use any color for the background. Select the square drawing tool, no line color and any fill color. On the stage, draw out a square, then choose the black arrow tool from the toolbar. Select the square and drag it outside to the left of the stage. While the square is still selected, hit the 'F8' key to convert it to a symbol. Step 2: On the timeline, create a keyframe on frame 39. Step 3: Select frame 39 on the timeline, then grab and move the square on the stage to the far right outside. Step 4:Right click anywhere between frames 1-39 on the timeline and 'Create Motion Tween' from the selection box.
Creating Clippings Creating a Key-Frame animation:
Creating Clippings Creating a Shape Tween animation: At the beginning Intermediate At the end frame at frame no. 1 at frame no. 20 At frame no. 40
Creating Clippings Tweening along a path: Step 1: Open Flash and size the work area from Modify>Movie choosing 300 x 200 for this example. Choose any color for the background. Step 2: On frame 1, create an object or import a graphic and then convert it to a symbol. Step 3: Insert a keyframe around 40 Step 4: Add a motion guide layer by selecting it. Step 5: Select the pencil tool and draw a path on the work area of the motion guide layer. Click on frame 1 of the object layer. Select 'arrow' from the toolbar and select the image object, moving it toward the top of the path you just drew until it 'snaps to' the beginning of the path. Click on frame 40 of the layer, then select the object again on the work area, then drag it to the end of the path until it 'snaps to' the other end. Step 6: Now go to the first frame of the object layer, select the layer and choose insert>create motion tween. You can resize the object at frame 40 so that while it moves along the motion path the size changes.
Creating Clippings Tweening along a path:
Adding Sound Effects to your Animation As a very basic introduction, it's as easy as importing a selected .wav file into your .fla. Once the sound is imported, it will be available as a choice from the library (if you import it on its own layer) or as a choice from the 'sound' panel. Embedding flash movie into a web page Insert the code below into a html page <object width="300" height="300"> <param name="movie" value="somefilename.swf"> <embed src="somefilename.swf" width="300" height="300"> </embed> </object>
Adding Sound Effects to your Animation As a very basic introduction, it's as easy as importing a selected .wav file into your .fla. Once the sound is imported, it will be available as a choice from the library (if you import it on its own layer) or as a choice from the 'sound' panel. Embedding flash movie into a web page Insert the code below into a html page <object width="300" height="300"> <param name="movie" value="somefilename.swf"> <embed src="somefilename.swf" width="300" height="300"> </embed> </object>
Adding Audio or video to a web page Audio and video files can be embedded in a web page or placed on a web server so that they can be downloaded on demand. There are three tags that are typically used to add sound files. Two are not valid HTML and the third doesn't work reliably across browsers: <bgsound> - not a valid HTML tag, and it only works in Internet Explorer <embed> - not a valid HTML tag, but it works in most browsers <object> - a valid HTML tag, but it only works in Safari.
Adding Audio or video to a web page Adding video with the img element’s dynsrc property:
Adding Audio or video to a web page Adding video with the img element’s dynsrc property:
Adding Audio or video to a web page Using ‘embed’ element to add audio and video: Audio: <embed src="LoopyMusic.wav" loop="true"</embed> Video: <table> <tr><td><embed src="intro.wmv" loop="false" width="250" height="180"></embed></td> </tr></table>
Using Windows Media Player ActiveX control The Windows Media Player and other ActiveX controls are embedded into web pages with the ‘object’ element. The HTML program below shows how to use the ‘object’ element to embed two Windows Media Player ActiveX controls in the web page. One of the controls plays a video. The other plays an audio clip. If your activeX ID is correct you can see the output for the program below. The output of the program (given in the next slide) is shown below.
Microsoft Agent Control Microsoft Agent is an exciting technology for Interactive animated characters in a windows application or a web page. The Microsoft Agent Control provides access to Agent characters such as “Peedy (a parrot), Genie, Merlin (a wizard) and Robby (a robot) - as well as those created by third party developers. These Agent characters allow users to interact with the application using more natural human communication techniques. The control accepts mouse and keyboard interactions, speaks (if a compatible text-to-speech engine is installed) and also supports speech recognition (if a compatible speech-recognition engine is installed). Using Microsoft Agent allows web pages to speak with users. The detailed code and the explanation to create an agent is given in the course material. The output of the program is shown in the next slide.
Microsoft Agent Control Microsoft voice Recognition Engine and Microsoft Agent: The detailed code and the explanation to create a voice recognition agent is given in the course material. The output of the program is shown below.
Embedding Real Player ActiveX Control A RealOne Player object may be embedded into a web page to enhance the page with streaming audio and video. The example below demonstrates streaming audio and video in a web page by embedding RealOne Player object in the page using ‘embed’ element.
Embedding Real Player ActiveX Control The output of the previous program is below.
Embedding VRML into a webpage VRML (Virtual Reality Modeling Language) is a scene description language. It is a standard file format for representing 3D interactive vector graphics designed particularly with the World Wide Web in mind. VRML files are commonly called "worlds" and have the *.wrl extension. You will need to install a VRML plug-in before you can view VRML models using Microsoft Internet Explorer. (Here is a sample) • #VRML V2.0 utf8 • # Red cone • Shape { • appearance Appearance { • material Material { • diffuseColor 1 0 0 • } • } • geometry Cone { • bottomRadius 0.75 • height 1.6 • } • }
Embedding VRML into a webpage The program below shows how to embed VRML files into a web page. • <HTML> • <!-- Embedding VRML into a Web page --> • <HEAD> • <TITLE>Live VRML</TITLE> • </HEAD> • <BODY> • <EMBED SRC = "hemoglobine.wrl" WIDTH = "400" HEIGHT = "400"> • </BODY> • </HTML>