Download
1 / 20
200 likes | 271 Views
Basic First Aid. Why to know first aid procedures?. Lives can be saved by the steps anyone can take until medical help can arrive. First Aid Kits. Every office, factory, home and school should have an accessible first aid kit Every kit should have the following items First aid book

E N D
Why to know first aid procedures? • Lives can be saved by the steps anyone can take until medical help can arrive.
First Aid Kits • Every office, factory, home and school should have an accessible first aid kit • Every kit should have the following items • First aid book • Band aids of various sizes • Elastic bandages • Gauze and adhesive tape • Antiseptic wipes (alcohol wipes) and cotton wool • Safety pins and tweezers • Scissors • Latex gloves • Calamine lotion • Clinical thermometer • Analgesic tablets (aspirin)
Accidents & Emergencies Can & Do Happen!
Severe Bleeding, Wounds and Injuries • Blood can be lost very rapidly from a severed or torn artery. • Severe blood loss can lead to shock, unconsciousness or death • Any injuries that occur in the shop need to be reported right away to ME!
External Bleeding • If an adult looses more than 1 liter of blood or a child looses as little as 1/3 of that amount loss is considered severe.
Arm or Leg Injuries • Treat by • 1. Laying the victim down and if possible, raise the injured part. • 2. Press hard on the wound with a clean pad. If the wound is gaping, hold the edges together firmly • 3. If there is a foreign body in the wound (glass, metal, etc) apply pressure alongside • 4. Take a firm pad and bind it firmly over the whole wound so that pressure is maintained. (A scarf or tie can be used) • 5. If blood soaks through the bandage do not remove it. Instead continue to apply pressure to the wound for 7-10 minutes. • 6. Seek medical attention
Head Injuries • Signs • Blood or fluid from the ear • Loss of consciousness • Wound • Sometimes no signs • Treatment • Very carefully, try to put flaps of skin back into position • Press firmly on the wound with a clean, (sterile if possible) pad • Hold the dressing in place with more clean cloth • If the victim is conscious, lay them with their head and shoulders slightly raised • If fluid comes from the ear, cover the ear with a clean pad and lay them on that side to allow free drainage of the fluid from the ear. • See medical help immediately
Chest Injuries • Cover the wound immediately using the palm of your hand or the victims if they are conscious • Place a sterile dressing or clean pad over the wound then cover the pad with a plastic bag, kitchen film or foil, held in place with adhesive strapping or firm bandaging to form an airtight seal • If victim is conscious, support him/her in a comfortable position • Call 9-1-1
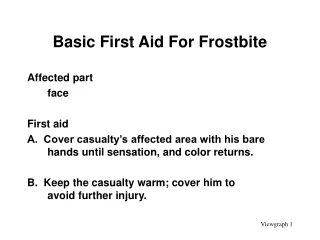
Burns • 3 Degrees • Caused by heat, chemicals or radiation • Scalds are caused by steam or hot liquids • WARNING • 1. Never put butter or greasy ointment on a burn. • 2. Always seek medical attention if: • The victim is a child or elderly • Burn covers more than one body part • Burn is located on any sensitive part of the body • Burn is third degree • Burn is caused by chemicals
First Degree Burns • Damage the outer layer of skin • Signs • Redness • Mild pain • Swelling • Treatment • Plunge in cold water or hold under a cold running tap for 10 minutes or the until the pain stops or lessens • Cover with a clean gauze dressing for protection
Second Degree Burns • Go through to the second layer of skin • Signs • Blisters • Rough, red skin • Swelling • Extreme pain • Treatment • Remove all clothing, jewelry, watches from the burned area unless it is sticking to the skin • Pour large amounts of cold water over the affected area for at least 10 minutes • Gently blot areas. DO NOT rub; rubbing may break blisters • Lightly cover the entire burned area with a clean, dry dressing. If fluid soaks through cover with another layer. • Raise a burned arm or leg to reduce swelling but be careful not to burst blisters • Call 9-1-1
Third Degree Burns • Less painful than 2nd degree burns because the nerve cells in the affected tissue are destroyed but the damage is greater. • The burn goes through to the third layer of skin. • Skin appears whitish or charred
Third Degree Burns • Do not remove any clothing near or at the site of the burn • Do not apply cold water or medication • Place clean, dry cloths over the damaged area • If burns are on arms or legs, raise the arm or leg to reduce swelling • If burns are on the face, check frequently to make sure that he/she is not having difficulty breathing • Get victim to a hospital IMMEDIATELY
Cuts & Grazes • Bleeding usually stops within a few minutes • Treat by cleaning the area with a gauze or cotton pad • Small cuts heal best if covered • Antibiotic ointments may be used
Foreign Body in the Eye • Eye • When on the pupil or embedded in the white of the eye • Never try to remove the object • Cover the injured eye with a clean pad • Bandage both eyes • Take the victim to the hospital • When floating on the white of the eye • Advise the victim not to rub the eye • Have them sit down facing a light so that you can see into the eye clearly • Using your finger or thumb gently pull the eyelids of the injured eye apart • When you see the foreign body wash it out with clean water • If the foreign body has not moved, try to lift it off with a moist swab or the dampened corner of a tissue or handkerchief.