Download
1 / 17
170 likes | 264 Views
204CR / 346CS Block Two Telling Stories: The basics of narrative Video. Weeks 4 – 7 Theory: Early Cinema and the development of film language - The Institutional Mode of Representation and Hollywood

E N D
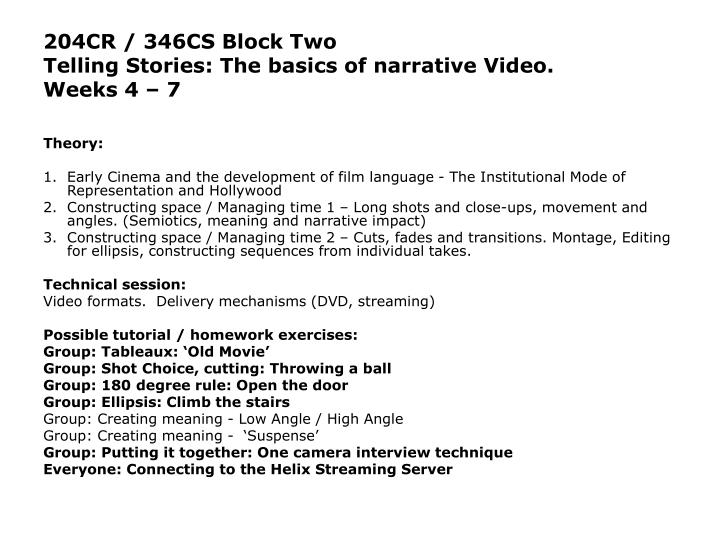
204CR / 346CS Block Two Telling Stories: The basics of narrative Video. Weeks 4 – 7 Theory: Early Cinema and the development of film language - The Institutional Mode of Representation and Hollywood Constructing space / Managing time 1 – Long shots and close-ups, movement and angles. (Semiotics, meaning and narrative impact) Constructing space / Managing time 2 – Cuts, fades and transitions. Montage, Editing for ellipsis, constructing sequences from individual takes. Technical session: Video formats. Delivery mechanisms (DVD, streaming) Possible tutorial / homework exercises: Group: Tableaux: ‘Old Movie’ Group: Shot Choice, cutting: Throwing a ball Group: 180 degree rule: Open the door Group: Ellipsis: Climb the stairs Group: Creating meaning - Low Angle / High Angle Group: Creating meaning - ‘Suspense’ Group: Putting it together: One camera interview technique Everyone: Connecting to the Helix Streaming Server
Documentary Film & Video • “Creative treatment of actuality”- John Grierson • Every Documentary falls somewhere between the most pure form of “telling a found story” and the less pure “contrived fiction” Surveillance Camera Hollywood Film
Interview Styles • Vox Pops: – Series of talking heads all responding to the same question • Discussion: – Wide two shot of both participants (no close-ups or reaction shots) • ‘Soundtrack interview’: (i.e. interviewee visually absent) – sound only interview illustrated by rostrum camera and illustrative moving visuals. • Classic shot-reverse-shot interview: • Multicamera: vision mixing in studio • One camera: Needs to be ‘pieced together’ in editing
Videotaping Interviews • What we have learned so far: • Keep the camera still – use a tripod or, failing this, let the camera operator ‘lean’ on something • Record extra video for editing. Start recording at least 5 seconds before the action or talking begins, then continue recording at least 5 seconds after the action or talking ends. Editing will be a lot easier if you have a little extra footage before and after the event you are trying to capture. • Choose your angles wisely and stick with them
Preparing for a Formal Interview: • Generate an initial list of questions for the guest. It’s always a good idea to provide the guest with these questions prior to the interview so they can be ready with their answers. • Your questions should focus on what interests you (and your audience) about the thoughts and ideas of the person you are interviewing? • Focus on questions that elicit an opportunity to share their thoughts, understanding and knowledge, experiences, predictions etc. • Do not ask questions that can be answered with a simple yes or no.
Interview Audio: • Find a quiet space FIRST (fountains / traffic / crowds = BAD) • Use an external lapel microphone (lavalier) or shotgun microphone for the interview if available. • If you have to use the camera’s built-in microphone, you MUST have the camera within 5 or 6 feet of the person being interviewed to record decent audio…. closer if there’s a lot of background noise (so go inside!) • Try to position the camera about 30 degrees to the left or right of the subject (not straight on).
Shot Composition for a Formal Interview: • ESTABLISHING SHOT: Wide shot showing both interviewer and interviewee (Cam Pos 1) – audio is not used from this shot. • MAIN SHOT: Set up the shot of the Guest with the camera slightly behind and to the side of the Interviewer. (Cam Pos 2) audio of responses used. • Frame the shot with the Guest's “eyes on the upper third line” (rule of thirds – explained later) and allow a little more space in front of the face in the direction they are turned. • Have the interviewer sit and face the guest so they have someone to connect with and talk to. The interviewer should ask the questions and tell the guest to ignore the camera and just “talk to me”. • Start the first answer shot with a medium or medium-wide shot: From just above waist to top of head… with eyes on the upper third line! This will allow room to put in a title key over the video when editing. • You can zoom-in to a closer shot later in the interview, but do it while a new question is being asked. It will make editing easier if you're not zooming during an answer.
Over the Shoulder (OS) Shot • This shot is wide enough to include part of the head and shoulders of the person doing the interview. It helps establish the relative position of the interviewer and guest being interviewed. • This shot isn't always necessary but is useful if you are going to have "reverse" angle shots(Cam pos 3) of the interviewer asking questions or reacting to something the guest is saying, like nodding in agreement as the guest talks. (audio can be used from this take) • You could also pan just a bit right to eliminate the interviewer from this shot leaving you with just a medium shot of the guest. http://www.library.kent.edu/page/11061
Medium close-up Shot of Guest with title • This shot positions the eyes of the guest on an "imaginary" line approximately 1/3 of the way down from the top of the screen. In addition, the shot is wide enough to allow space to add the Name and Title of the guest being interviewed. Notice that the guest is not looking at the camera but at the interviewer and there is slightly more room in "front" of the face in the direction the guest is looking. Use this shot at the beginning of the interview. http://www.library.kent.edu/page/11061 The rule of thirds http://www.silverlight.co.uk/tutorials/compose_expose/thirds.html
Shooting “Cover” Video • 2 types: Cutaways & Noddies • Cover video can be used during the editing process to “cover” edits needed in the interview or to provide visual support for narration. • While the interviewer and guest are sitting and talking (before starting the formal interview) try to get some shots of the guest's hands or just the guest sitting and listening to the interviewer. You can use these shots in editing. • Ask permission to stay in the location (office or wherever) that you shot the interview for a few minutes more to tape cover video for the program. • If you can, move the camera around to a position next to where the guest was seated and get a medium shot of the interviewer from the guest's perspective. Record the interviewer asking questions and just sitting and nodding as if listening to the guest (only need to have them do this for about 5 seconds, then ask the next question. These shots can be used later when editing the interview.
Shooting “Cover” Video • Get shots of other things at the interview location. Any signs, objects on desks, anything that might be associated with the content of the interview. • When possible, get interior shots of anything you can. If you can get shots of people working, great! But be sure to get permission first. • Limit panning and zooming. Don’t pan over here to something interesting, then pan over there to something else. Similarly, don’t zoom in and out. Think instead of a series of still shots. • HOLD EVERY SHOT STILL FOR AT LEAST 15 SECONDS OR MORE! Count to at least 15 after starting to record a shot before stopping, changing shots, starting a pan or zoom, etc. Some shots, like an exterior of a building or an interior of a working space with workers should be recorded for at least 30 (or more) seconds without moving the camera. Hint: The wider the shot, the longer it should be on to allow the viewer to “see” everything in the shot.
More tips • Camera person: Don’t be afraid to ask the interviewer and interviewee to wait a second when adjusting the framing of a shot or changing shots. Let them know when you’re ready to record and when you are recording…. Wait about 5 seconds AFTER you start recording to “cue” the interviewer that it’s ok to start. • Avoid Group Interviews. Interviews are best when you are one-on-one with the interviewee. In most situations it is a bad idea to interview a group of people all at once, they may tend to answer for one-another rather than the audience and they may play off one-another in a manner that is distracting (e.g., interviewing a band). • Group interviews are extremely hard to shoot with one camera and get close-ups of the person talking without lots of distracting panning and zooming.
Editing the interview • Introductory Shot (GV of location / venue) with voice-over introducing the interview then 3 main shots + additional cutaways: • Shot 1 – Wide 2 shot as first question is asked • Shot 2 – Mid shot (o/s shot) of interviewee’s reply • Shot 3 – reverse shot (noddie) if the editor needs to ‘shorten’ the answer
Advanced editing technique • Split edit • Use audio from one shot to ‘go under’ visuals from another (see handout for examples) Guests Answer starts here Guest listening to question Interviewers question Video Track Audio Track Question finishes here
Optional / Supplementary portfolio task (for the more theoretically inclined…..) • Analyse one or more computer game cut-scenes in the light of the lectures / readings on classical Hollywood film language (mise-en-scene, continuity editing, narrative conventions). • To what extent do the cut-scenes conform to Hollywood norms? • How might computer game cut-scenes develop in the future (Hints A.I. behaviours / Machinima….) • About 1000 words – with images.