Download
1 / 18
190 likes | 297 Views
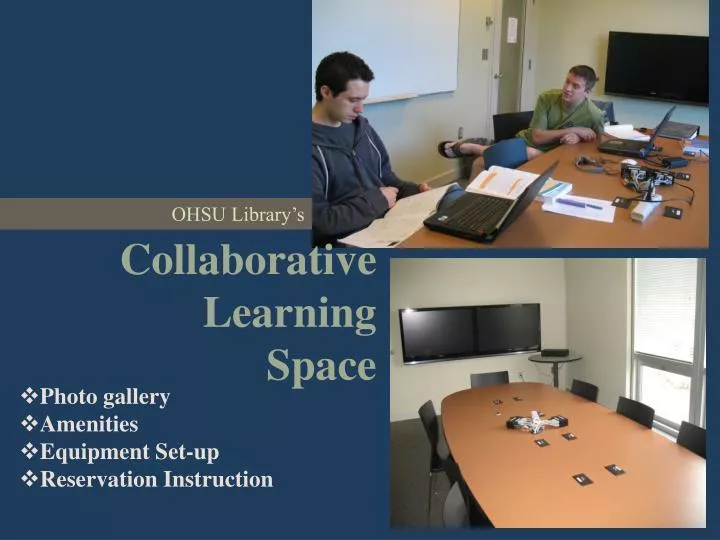
OHSU Library’s. Collaborative Learning Space. Photo gallery Amenities Equipment Set-up Reservation Instruction. Equipment Set-up. DVD/VCR set-up Laptop—Big screen set-up . Home. DVD/VCR set-up. Press the Power button on the remote labeled “Monitor”. Step 1: . Press the input button.

E N D
OHSU Library’s Collaborative Learning Space • Photo gallery • Amenities • Equipment Set-up • Reservation Instruction
Equipment Set-up • DVD/VCR set-up • Laptop—Big screen set-up Home
DVD/VCR set-up Press the Power button on the remote labeled “Monitor”. Step 1: Press the input button. Step 2:
DVD/VCR set-up continued Step 3: Scroll to “Video 2” by continually pressing the input button. Step 4: Press Power button on DVD remote.
DVD/VCR set-up continued Step 5: Insert DVD or VHS in player and use DVD remote to operate. Task Complete! Home
Laptop big screen set-up Press the Power button on the remote labeled “Monitor”. Step 1: Press the input button. Step 2:
Laptop big screen set-up continued Step 3: Scroll to “PC” by continually pressing the input button. Step 4: Connect one of the monitor cables from the table outlet to your laptop monitor. (Note the table outlet number for future reference)
Laptop big screen set-up continued Step 5: Turn on the switcher box using the red button.
Laptop big screen set-up continued Step 6: Press the button on the switcher box that corresponds with the number on your table outlet.
Laptop big screen set-up continued Task Complete! Depending on your laptop, you may need to adjust your setting for the desktop to display correctly. Most laptops can be adjusted by pressing the Fn and the LCD/CRT keys. Home
Amenities • Wide screens • Multiple laptop outlets • DVD/VHS player • Whiteboard and pens • Conference table, chairs • Room Key • White board pens, eraser • Cords for equipment hook-ups • Remote controls for DVD/VHS • Instructions for laptop/DVD/VHS set-up Included at check out Home
Photo gallery Conference styled seating Home
Photo gallery continued Campus view from window Home
Photo gallery continued Wide wall-mounted screens Home
Photo gallery continued Multiple laptop outlets Home
Photo gallery continued DVD/VHS Player Home
Photo gallery continued Whiteboard Home
Photo gallery continued • Included at check out: • Room key • Whiteboard pens, eraser • Cords for laptop hook-up • DVD/VHS remotes • Set-up instructions Home