Download
1 / 86
860 likes | 978 Views
EASYC for VEX Cortex Llano Estacado RoboRaiders FRC Team 1817. Humans and Machines. Machines are built to perform useful tasks. The way a Machine works depends entirely on the way the Human build it.

E N D
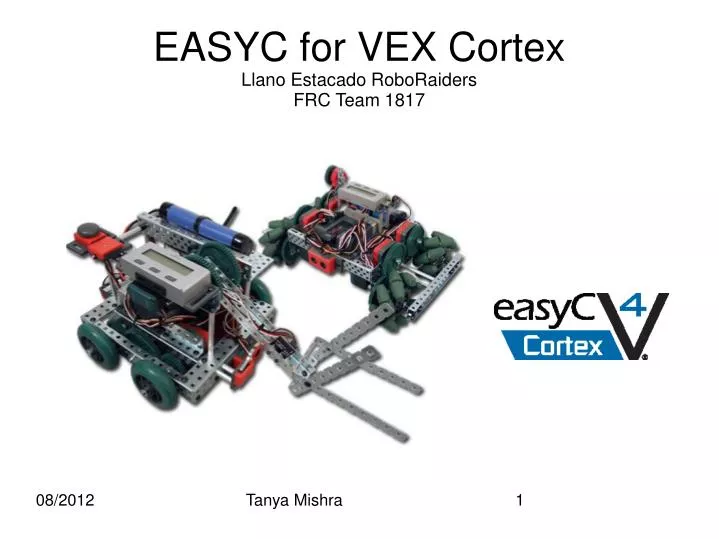
EASYC for VEX CortexLlano Estacado RoboRaiders FRC Team 1817 Tanya Mishra
Tanya Mishra Humans and Machines • Machines are built to perform useful tasks. • The way a Machine works depends entirely on the way the Human build it. • Since Machines and Robots need a medium of communication, a language called “Programming Language” is used. • EASYC, ROBOTC, C++, C all are programming languages. • The instructions in the language are called “Programs” and the human that writes the instructions is called the “Programmer”.
Tanya Mishra • Task of Programmer: Understand Problem, Find a solution, Write a program to solve the problem in the required Programming language. • Task of Machine: Follow the program provided. • A ROBOT is a Machine.
Tanya Mishra Planning and Behavior • Behavior: Action the Robot has to take. • Big Behavior: Solving a maze • Small Behavior: Turn Left, Move Forward, etc. • Big Behavior is made up of Smaller Behaviors. • Plan a Solution to the problem. • Break down the plan into detailed smaller steps. • Each step is a behavior the robot needs to follow. • Sequence of these steps in English is called “pseudo-code”.
Tanya Mishra • “Flow charts” are a visual representation of the program flow. • Start and End: “Rounded Rectangles”. They contain the word “Start” or “End”, but can be more specific such as “Power Robot Off” or “Stop All Motors”. • Actions: “Rectangles”. They act as basic commands and process steps. • Decision blocks: “Diamonds”. These typically contain Yes/No questions. Based on the choice, the next step is determined.
Tanya Mishra Introduction to C Programming • EasyC is based on the the principles of C Programming. • We will cover the following concepts: 1. Basic Components of a C Program 2. Data Types and Variables 2. Conditional operators 3. Control Structures and Loops 4. Methods and Functions
Tanya Mishra A Basic C Program #include<stdio.h> // Header File void main(void) // Main function { // Body of the main function } • Header file: Includes all the required words and instructions needed to write a program • Main function: Execution starts from here • Body: stepwise Instructions to the Robot
Tanya Mishra • Each Instruction to the robot is also called a “Statement”. • When the list of instruction is send to the VEX cortex, it read them from top to bottom and left to right. • Different Commands use different paired Punctuations such as “[]” “{}” “()” • “{..}” defines a body of one or more instructions. Also called a “Compound Statement”. • Every instruction in the body ends with a “;”. It shows the end of a instruction.
Tanya Mishra • Comments are for the programmer to understand what a particular statement does. • Two kinds of comments: 1. // This is a one line comment 2. /* This is a more than one line Comment.*/ • C language is case sensitive: Upper and lower cases are considered different.
Tanya Mishra Data types and Variables • A “Variable” is a place to store a value. • A variable has a “Type” and a “Name” • “Type” deals with the type of Data the variable will hold. Type of Data: Int: Whole Numbers. Positive, Negative, Zero float(Floating Point): Decimal Point Numbers. Positive and Negative. String: Text. Letters, Spaces and characters.
Tanya Mishra char(Characters): Single characters bool(Boolean): True and False values • Declare a variable: int Age; float Score; string Name; char Grade; bool Pass;
Tanya Mishra Assign a variable: Age = 18; Score = 90.5; Name = “William”; Grade = 'A'; Pass = True; Declare and assign: int Age = 18; float Score = 90.5; string Name = “William”; char Grade = 'A'; bool Pass = True;
Tanya Mishra Variable Naming Rules: • A variable name can not have spaces in it. • A variable name can not have symbols in it. • A variable name can not start with a number. • A variable name can not be the same as an existing reserved word. Scope of a Variable: • Local variables: Within a certain block of code or function. Cannot be accessed outside. • Global variables: Can be accessed anywhere in the code.
Tanya Mishra Using Variables in a print to screen function: When printing a variable on the screen, the following syntax is used: Print to screen function(“%type”,Variable); Signed : + and - , unsigned: - , short: less range , long : more range
Tanya Mishra Conditional Operators • Comparison operators
Tanya Mishra • Logical operators: Boolean Truth Table Joining two or more statements using “And” and “Or”
Tanya Mishra And : && Or : || Not : !
Tanya Mishra Control Structures and Loops Control Structure • IF statements: if(condition) { Instructions, if “condition” is True }
Tanya Mishra • IF-ELSE Statements: if(condition) { // Instructions, if “condition” is true } else { // Instructions, if “condition” is false }
Tanya Mishra • ELSE-IF Statements: if(condition1) { // Instructions, if “condition 1” is true } else if(condition 2) { // Instructions, if “condition 2” is true } else { // Instructions, if “condition 1” and “condition 2” are false }
Tanya Mishra • Switch Statements: switch(expression) //expression can only be an “int” or “char” { case Value-1: // Instructions, if expression = Value-1 break; case Value-2: // Instructions, if expression = Value-2 break; default: // Instructions, if expression does not match any Value }
Tanya Mishra Example: char Grade = 'A'; switch(Grade) { case A: Your Grade is A; break; case B: Your Grade is B; break; default: This is the default choice }
Tanya Mishra Loops • While loops: while(condition) { // Instructions, if “condition” is true } Note: Control Structures execute only once. On the other hand, while loops execute continuously until the condition is false. • If the condition in the loop is always true, the loop never ends. Such a loop is called an “Infinite Loop”. • A loop will end only when the condition is false or there is a “break” statement.
Tanya Mishra Example: int count = 0; //Initialization while(count <= 2) //Condition { PrintToScreen(“ I have %d apple \n”, count); count = count + 1; //Increment } Output: I have 0 apple I have 1 apple I have 2 apple
Tanya Mishra • For Loop: for(initialization; condition; increment) { // Instructions, If “condition” is true } Similar to a while loop except that the initialization and increment are all together. • Note: Initialization is done only when the loop first starts. After that it is skipped.
Tanya Mishra Example: int count; for(count =0; count <= 2; count = count +1) { PrintToScreen(“ I have %d apple \n”, count); } Output: I have 0 apple I have 1 apple I have 2 apple Note: \n is called new lines. It prints the next sentence in a new line.
Tanya Mishra Methods and function • Functions are named sections of code that can be called from other sections of code. • Also called subroutines. • Every executable statement in C must live in a function. • Functions have a Data type, name and input values. • Input values are called Parameters. They are the values you want the function to work with.
Tanya Mishra • The function definition specifies the “return value” and the “parameters” of the function: <data type> FunctionName(<param1>, <param2>, ...) { <function body> <return type> } • Return type and Data type should be of the same kind. • Return type is “void” if nothing is to be returned. Parameters is “void” if nothing is to be passed in.
Tanya Mishra Example: int addition(int x, int y) { int z; z = x+ y; return z; } void main(void) { addition(2, 3); }
Tanya Mishra Some Useful terms Compiler: Turns C program into the machine language for the controller. Loader: Loads the machine language output of the compiler (along with other stuff) into the robot controller. Machine Language: What the robot controller actually understands. Found in .HEX files. 10110100 11100101 00001011
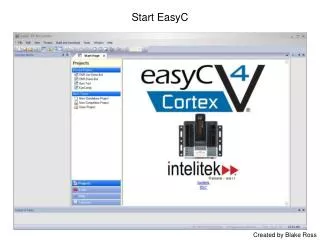
Tanya Mishra Download EASYC • Download Link: EASYC V2.0 for VEX http://www.intelitekdownloads.com/easyCV4/
Tanya Mishra Updating EASYC If the website says you need to update EasyC, you can do that by going to: Help->Check for updates
Tanya Mishra Updating the Firmware on the Cortex Controller and Remote Controller • “Firmware” is a piece of sofware that access the operating system on the processor and allows it to perform its task. Step 1: Connect the Cortex/Remote Controller and your computer using the A-A USB cable. The LED should start flashing
Tanya Mishra Step 2: On your computer's taskbar, goto: Start -> All Programs -> easyC v4 For Cortex -> IFI VEXNet Firmware Utility
Tanya Mishra Step 3: Select “SEARCH” if the response is (Upgrade required) then “BOOTLOAD” and YES
Tanya Mishra Step 4: Then click “DOWNLOAD”
Tanya Mishra Step 5: Afterward you should see the following:
Tanya Mishra Connecting the Cortex Controller and Remote Controller • Connect the two devices together and then turn on the Remote Controller or micro controller. Wait until the VEXNet LED turns solid green.
Tanya Mishra EASYC First Look Step 1: File -> New Standalone Project->Joystick Project(Wifi)
Tanya Mishra 1. Function Block(Left): You can all the available functions and your project file information. 2. Main (Middle): Drag and Drop the functions here to see how they connect and get a visual look for the code. All You need to work with is the area between “Variables” and “End”. 3. Project Pane (Right) : See your project files and other files. 4. Build information (Bottom) : See any code building information here.
Tanya Mishra When running the Robot, the real time values in each port can be seen in the “Online Window” Step 1: EASYC-> Build & Download -> Online Window
Tanya Mishra When running the Robot, any “print to screen” values can be seen in the “Terminal Window” Step 1: EASYC-> Build & Download -> Terminal Window
Tanya Mishra You can open the controller configuration (Marked with a Red Arrow) and write down what you are going to plug in each port.
Tanya Mishra VEX Cortex Controller The VEX Cortex Micro controller has the following ports: • 8 Analog ports • 12 Digital ports • 6 Interrupt ports • 8 Motor ports
Tanya Mishra VEX Remote Controller • Vex Remote control provides you with two joysticks (each having a x- axis and y-axis), eight buttons on the front and four additional buttons on the top.
Tanya Mishra • Each set of buttons or a pair of joystick has an assigned channel number written next to it as shown in the figure. Each of these controls are accessed using the channel number they belong to.
Tanya Mishra Incorporating C Programming baics in EASYC • We start by placing the needed module between the “Variables” and “End” modules. Creating a “While” loop: Step 1: Click the “+” sign next to the Program Flow on your Function Panel (Left) Step 2: Click and drag the “While loop” on to the Main panel (Middle) and place it between the two modules you need it to.