Download
1 / 49
490 likes | 645 Views
Routing With a Link-State Protocol. Introducing Routing and Switching in the Enterprise – Chapter 6. Objectives. Describe and plan a network using OSPF. Design and configure a network using single-area OSPF. Work with multi-protocol environments. Describe and Plan a Network Using OSPF.

E N D
Routing With a Link-State Protocol Introducing Routing and Switching in the Enterprise– Chapter 6
Objectives • Describe and plan a network using OSPF. • Design and configure a network using single-area OSPF. • Work with multi-protocol environments.
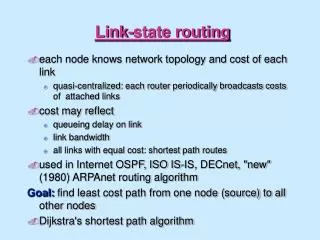
Describe and Plan a Network Using OSPF • Link-state routing protocol • Open standard • Classless interior gateway protocol • Divides the network into areas for scalability
Describe and Plan a Network Using OSPF • DOES NOT send frequent periodic updates of the entire routing table • Sends an update only when a change in the topology occurs, such as a link going down. • In addition, OSPF performs a full update every 30 minutes.
Describe and Plan a Network Using OSPF • Compared with distance vector protocols, link-state routing protocols: • Requires more complex network planning and configuration • Requires increased router resources • Requires more memory for storing multiple tables • Requires more CPU and processing power for the complex routing calculations
Describe and Plan a Network Using OSPF • RIP • receive updates from their immediate neighbors, but with no details about the network as a whole. • OSPF • generate a complete map of the network from their own viewpoint • OSPF does not automatically summarize at major network boundaries
Describe and Plan a Network Using OSPF • Bandwidth determines the cost of a link • Higher bandwidth = lower cost = desirable route • Cost = 100,000,000 / bandwidth of link in bps • Manual cost configuration at an interface: ip ospf cost
Describe and Plan a Network Using OSPF • SPF algorithm (Diijkstra’s Algorithm) • Each router has a topological tree (map of network) • SPF tree information stored in topology database
Describe and Plan a Network Using OSPF • OSPF • Establish and maintain neighbor relationships, or adjacencies, with other connected OSPF routers (advanced form of neighborship between routers that are willing to exchange routing information) • When routers initiate an adjacency with neighbors, an exchange of link-state updates begins. • Routers reach a FULL state of adjacency when they have synchronized views on their link-state database
Describe and Plan a Network Using OSPF • OSPF • Hello protocol is used to initially establish and maintain adjacencies – sends hello packets to directly connected OSPF routers using the address of 224.0.0.5 • Packets are sent every 10 seconds on Ethernet and broadcast links and every 30 seconds for non-broadcast links • Settings shared include the hello interval, dead interval, and network type, as well as the authentication type and authentication data if configured
Describe and Plan a Network Using OSPF • Designated router (DR) • Backup designated router (BDR) • DROther
Describe and Plan a Network Using OSPF • DR and BDR reduces the number of updates sent, unnecessary traffic flow, and processing overhead on all routers • All routers accept updates from the DR only • On broadcast network segments there is only one DR and BDR. • All other routers must have a connection to the DR and BDR. • When a link fails, the router with information about the link sends the information to the DR, using the multicast address 224.0.0.6. • The DR is responsible for distributing the change to all other OSPF routers, using multicast 224.0.0.5..
Describe and Plan a Network Using OSPF The router ID is an IP address that is determined by: 1. The value configured with the router-id command 2. If no value is set with the router-id command, the highest configured IP address on any loopback interface 3. If no loopback interface is configured, the highest IP address on any active physical interface The router ID can be viewed using the following show commands: show ip protocols, show ip ospf, or show ip ospf interface
Within a local network, the router with the highest router ID is elected the DR. The second highest is elected as the BDR. An administrator can force the DR and BDR election by configuring a priority using the interface configuration command: ip ospf priority number By default, OSPF routers have a priority value of 1. Highest priority setting will win the election for DR, regardless of highest router ID. The highest value that can be set for router priority is 255. A value of 0 signifies that the router is ineligible to be DR or BDR.
Area 0 – Backbone Area • Other areas up to 65,635 – must connect to Area 0 • Roles of routers in an OSPF Autonomous System: • Area Border Router (ABR) - connects an area to the backbone • Autonomous System Border Router (ASBR) - router that connects an area to a different routing protocol • Activity 6.1.4.2
Design and Configure a Network Using Single-Area OSPF OSPF configuration steps: • Enable OSPF + process ID • Advertise networks + wildcard mask and area ID • Activity 6.2.1.3 • Lab 6.2.1.4
Design and Configure a Network Using Single-Area OSPF • LSPs do not need to be sent periodically. • An LSP only needs to be sent: • During initial startup of the router or of the routing protocol process • Whenever there is a change in the topology, including a link going down or coming up, or a neighbor adjacency being established or broken • Other information included in the LSP • sequence numbers and aging information - used by each router to determine if it has already received the LSP from another router - allows a router to keep only the most current information in its link-state database.
Design and Configure a Network Using Single-Area OSPF • Before two routers can form an OSPF neighbor adjacency, they must agree on three values: Hello interval, Dead interval, and network type • Every 10 seconds on multiaccess and point-to-point segments • OSPF Hello packets are sent as multicast to an address reserved for ALLSPFRouters at 224.0.0.5
Design and Configure a Network Using Single-Area OSPF • The router selects the DR based on the highest value of any one of the following parameters, in the sequence listed: • 1. Interface Priority: The interface priority is set with the priority command. • 2. Router ID: The router ID is set with the OSPF router-id configuration command. • 3. Highest Loopback Address: The loopback interface with the highest IP address is used as the router ID by default. OSPF favors loopback interfaces since they are logical interfaces and not physical interfaces. Logical interfaces are always up. • 4. Highest Physical Interface Address: The router uses the highest active IP address from one of its interfaces as the router ID. This option poses a problem if interfaces go down or are reconfigured. • After changing the ID of a router or interface priority, reset neighbor adjacencies. Use the clear ip ospf process command. This command ensures that the new values take effect.
Design and Configure a Network Using Single-Area OSPF Tune OSPF parameters: • Interface priority • Router ID • Loopback and interface addresses • Bandwidth (cost ) • Use the clear ip ospf process command to ensure that the new values take effect
Design and Configure a Network Using Single-Area OSPF • When the DR is elected, it remains the DR until one of the following conditions occurs: • The DR fails. • The OSPF process on the DR fails. • The multiaccess interface on the DR fails. • If the DR fails, the BDR assumes the role of DR and an election is held to choose a new BDR. • If a new router enters the network after the DR and BDR have been elected, it will not become the DR or the BDR even if it has a higher OSPF interface priority or router ID than the current DR or BDR.
Design and Configure a Network Using Single-Area OSPF • Packet Tracer Lab – DR & BDR • Exploration 3 – 11.4.3.2 • Packet Tracer Lab – Fine Tuning OSPF • Exploration 3 – 11.5.2.3
Design and Configure a Network Using Single-Area OSPF Verification and troubleshooting commands: • show ip ospf neighbor • show ip protocols, show ip route • show ip ospf, show ip ospf interface
The default configuration of OSPF exchanges information between neighbors in plain text. • A hacker on a network could use packet sniffing software to capture and read OSPF updates and determine network information. • When authentication is enabled in an area, routers will only share information if the authentication information matches. • Authentication protects integrity of routing information • Type 1 - Simple password authentication • Type 2 - Message Digest 5 (MD5)
Type 2 - Message Digest 5 (MD5) • Requires a key (password) and a key ID on each router. • Lab – 6.2.2.2
Work with Multi-Protocol Environments • Default route configured on ASBR • ASBR distributes the route into the OSPF network
Work with Multi-Protocol Environments Benefits of OSPF summarization: • Reduces number of networks advertised • Reduces memory requirements • Reduces number of entries in router updates • Isolates flapping and other problems to their location
Work with Multi-Protocol Environments To configure an OSPF ABR router to summarize these networks to another OSPF area, issue the following command in router configuration mode: area area-id range ip-address ip-address-mask
Work with Multi-Protocol Environments OSPF limitations: • Increased router memory and processing demands • Strict design requirements • Knowledgable administrator required • Initial discovery process takes up network bandwidth
Work with Multi-Protocol Environments • Administrative distance (AD) determines routes that appear in routing table
Summary • OSPF is a classless interior link-state routing protocol used in enterprise networks • OSPF uses bandwidth to generate the cost metric • OSPF routers elect a DR and BDR on multi-access networks • Router ID or router priority can be used to dictate the selection of DR and BDR • The OSPF network command uses a wildcard mask • Default route distribution and inter-area route summarization are used in OSPF networks