Download
1 / 24
240 likes | 314 Views
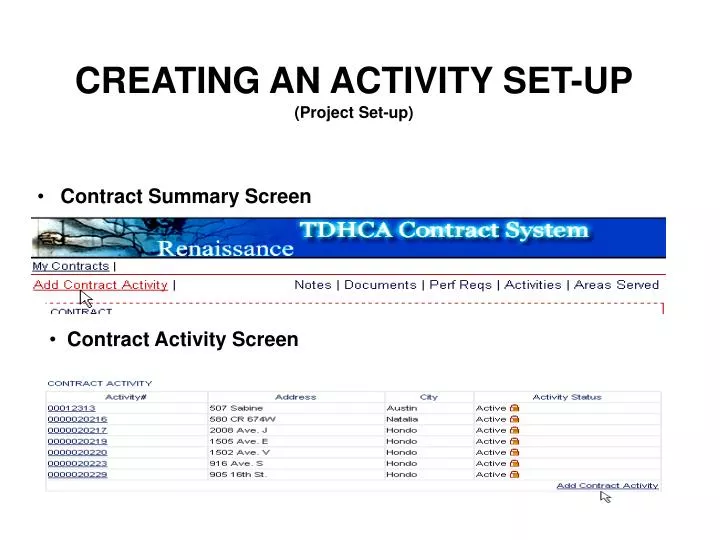
CREATING AN ACTIVITY SET-UP (Project Set-up). Contract Summary Screen. Contract Activity Screen. Required Documentation ( Project Set-up). Click on the box, then proceed with the set-up. Refer to the website for the most current checklist. .

E N D
CREATING AN ACTIVITY SET-UP(Project Set-up) • Contract Summary Screen • Contract Activity Screen
Required Documentation(Project Set-up) • Click on the box, then proceed with the set-up. • Refer to the website for the most current checklist.
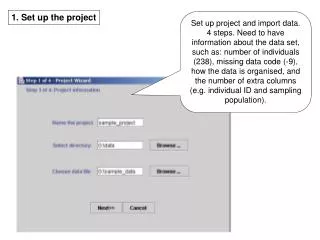
The following screens are sections of an Activity Set-up • Enter the actual budgeted amount from the work write-up/cost estimate including soft cost
Line 1 -Enter the street address of the home. Do not enter the homeowner’s name. • Line 2 –No entry is required in this field. • City, State, Zip – Each field must be completed. • City Type – Select “city”.
Check the box(es) as applicable with the purpose(s) stated in the HOME contract.
Select the box(es) that agrees with the specific purpose stated in the HOME contract. • Square Footage - enter the square feet of the home. • Cost per Sq Ft – enter the cost • 221(d)3 Limits – Enter the maximum per-unit subsidy for the area being served (refer to Appendix A-32).
Property Type - Enter Single Family • Accessible - Check this box if the property meets Accessibility (reconstructions have to be accessible per HUD requirements). • FHA Insured – Do not check this box.
Unit Number – Alwaysenter 1 • Monthly Gross Income - Enter the household’s monthly gross income, as calculated on the 14 series income worksheets. • Name – Enter the full name of the head of household
Number of Bedrooms – select the applicable number • Occupancy - Select “Homeowner” • Select from the drop down boxes as applicable
Hispanic – Click only if head of household is of Hispanic ethnicity • Household Size – Select the appropriate number. • Head of Household Race – Select the appropriate race; Hispanic is recognized as White for the purpose of this data. • Primary Special Need – Select applicable special need type. • Head of Household - Select appropriate description
Select as specified in the contract. • Click SAVE to store the data entered.
Creating a Project Budget(Budget Detail) Now that all of the preliminary data has been entered and saved you’re now ready to enter the activity’s budget detail per the cost estimate/work write-up. • Sections of the set-up will automatically populate after saving entered data. • Click Budget Detail on the right-hand side of the screen.
Amended – Enter budget amount (same as entered in the start-up page). • Save - Click to store the budget (Amended) data. • Itemize – Select the Itemize on the right-hand side of screen press enter to go no to the next screen.
Budget Itemization • Item Numbers - Sequential item numbers are assigned by the System. • Item # - “x” items can be deleted if necessary. • Budget Category – To add, click the (+) symbol next to Hard Cost or Soft Cost. • Amount - Enter the appropriate dollar amount for each item. • Save - Click Save to store the data entered
This screen will appear each time you add a category as the “Unitemized” amount decrease to zero dollars.
PROJECT SET-UP APPROVAL & DISAPPROVAL • Order of APPROVAL ACTIONS • After complete Set-Up data has been entered click Save; • Click Submit for Approval without Saving, this action updates the activity status; • Pending PM Approval which notifies PM that the Set-Up is ready for processing. • The user who last enters data cannot be the same person who approves the activity and submits to PM.
OVERVIEW OF “STATUS” • Pending PM Approval, no further action by the CA can be done on the activity.
Disapproved by PM, the CA must make corrections and resubmit for approval.
Creating online notes • From the CONTRACT ACTIVITY screen click on Notes in the upper right-hand corner. • Click Create New Note