Download
1 / 52
540 likes | 737 Views
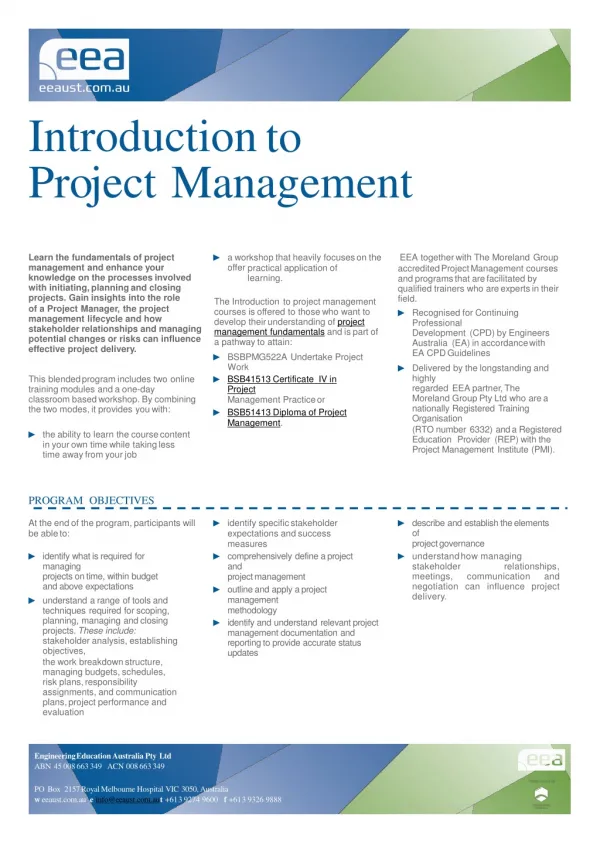
Introduction to Project Management. Session One What is Project Management? Exercise Session Three Using project management tools. Agenda. Session One. 45 mins. Some necessary terminology : Project manager leader of project team Project team members

E N D
Session One What is Project Management? Exercise Session Three Using project management tools Agenda
Session One 45 mins
Some necessary terminology: Project manager leader of project team Project team members individuals from different departments within company Matrix organization team structure with members from different functional areas depending on skills needed Introduction to Project Management
Proposal written description of goals that shows work & time frame of project Project management is the activity involved in managing projects. A project is work undertaken as a temporary of continuous endeavour to create a unique product, service of outcome. Project Planning
Exercise: Lets build a chain to keep us together. Divide into two or three groups Use the tools / materials provided to build a chain that will keep the class together. The following criteria must be met: There must be 40 links in the chain, Each link should be 5 cm wide and 13 cm long. You have only 20 mins to complete the exercise. What is Project Management?
Session Two 45 mins
During this management activity we attempt to keep scope, schedules and resources in balance. Scope. This referes to the range of tasks required to reach your goal/s Schedules. This is the time and sequence of each task, as well as the total project duration Resources. The people and/or equitment used to perform or facilitate project tasks. What is Project Management?
When scope, schedule, and resources are in balance, you have just the right amount of resources to accomplish all your project tasks on or before the project deadline. Effective project plans are goal directed Traditionally, project planning has been activity focussed. Goal-directed project management uses milestones to make sure that the right project activities (or tasks) are completed on time and within budget. Goal directed Project Management (GDPM)
Project Management involves a range of activities that lead to successful completion of projects. These activities are completed in 4 Stages: We label these phase Plan-Do-Check-Act: Plan - This stage involve planning actitities, where we envision what the future will be like. Do - During this stage we implement our plan. The most important thing project managers do here is to empower project team members to perform. GDPM: Process
Check - Here we check whether we have reached our objectives (which must always be client satisfaction), and identify our mistakes so that we can learn from them. Act - This involves using our lessons learnt to improve our future performance Goal Directed Project Management
Milestones Milestones should describe a condition through which the project must pass to reach the final objective Example - Every group member must know what to do and have the required tools to do perform their tasks. Milestones must state what to achieve, without necessarily implying how to achieve it. Example - Laila will staple the chain links together so that they will not come apart. GDPM: Milestones
When describing a milestone, begin with the word when - this creates the impression that the milestone is achieved only after the condition described has been reached Milestones should be measurable; it must be clear when thay have been reached. Milestones are checkpoints throughout the project that ensure the project is on course and that provides direction towards the final objective. Milestones should be able to accommodate changing circumstances; a change in the activities involved should not affect the milestone. GDPM: Milestones
Project Teams use various tools to manage projects. The most common tools within a project plan includes: Milestone Plans Resource Plans Activity Plans Checklists (of Scorecards) In Session 3, we will look at a software tool that contains all these tools that can be used during your project. Tools
Popular tool for project scheduling Graph with bar for representing the time for each task Provides visual display of project schedule Also shows slack for activities, (amount of time activity can be delayed without delaying project) Gantt Chart
When is a project successful? Experience proves that success should be measured by looking at the project from different perspectives. The four most common include: Financial Perspective - Did we meet our financial goals Customer perspective - Are our customers happy with the final product Process Perspective - Did we work efficiently Personal Development Perspective - What did we learn form completing the project All four perspectives are equally important !!!!!!!!!!! A final word...
Case Study 45 mins
Developing a Project Plan The process of developing a project plan consists of a logical sequence of 5 steps. They include: Agree project objectives. Objectives should be SMART. Define milestones. This must be achieved before we can move on. Assign roles and responsibilities. The best man/woman for the job. Define and plan project activities. Estimate the cost and effort involved, and what activites are dependant. Scheduling. Determine the start and end of every activity, and its place in the sequence of events Plan
Implementing the Plan When the plan is implemented the following tasks must be performed to empower team members to be effective: Monitor Progress. Performance must be measured regularly to identify variances from the projecty plan. Reporting Project Performance. Reporting performance keeps every team member in the picture and is a big motivator. Maintaining the Plan. Contingencies often require changes to the original plan. This activity allows for the plan to be amended to incorporate contingencies. Do
How did we do? Ask the following questions to check project performance (Can also be used during the previous stage): Performance against plan. How long did the atsk take when compared to plan? Has a planned milestone been achieved? Did a team member uncover other activities that need to be completed ? Check
How did we do? Task completion Was the task completed? What is still outstanding? Did the completion of the task achieve the expected outcome? Risks Did any team or client issues arise that need to be included for future reference? Did any risks arise that need to be included for future reference? Check
How did we do? Scope changes Did the scope of the project change during the execution of tasksd any risks arise that need to be included for future reference? “Scope creep” is a major problem with many projects. Check
Many tools exist that are used by project teams to manage projects. These tools range from sheets of paper, to MS Excel Spreasheets, to involved software applications. MS Project, part of the MS Office suite of desktop applications, is a good example. In this session you will be introduced to MS Project, and develop the skills to create a basic project plan. Project Management Tools Click on the image to take a quick tour of MS Project
Before we start, there are a few important points to keep in mind. These are true for all project management tools: The tool is a database of project information The tool allows you to display the information in the database in different formats Also, it is important to remember that MS Project stores 5 different “ingredients” or types of information. This includes: Goals (or objectives) Tasks Resources Time Costs MS Project Quick Start
In MS Project, you create a project plan by performing these main procedures: Open a new project file (or an existing template) Specify the project start date Create a task list and add information about each task (such as its duration and cost). Here you will also define milestones Group and organise tasks into phases, summary tasks and subtasks. A phase is a group of related tasks MS Project: Main Procedures
Put tasks into a logical and efficient sequence by specifying dependancies between tasks. Add resources and assign resources to tasks Add cost information to tasks and resources Analyse your project and optimise it to reduce costs, eliminate unnecessary tasks, and bring it in the project deadline Save baselive information, such as planned task start and finish dates, estimated durations and costs. Baseline information is the blueprint for your project - you will use this to measure progress. MS Project: Main Procedures
Lets learn to use MS Project by building a project plan for the following Project. Example Nawal is getting married. She would her wedding to be perfect and decides to draw up a plan for the wedding. Her mother suggests that she uses MS Project to help her plan the wedding, as she is a very good ecommerce student. Lets help Nawal plan her wedding!!!!! MS Project: Example
Are we sure we know what it is we want to do? We need to be sure that we understand the overall objective and scope of the project Exatly, what is it that we want to achieve (remember SMART). A clear overall objective and scope will help you to manage your project. What exactly does Nawal want to do? Before we start……...
To start a new project file: Click New Enter a start date: Start date = type the date in which you want to start in the Start date box To change the start date click on Project menu and click Project Information and enter the new date in the Start date box Enter your projects goals, scope and assumptions Step 1: Open a new project file
Enter your projects goals, scope and assumptions: Click on File menu, and click Properties Click the Summary tab Enter information in the Comments box Save your project Click Save If this is the first time you save, type the project name in the File name box Click Save Step 1: Open a new project file
To create a task list: Using the following rules, draw up a list of tasks: Include only tasks that are critical to the completion of your project Build phases and milestones Remember repetitive tasks, such as weekly meetings. Enter tasks Click on the View Bar, and click Gantt Chart In the Task Name field, type a task name (Use a verb and a noun) Step 2: Creating Tasks
To delete tasks On the View bar, click Gannt Chart In the Task name field, select the task you want to delete On the Edit menu, click Delete Task Enter recurring tasks On the View Bar, click Gantt Chart In the Task Name field select the row above the one which you plan to use for the recurring task On the Insert menu, click Recurring Task In the Name box, type the task name Step 2: Creating Tasks
To create a milestone: To enter a milestone On the View bar, click Gannt Chart In the Duration field of the task that you want to make a milestone, type 0 days Task duration: To change the duration of a task: On the View bar, click Gannt Chart In the Duration field, type the duration you want Step 2: Creating Tasks
The next step is to order your tasks in a logical task list so that you can: Spot missing task, or errors in the logical flow of tasks Complete each phase of your project at the right time Create a hierarchy to show each task as part of a major step So, we want to make this…. Look like this... Step 3: Ordering Tasks A Fsd dgsdbd 1. dgdgd 2. gdg B gdgd hdh 1. hfhf C fhfhffhf fhf C Fsd dgsdbd A dgdgd 2. gdg 1. gdgd hdh 1. hfhf B fhfhffhf fhf
To move tasks to there correct place: To move a task On the View bar, click Gannt Chart Click the ID number of the task you want to move Click Cut Task Select the row above which you want to insert the task Click Paste Step 2: Ordering Tasks
To make different sets of taks more visible: Outline your tasks On the View bar, click Gannt Chart In the Task Name field , select the task you want to outline Click Indent (move tot he right) to indent a task, or click Outdent (move to the left) to outdent a task Some tasks may only be able to start on completion of some other task. These are called dependant tasks. To show these tasks on your plan, following next few steps: Step 2: Ordering Tasks
To show these tasks on your plan, following next few steps: On the View bar, click Gannt Chart In the Task Name field , select two or more tasks you want to link Click Link Tasks A link line will appear on the Gantt Chart, connecting the two tasks To remove task links, follow the same steps but click Unlink Tasks Step 2: Ordering Tasks