Download
1 / 23
230 likes | 348 Views
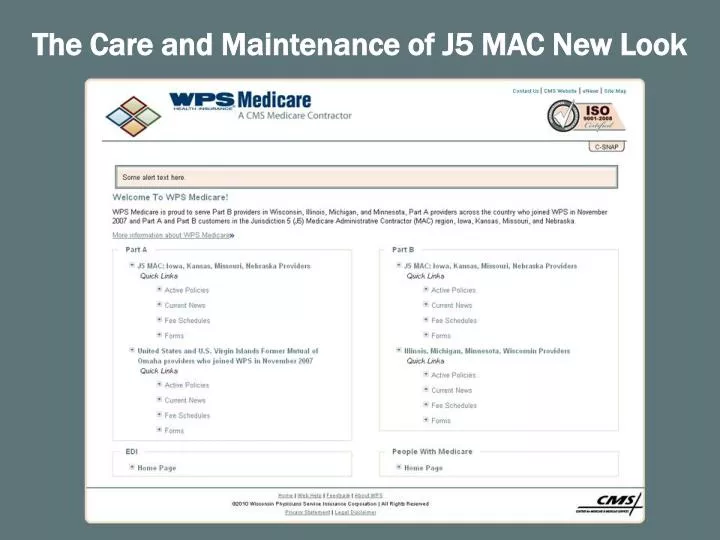
The Care and Maintenance of J5 MAC New Look. Naming Conventions. Each graphic and include item is named by function_contract area_secondary identifier. Example: bg_j5b_top is the top part of the background for J5 MAC Part B

E N D
Naming Conventions • Each graphic and include item is named by function_contract area_secondary identifier. Example: • bg_j5b_top is the top part of the background for J5 MAC Part B • leftnav_j5b_faq is the left navigation include for the FAQ area of J5 MAC Part B
1 2 3 4 5 Neutral Page Header • The header consists of: • Graphic encompassing four contract areas <clickable to home> • Text identifier of company and contract area • Navigation to contact, CMS, eNews and site map • ISO graphic • Link to C-SNAP
Alert Box • The home splash page and each contract splash page has an alert box. • The background is controlled through the div “alertbox” • The content is controlled through an include file • alert_home.txt controls the alert for the home page • Updating the Alert • Update the alert_###.txt to change the alert for that contract area. • Hiding the alert • Add the class “hide” to the alertfull div • Add a paragraph with the “hide” class around the include file. • Important:You need to hide both the box and the include file.
Boxed Sections - Components • The boxed sections have three components. • The first is a div with the id “boxed”. This container holds all of the boxed elements and ends after the last boxed section. • The boxed sections have the class of “left” or “right”, depending on which side you want them to appear on. • If you want the tops of the left and right divs to align, add <br class=”clear”> before all left divs except for the first.
1 3 2 4 Boxed Sections - Customizing • The <h3> tag applied to the title moves the title into position as part of the border. • Images added to the left or right div will float to the top right. Images should be no larger than 48 x 48 pixels. • The <more> class applied to the <a> tag at the bottom of the box positions the text to the right and reduces the font size. • Add the class “highlight” to the left or right div to give the box a darker, stronger border. • If you want to use the boxes without the border, add the class “noborder” to the left or right div. <div class="left noborder”>
Footer • The footer for each section is controlled through the include file footer_###.txt. • The Home link directs the user to the main home page • The Web Help link directs the user to the contract-specific help page • The Feedback link directs the user to the contract-specific feedback page • The About WPS link directs the user to the contract-specific About page • The Privacy Statement link directs the user to the contract-specific privacy information page • The Legal Disclaimer link directs the user to the contract-specific legal disclaimer page • The CMS logo directs the user to the CMS website
1 2 3 4 5 6 Header • The header consists of: • Graphic identifier of states <clickable to contract home> • Text identifier of company and contract area • Text identifier of contract covered states • Navigation to contact, CMS, eNews and site map • Search area with links to search options and tips • Top navigation • There are three header files defined for each contract area • Use header_###.txt for files root level files (index.shtml, privacy.shtml, etc. • Use header_###_lev1.txt for files one level deep • Use header_###_lev2.txt for files two levels deep • User header_###_lev3.txt for files three levels deep • If you do not use the correct file, the header graphics will not display.
Breadcrumb • The breadcrumb is added dynamically through breadcrumbs.js in the _includes directory. The page name is set through the document title.
Top Navigation • The top navigation is an unordered list <ul> controlled by CSS. • Each top level item is followed by empty span tags <span></span>. The empty span tags hold the right side of the tab. • Each top level item has a unique ID that is used to highlight the tab on that area’s pages. • These id’s are also placed as a class in the body tag, so that when they match, the tab is highlighted. • It is very important that the identifiers are used exactly as defined
1 2 Right Links on Splash Pages • The right link menu on the spash page is controlled through the include file rightsplash_###.txt. • The header areas use the h1 tag for highlighting • The list is a definition list <dl>, with each item a definition description <dd> <h1>Spotlight</h1> <dl> <dd> <a href="http://www.wpsmedicare.com /j5macpartb/publications/news/archived/2010_0625_preservation.shtml" ">2010 Medicare Physician Fee Schedule Informational Update</a> </dd> </dl>
Graphic Identifiers • Graphic file-type identifiers are included in the CSS and automatically apply the graphic to the item. Apply the class to the “a” tag to call the graphic. • Some file types are identified by the extension and do not require the class. • In order to meet accessibility requirements, the type of file is identified within <span> tags contained in the <a> tag. • Important: there cannot be any space between the filename and the closing quote or the CSS will not identify the file. • The span tags must be contained within the <a> tags, they should appear right before the closing </a> tag.
Graphic Identifiers - Applying <a class="external" href="http://www.cms.gov/ICD10" target="_blank">ICD-10 Transition<span> (external link)</span></a>
Status Area • The status boxes on the splash page are controlled through the include file status_###.txt. • To update the status of any area, update the appropriate include file.
Left Navigation • The left navigation is an unordered list <ul> controlled by CSS. • Each item has a unique ID that is used to highlight the tab on that area’s pages. • These id’s are also placed as a class in the content div tag, so that when they match, the item is highlighted. • It is very important that the identifiers are used exactly as defined. • For each page, make sure that the correct include file is called for that area
Left Navigation - Example • In shtml file <div id="content" class="cms"> <!--#include virtual="../../../_includes/ leftnav_j5b_resources.txt" --> • In leftnav_j5b_resources.txt:<li><a id="cms" href="http://medicaretest/ j5macpartb/resources/cms_resources">CMS/ External Links</a></li> • In j5b.css .cms #leftnav #cms { background-image: url(../_images/menugrad_j5b.png); color:#063d5b; }
Tables • Use the Table Header <th> tag for header rows. • To use the colored background on the training pages, add class=“odd” to the row. <tr class=“odd”> <td>Info</td> </tr>
Buttons • Buttons have been defined in two sizes. • The smaller size is used for cancel, reset and search. • The larger size is for submit and longer content. • In order to use the buttons, apply the class” submit” for the larger button or “reset” for the smaller button. <input class="submit" type="button" value="Submit Request" onclick="submitRegForm(wpsFormTo);" alt="submit button" tabindex="16" accesskey="s"> <input type="reset" class="reset" name="reset this form" value="Reset" alt="reset button" tabindex="17" accesskey="r">
Creating a New Page • Change the doctitle to match the content • Look at the body class to ensure that it highlights the correct top tab • Look at the content class to ensure that it highlights the correct left navigation • Look at the include file for the left navigation to ensure that the correct file is called. • Check paths to the root folder so that the css and include files can be found. • Look at the include file for the header to ensure that it is appropriate for your file location. • Edit the page header and contents.
Copying a File • If you are copying a file from one contract area to another • Search and replace – find j5a and replace with j5b • Double-check paths to root • Double-check header include file level • Save to new location