Download
1 / 55
550 likes | 558 Views
Using QuickBooks Payroll. Learning Objectives. Activation and Set-up Select a Payroll Service Enter Payroll Codes Enter Year-to-Date Information Define Company Rules/Preferences Routine Payroll Functions Enter Timesheet Data Review and Create Paychecks Create Payroll Tax Payments

E N D
Learning Objectives • Activation and Set-up • Select a Payroll Service • Enter Payroll Codes • Enter Year-to-Date Information • Define Company Rules/Preferences • Routine Payroll Functions • Enter Timesheet Data • Review and Create Paychecks • Create Payroll Tax Payments • Print and File Tax Forms • Payroll Reports
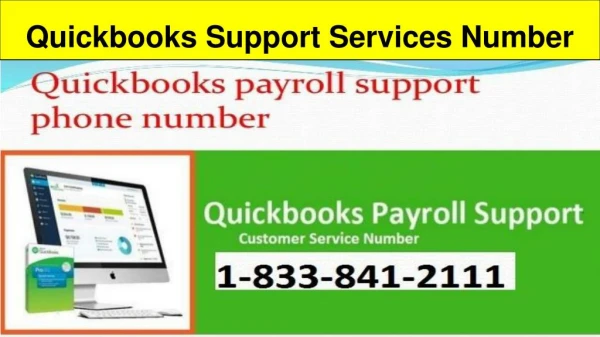
Activation and Set-up First, activating payroll in QuickBooks is easy !! Secondly, QuickBooks will guide you thru a one-time, easy-to-follow interview, that allows you to set-up and customize payroll codes for your company and enter employee year-to-date history. The Benefit: Once all four steps are completed, you will be able to generate payroll transactions and maintain payroll deadlines effortlessly.
Step 2 – Activate Payroll Within QuickBooks • From within QuickBooks: • Go to “Employees” • Select “Payroll” then • Select “Order Payroll Service” Definition: An “employee” is someone for which you pay and withhold payroll taxes. If no taxes are being withheld from the payment being issued, then you should refer to QuickBooks “vendor” set-up, in order to track or generate 1099 details.
Once you chosen a desired level of service, you will be taken to an online order form to purchase and activate your payroll features
After payroll activation is complete, you will notice several additional payroll functions that have been added to your Employees menu in QuickBooks
You will also notice several new payroll icons added to the Employees section of the Home navigation Screen: (We’ll come back to these later, when we are ready to create paychecks)
Enter Payroll Codes and Year-to-Date Information: Choose Payroll Setup to begin entering your own payroll codes and employee year-to-date information
(1) To establish company policies and year-to-date information, you will be guided thru a series of set-up screens. Simply follow the step-by-step process. (2) Most screens also offer “help” links (in blue) that provide additional information or details, in order to assist you with your payroll requirements.
While some individuals prefer to set-up hourly codes by workman’s comp classification, others choose to create hourly codes by department name or functional task. (i.e. Admin, Supervisor, etc) Be sure to customize payroll items based on your own reporting preferences or needs. Keep in mind, that each payroll code can be set to post to it’s own unique general ledger account.
As you make progress, your task list will continue to advance. You may also click-on any previous step (if you wish to go backwards). You’ll find that it is easy to Add New items, Edit or Delete payroll codes
Once you are satisfied with the set-up of your payroll wages and deduction codes, you may begin entering specific employee information such as: hire dates, individual pay rates, personal deductions, company benefits, sick/vacation policy information and other relative employee information.
As you continue through the set-up screens, there may be questions that you are not sure how to answer. (1) You can either click on Finish Later and come back when you have more information (or) you can continue without the information and fill-in the missing information later. (2) You may want to consider asking your accountant/advisor to assist you, while you make progress thru some of these questions.
Eventually, you will reach a screen that asks you to Edityear-to-date historical payroll information about your employees and tax payments. Notice that your progress will be displayed to the left of the Edit button.
For each Employee, you can enter: a. Each paycheck received-to-date (or) b. A Summary-by-month (or) c. A Summary-by-quarter
Once you are finished with the QuickBooks Payroll Setup click-onFinish
Once set-up is complete, you can review or modify your new payroll codes by selecting Lists then Payroll Item List. Select the Payroll Item button to Edit a description, modify the general ledger account, etc.
Define Company Rules/Preferences: (This is also a one-time exercise, where you educate QuickBooks about your preferences for employee defaults, that will be used for all new hires From within QuickBooks, select Edit then Preferences
How often do you anticipate preparing paychecks? Choose from: Daily, Weekly, BiWeekly, SemiMonthly, Monthly, Quarterly, Annually (or create your own) Keep in mind: These preferences are designed to assist you with keeping on task with “new hire” procedures, although QuickBooks will also allow you to generate “unscheduled payroll” (or paycheck) transactions, when the need arises.
Set-up your standard (Fed/City/State/Local) Tax Deductions: Be sure to set-up “company-paid state/local taxes” that are applicable to the majority of your “new hires”. You will also have the ability to over-ride these settings on a “per employee” basis, when setting-up an employee.
Define your company’s Sick/Vacation Policy: Keep in mind: Use default settings that can be applied to all “new hires”, such as: Maximum number of hours/days earned per year and other similar sick/vacation rules.
Do you have a common (or standard) rate of pay for “new hires”? Choose from: Hourly, Salary, Commission or Bonus (or create your own) Keep in mind: This preference is designed to assist you with “new hire” set-up, so enter the most common payroll code and standard rate for new hires (if applicable). QuickBooks will also allow you to over-ride these defaults, when the need arises.
Do you offer Company (or) Employee Fringe Benefits? Choose from: Retirement Plans, Medical and Insurance Plans, and other Taxable ORNon-Taxable Adjustments (not gross earnings) such as: Auto. Mileage, Small Tools, Child Support, etc. Reminder: This preference is designed to assist you with keeping “on task” with standard office procedures, although QuickBooks willalso allow you to generate “unscheduled payroll” (or paycheck) transactions, when the need arises.
The Workers Compensationoption comes with QuickBooks “Pro”, “Premier” (or) “Enterprise” Editions. (Enhanced or Assisted payroll service ONLY) This feature allows you to generate reports for workers compensation insurance audits and premium calculations, which are very beneficial to specific industries, such as construction.
Congratulations !! You have completed your one-time payroll activation and customized set-up. You are almost ready to begin creating and printing employee paychecks.
Routine Payroll Functions: In QuickBooks, payroll can be prepared and managed easily by just following four simple steps:
Before we begin creating paychecks: Let’s take a few minutes to review your payroll options by clicking-thru the Employee Navigation icons. ** Notice that clicking-on Employees will take you to the employee list
From the Employee List, you can quickly access or review existing information: • Click-on New Employee to set-up an employee • Click-on any Employee Name to review their individual transactions • Click-on Edit Employee to change their contact or compensation info. • Click-on the Report links, to access employee earnings or reports • Double-click on any transaction, to edit or review the transaction
Use the Edit Employee button to verify Employee Set-up: • (1) Toggle the Change Tabs: view to display Payroll and Compensation Info • (2) Verify/Modify Applicable Payroll Codes in the Item Name and Hourly Rate Fields • (3) Be sure to set the Employee on a Payroll Schedule • (4) Turn-on the Use time data to create paychecks (if the employee’s paycheck • should be calculated and determined by timesheet information) • (5) Modify other relative information (Additions/Deductions/Taxes/etc)
Repeat these steps for each NEW employee that you wish to pay (or) to modify existing employee’s pay, tax or other changes
Step 1(a) – Entering Timesheet Data (Optional): * Enter the Employees Name * Fill-in Relative Timesheet information * Service Item is a service code for billing purposes * Payroll Item is the pay code for paycheck purposes * Billable time is turned on/off for billing purposes Click Save & New to enter a new employee (or) Save & Close when done
Step 1(b) – Creating Paychecks: Create Paychecks by selecting Start Scheduled Payroll
The Pay Period Ends Date is the week for which you want to pay (typically employers pay a week behind). The Check Date is the date of the check. Place a check-mark on the employees you wish to pay. Notice that not all employees have timesheet data, but we can still mark them “to be paid”.
You can click-on the Employee Name to review (or) adjust their Gross-to-Net Pay Calculations
Edit/Review Payroll Calculations • Add Hours without Timesheet or Customer:Job data (if preferred)
Earnings Notice that each paycheck is divided into four sections Other Payroll Items Employee Deductions Summary Company Expenses
After Paychecks have been successfully created, you will be taken to the “Print Paychecks” screen
Create Payroll Tax Payment • Select the tax you want to pay • Click on “View/Pay” to create
(1) Review Accuracy of Tax Payment. (2) If you are using EFT (payment by phone or internet) rather than printing checks, turn-off the To Be Printed box and enter the text EFT in the Check Number field (3) (or) Select E-payment (if you have signed-up for Intuit’s E-File Services)
Step 4 – Printing/Filing Tax Forms: When you choose to Process Payroll Forms the following options will appear:
If you choose the Federal Forms option, you will • be given a list of IRS Federal Forms to choose • from. • Then, select the appropriate filing period
QuickBooks will generate and print the forms for you, including filling-in the blanks, based on the paychecks and tax payments that you previously recorded. You may also over-ride the information, if it is not correct. (although you should try to determine why it is not correct)
If you choose the State Form option (from the Process Payroll Forms screen) you will be given a list of State Forms to choose from. Then, select the appropriate filing period and QuickBooks will generate and print the forms for you (including filling-in the blanks) Based on your paychecks and tax payments previously recorded.
Payroll Reports • Are accessible thru three different methods: • Thru the drop-down Menu’s: The most commonly requested report is the Payroll Summary Report, which displays earnings and taxes detailed by employee