Download
1 / 65
650 likes | 653 Views
Learn how to create and consume RESTful APIs in a single page application using Angular 2, including routing, pipes, and unit testing.

E N D
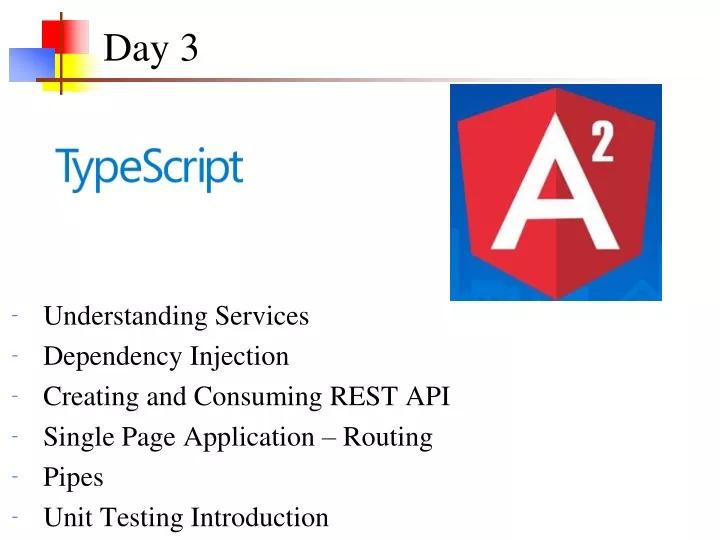
Day 3 Understanding Services Dependency Injection Creating and Consuming REST API Single Page Application – Routing Pipes Unit Testing Introduction
Angular2 Services • Components are responsible for displaying stuff. • Need of Service: • If the logic or data isn’t view specific OR • Needs to be used globally across number of different components • We need services. • Service is basically just a class
Hands On Example • Create app.services.ts file in src folder import {User} from "./app.models";export class AppService {usersData:User[]; constructor(){ this.usersData = [new User("UF1", "UL1"), new User("UF2", "UL2"), new User("UF3", "UL3")]; }getAllUsers() { return this.usersData; }}
Using Service • Create an object of Service • Invoke the method of a service. Modify AppComponent Constructor constructor(){ let a:AppService = new AppService(); this.users = a.getAllUsers();} • Here, service object is for AppComponent. • It’s not a global object
Dependency Injection • Features of Services: • Are independent from any particular component • Provide shared data or logic across components • Dependency Injection is a pattern in which a class receives the instances of objects it needs (called dependencies) from an external source rather than creating them itself. • Angular is designed to manage all these dependencies between components and services for us. • Alternatively, we can register our service with Angular2 and Angular creates single instance of that class called Singleton • Angular2 provides an built-in Injector, which maintains a container of the created service instances.
Working with Service • 1) A class with @Injectable to tell angular 2 that its to be injected – DataService • 2) A class with a constructor that accepts a type to be injected import {Component, Injectable} from “@angular/core“ @Injectable() export class AppService { }
Hands On Example • Inject the dependency object in any component as argument. • Modify AppComponent Constructor constructor(private asvc: AppService){//let a:AppService = new AppService();this.users = asvc.getAllUsers();} • Register the Service in our application module by using providers metadata attribute. • providers: [AppService],
Server Communication with REST REST stands for Representational State Transfer • It is an architectural pattern for developing web services. • REST web services communicate over the HTTP specification, using HTTP vocabulary. • GET to retrieve information • POST to add new information, showing its relation to old information • PUT to update information • DELETE to discard information
MongoDB – NoSQL Database • NoSQL databases, don't use the traditional table-oriented SQL. • MongoDB is a document-oriented database that which stores data in documents, which are data structures that are almost identical to the standard JSON objects. • Collections == tables • Documents == record • Download from mongodb.com • After installation add the path to the MongoDB executable (usually the Program Files folder) to your environment variables . • Verify from command prompt > mongod
Creating REST Api • Deploydis a tool for modeling APIs for web applications. • It is built on top of Node.js and MongoDB, which allows it to store data as JSON. • Install Deployd tool using npm i.e. npmi –g deployd • To Verify > dpd --version • In Workspace, Create REST service name using: • dpd create restusers • This creates a new folder restusers • Change to restusers folder, type dpd • Now, dpd prompt appears • Type, dashboard • Server starts, Home Page for REST service is displayed
Creating Data Structure • In Deployd Dashboard • Click the green button in the Deployd dashboard and type Collection. • Set the name of the collection to /wsusers • Deployd will prompt you to define the properties that the objects in the collection will have. • Add properties required for REST service Data Structure. • After Data Structure Created, • Click Data Link, Add a minimum of 3 records • Click API link, observe URLs for each REST operation
RESTful Service API RESTful Web Service resources and http methods
Angular2 Http Service • The Angular2 Http service facilitates communication with the remote HTTP servers. • Angular 2 uses a pattern called Observables. • The Observable classes in Angular 2 are provided by the ReactiveX library. • The HttpModule from @angular/http library holds providers for a complete set of HTTP services. • We should be able to access these services from anywhere in the application. • So we declare dependency to the AppModule by adding HttpModule to the imports list. @NgModule({ imports: [BrowserModule, HttpModule],
Using Http Service Methods • Use http.get(url) to run our HTTP GET request. • .post(url:string, data:string, requestoptions) • .put(url:string, data:string, requestoptions) • .delete(url:string, requestoptions) • Each Http service method returns an Observable of HTTP Response objects. • An observable is a stream of events that we can process with array-like operators.
Observable Object • An Observable object, which gives us method subscribe() for observing the output. • To receive the output, we call the subscribe() method. • This takes three arguments which are event handlers. • onNext: will receive the HTTP response data. • onError: called if the HTTP request returns an error code • onCompleted: executes after completion of returning all its data • Angular doesn't know that we want to parse the response as JSON.
Consuming REST Api • Use the following with REST web service API • List all Users • Add a New User • Update an Existing User • Delete an Existing User • We use User Service as Data Layer to work with Data operations. • Modify User Class as below: constructor(private id:string, private fname:string, private lname:string){}
List All Users - Service • In AppService, verify is the constructor injects the Http dependency object constructor(private ht:Http){ • Define following member in Service class resturl= “http://localhost:2403/wsusers” • Modify getAllUsers() method getAllUsers(){ return this.ht.get(this.resturl); }
List All Users - Component • Modify the AppComponent Constructor constructor(private asvc:AppService){ this.asvc.getAllUsers().subscribe( (respdata) => console.log("Success ", respdata), (resperr) => console.log("Error", resperr), () => console.log("Completed") ); } • Transforming Response RAW data to JSON format using json(); (respdata) => this.users = respdata.json(),
Add a New User – Form Handling • Define a data member in Component Class newUser:User = new User("", "",""); • Create a Form with Text Boxes to accept User details and bind the text boxes with newUser object members. <form> <input placeholder="Enter First Name" [(ngModel)]="newUser.fname" name="txtFname"> <input placeholder="Enter First Name" [(ngModel)]="newUser.lname" name="txtLname"> <button type="button" (click)="addUser()">Add</button> </form>
Add a New User - Service • Define following members in Service class myheaders = new Headers({'Content-Type': 'application/json'}) options = new RequestOptions({headers:this.myheaders}) • Define addNewUser method addNewUser(newData:User){ return this.ht.post(this.resturl, newData, this.options); }
Adding a New User - Component • Define save() in Component: addUser(){ this.asvc.addNewUser(this.newUser).subscribe( (respdata) => this.users.push(respdata.json()), (err) => console.log("Add Error"), () => console.log("Add Completed") ); this.newUser = new User("","",""); }
Deleting User • In Template, Create a button for each row <button type="button" (click)="deleteUser(u.id)">Delete</button> • In App Service, define a method deleteUser(id:string){ return this.ht.delete(this.restUrl+"/"+id);}
Deleting User - Component • Component Class deleteUser(id:string){ this.asvc.deleteUser(id).subscribe( () => console.log("Delete Success"), () => console.log("Delete Error"), () => console.log("Delete Complete") ); }
Updating UI • Use splice() function to remove an element from an array. • To get the selectedIndex in collection of data, *ngFor provides index property. <tr *ngFor="let u of users; let i = index"> • Pass the index to Component Method from template <button type="button" (click)="deleteUser(u.id, i)">Delete</button> • Modify component method to handle index value deleteUser(id:string, idx:number){ this.asvc.deleteUser(id).subscribe( () => this.users.splice(idx, 1),
Editing User - Template • Create a new Column Heading Action <th>FName</th><th>LName</th><th>Action</th> • Create a Button for each row, <button type="button">Edit</button> • When user clicks the button populate current record data in form elements <td> <button type="button" (click)="editUser(u)">Edit</button> </td> • Define a method in component to populate data in form elements editUser(selectedUser:User) {this.newUser = selectedUser;}
Editing User - Component Copying an Object • The Object.assign() method is used to copy the values of all properties from one or more source objects to a target object. • It will return the target object. • Syntax: Object.assign(target, ...sources) editUser(selectedUser:User) { let cp = Object.assign({}, selectedUser); // Type Cast Object to User this.newUser = <User> cp; }
Updating User - Template • Create an Update button in Form, used to update the changes made by user in Form Elemens. <button type="button" (click)="updateUser()">Update</button> • Add method in service updateUser(user:User){ return this.ht.put(this.resturl, user, this.options); }
Updating User - Component • Define a method in Component Class updateUser(){ this.asvc.updateUser(this.newUser).subscribe( (respdata) => console.log("Update Success"), (err) => console.log("Update Error"), () => console.log("Update Complete.") ); this.newUser = new User("","",""); }
Hands On Exercise • Update the UI after successfully modifying the data source.
Single Page Application • In SPA we load a single HTML page and based on the user request/interaction, we load the other HTML views in the same page, hence the name Single Page Application. • The Web Site is divided into Component Views • The Layout Component is common for all views in our application. • The router is the mechanism for navigating from one component view to another component view. • Router uses a path to navigate to a specific component. • http://localhost:3000/about Now the router navigate us to About Component • Partial Component Views • Partial views are loaded into the layout whenever required. • Partials doesn’t have <html><head><body> Tags.
Creating a Project from Existing Setup • Create a new Project day3project • Create a new Folder src • Create boot.ts file in src folder • Setup the Current Project from existing Project • Install Project Dependencies • Install following additional Angular Modules required for our current project @angular/router • Create Home Page to use web component as below: <myroute-app>Loading. Please Wait... </myroute-app> • Develop <myroute-app> Component and Bootstrap the application and start NPM
Getting Started • Add the base tag in home page at the top of the <head> section. <base href=“/"> • This tag is used to tell the router how to compose navigation URLs. • API required for router is available in RouterModule.
Router Link Directive • Make our AppComponent as our layout component that only handles navigation and loading partials. • The routerLink directive allows us to bind the anchor tag to a string that tells the router where to navigate to the specifed path when the user clicks the link. • Add an anchor tag to the template, when clicked, triggers navigation to the specific Component. selector:"myroute-app", template: `<h2>Route Example</h2> <a routerLink="/">Home |</a> <a routerLink="/about">About |</a> <a routerLink="/contact">Conact |</a> ` })
Router Outlet Directive • Adding a <router-outlet> element to the layout template displays each component that matches to router link. template: `<h2>Route Example</h2> <a routerLink="/">Home |</a> <a routerLink="/about">About |</a> <a routerLink="/contact">Contact |</a> <hr> <router-outlet></router-outlet> `
Creating Partial Components • Create routecomponents.ts import {Component} from "@angular/core"; @Component({ template: "<h3>This is Home Component</h3>" }) export class HomeComponent {} • Create AboutComponent @Component({ template: "<h3>About Component Page</h3>" }) export class AboutComponent {} • Create ContactComponent • Register the components in Application Module
Configuring Routes – Add Routing • Routing is Navigation between different views. • The Angular router is an external, optional Angular Module called RouterModule. • The router is a combination of multiple provided services (RouterModule), multiple directives (RouterOutlet, RouterLink, RouterLinkActive), and a configuration (Routes). • Every time the current route changes, the included view changes with it according to the configuration of your application. • Make the RouterModule available for our Application i.e. our Module is depends on RouterModule • Declare the dependencies in imports array of @NgModule decorator
Hands On Example • In Application Module, Use the forRoot method for configuring routes. • It is a collection of pathnames mapped with components. @NgModule({ imports: [BrowserModule, RouterModule.forRoot([ {path:"", component:HomeComponent}, {path:"about", component:AboutComponent}, {path:"contact", component:ContactComponent} ])], • Run the Application and verify all the Links
Refactoring Route Configuration const myroutes:Routes = [ {path:"", component:HomeComponent}, {path:"about", component:AboutComponent}, {path:"contact", component:ContactComponent} ] @NgModule({ imports: [BrowserModule, RouterModule.forRoot(myroutes)],
Shadow DOM - Unique Component Styles • Templates sometime require unique styles • We can inline the styles directly using styles attributestyles: ["h3 {color: blue}"], template: `<h3>This is Home Component</h3> • We can use external stylesheet styleUrls styleUrls: [‘app/styles/app.component.css’]
Hands On Exercise • Create a NotFoundComponent for any other unmatched routes. • In path use: path : “**”
Pipes • Angular provides you with the pipes mechanismto format or transform the data in the template. • The general syntax for using pipe is: {{ expression | pipeName : inputParam }} • A pipe takes data as input and transforms it to the desired output. • An expression is followed by the pipe symbol |, which is followed by the pipe name and then an optional parameter (inputParam1) separated by a colon (:). • The framework comes with multiple predefined pipes such as date, number, lowercase, uppercase, and others.
Using Pipes • In home Component, Create a property price: number = 100.1234; • Display in template <p>{{ price }}</p>` • A pipe takes data as input and transforms it to a desired output. • Using currency pipe{{ price | currency }} • Pipe with parameter {{price| currency:’INR’ }} • Chaining Pipes: We can chain pipes together to make use of multiple pipes in one expression.{{ price | currency | lowercase }}
Hands On Exercise • Create myDate property and display current system date • {{myDate}} • Transform the Current date into simplified date {{myDate | date}} • Display the date in month / day / year format • {{myDate | date:"MM/dd/yy"}} • Create a product name property and display product name in uppercase. • productname: string = "Sony TV"; {{productname | uppercase}} • Display Product Name in Reverse Format.
Custom Pipes • We need to display product name in reverse format. • Angular2 doesn’t have built-in pipe. • In this situation, need to create user defined pipes called as custom pipes. • Each custom pipe implementation must: • have the @Pipe decorator with pipe metadata that has a name property. • This value will be used to call this pipe in template expressions. • Implement the PipeTransform interface's transform method. • This method takes the value being piped and a variable number of arguments of any type and return a transformed ("piped") value. • We must include our pipe in the declarations array of the AppModule.
Hands On Example • Create a new typescript file app.pipe.ts import {Pipe, PipeTransform} from "@angular/core" @Pipe({name:"reverseText"}) export class ReversePipe implements PipeTransform { transform(value){ return value.split("").reverse().join(""); } } • In App Module declarations: [AppComponent, ReversePipe], • Apply pipe in template. {{productName | uppercase | reverseText}}
Angular2 Project Setup • There are various options to create Angular2 Project Setup: • Manual Setup • Use Quick Start files – Download from angular.io • Angular CLI Tool – Generates boilerplate code.
Angular CLI • One of the easiest ways start a new Angular 2 application is to use the Angular command-line interface (CLI) that allows you to: • generate boilerplate code for new Angular 2 applications • add features (components, directives, services, pipes, etc) to Angular 2 applications • To install Angular CLI: npm install -g @angular/cli • which will install the ng command globally on your system. • To verify whether your installation completed successfully: ng version which should display the version you have installed.
Using Angular CLI • Now that we have Angular CLI installed, we can use it to generate our Todo application: ng new mytestproject • This will create a new directory for us with everything we need to get started • # enter new directory the CLI created for you cd mytestproject • # start the development server ng serve • which will start a local development server that you can navigate to in your browser on http://localhost:4200/. • The application will automatically reload when a source file has changed.
File Name Conventions • Each unit test is put into its own separate file. • The Angular team recommends putting unit test scripts in a .spec filename extension to mark it as a testing script (this is a Jasmine convention). • So if you had a component /app/components/mycomponent.ts, then your unit test for this component would be in /app/components/mycomponent.spec.ts.
Using Angular CLI • Angular CLI can also help us generate necessary code to our existing Angular application using the ng generate command: • # Generate a new component ng generate component my-new-component • # Generate a new pipe ng generate pipe my-new-pipe • # Generate a new service ng generate service my-new-service • # Generate a new class ng generate class my-new-class • # Generate a new interface ng generate interface my-new-interface