Download
1 / 12
780 likes | 2.48k Views
HTML Images. The Image Tag and the Src Attribute. In HTML, images are defined with the <img> tag. The <img> tag is empty, which means that it contains attributes only and it has no closing tag.

E N D
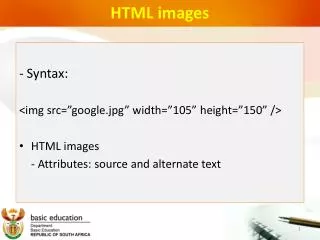
The Image Tag and the Src Attribute • In HTML, images are defined with the <img> tag. • The <img> tag is empty, which means that it contains attributes only and it has no closing tag. • To display an image on a page, you need to use the src attribute. Src stands for "source". The value of the src attribute is the URL of the image you want to display on your page.
The syntax of defining an image: <img src="url"> • The URL points to the location where the image is stored. An image named "boat.gif" located in the directory "images" on "www.disney.com" has the URL: http://www.disney.com/images/boat.gif. • The browser puts the image where the image tag occurs in the document. If you put an image tag between two paragraphs, the browser shows the first paragraph, then the image, and then the second paragraph.
The Alt Attribute • The alt attribute is used to define an "alternate text" for an image. The value of the alt attribute is an author-defined text: • <img src="boat.gif" alt="Big Boat"> • The "alt" attribute tells the reader what he or she is missing on a page if the browser can't load images. The browser will then display the alternate text instead of the image. • It is a good practice to include the "alt" attribute for each image on a page, to improve the display and usefulness of your document for people who have text-only browsers.
Inserting an Image <html> <body> <p> An image: <img src="constr4.gif" width="144" height="50"> </p> <p> A moving image: <img src="hackanm.gif" width="48" height="48"> </p> <p> Note that the syntax of inserting a moving image is no different from that of a non-moving image. </p> </body> </html>
Inserting Images from different locations <html> <body> <p> An image from another folder: <img src="/images/netscape.gif" width="33" height="32"> </p> <p> An image from Disney: <img src="http://www.disney.com/images/donald.gif" width="73“ height="68"> </p> </body> </html>
Background Image <html> <body background="background.jpg"> <h3>Look: A background image!</h3> <p>Both gif and jpg files can be used as HTML backgrounds.</p> <p>If the image is smaller than the page, the image will repeat itself.</p> </body> </html>
Adjust images to different sizes <html> <body> <p> <img src="/images/hackanm.gif" width="20" height="20"> </p> <p> <img src="/images/hackanm.gif" width="45" height="45"> </p> <p> <img src="/images/hackanm.gif" width="70" height="70"> </p> <p> You can make a picture larger or smaller changing the values in the "height" and "width" attributes of the img tag. </p> </body> </html>
Make a hyperlink of an image <html> <body> <p> You can also use an image as a link: <a href="lastpage.htm"> <img border="0" src="buttonnext.gif" width="65“ height="38"> </a> </p> </body> </html>
Create an image map <html> <body> <p> Click on one of the planets to watch it closer: </p> <img src="/images/planets.gif" width="145" height="126" usemap="#planetmap"> <map id="planetmap" name="planetmap"> <area shape="rect" coords="0,0,82,126" alt="Sun" href="sun.htm"> <area shape="circle" coords="90,58,3" alt="Mercury" href="mercur.htm"> <area shape="circle" coords="124,58,8" alt="Venus" href="venus.htm"> </map> <p> <b>Note:</b> We use both an <b>id</b> and a <b>name</b> attribute in the map tag because some versions of Netscape don't understand the id attribute.</p> </body> </html>
Turn an image into an image map <html> <body> <p> Move the mouse over the image, and look at the status bar to see how the coordinates change. </p> <p> <a href="tryhtml_ismap.htm"> <img src="/images/planets.gif" ismap width="146" height="126"> </a> </p> </body> </html>