Download
1 / 27
270 likes | 353 Views
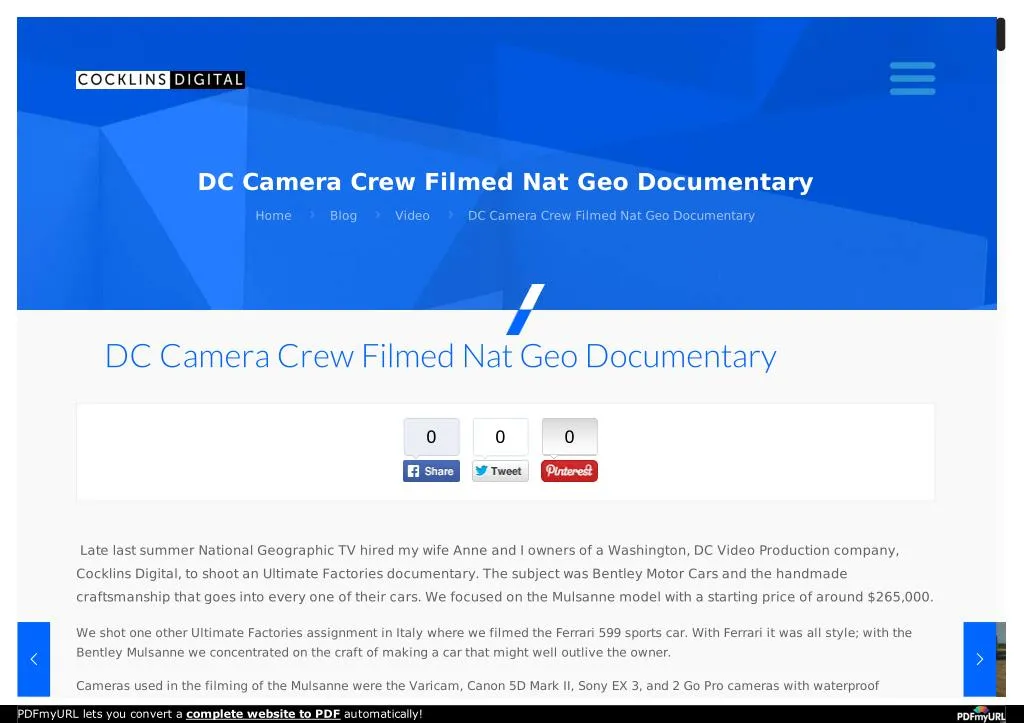
Late last summer National Geographic TV hired my wife Anne and I owners of a Washington, DC Video Production company, Cocklins Digital, to shoot an Ultimate Factories documentary. The subject was Bentley Motor Cars and the handmade craftsmanship that goes into every one of their cars. We focused on the Mulsanne model with a starting price of around $265,000.

E N D
DC Camera Crew Filmed Nat Geo Documentary Home Blog Video DC Camera Crew Filmed Nat Geo Documentary DC Camera Crew Filmed Nat Geo Documentary 0 0 0 Late last summer National Geographic TV hired my wife Anne and I owners of a Washington, DC Video Production company, Cocklins Digital, to shoot an Ultimate Factories documentary. The subject was Bentley Motor Cars and the handmade craftsmanship that goes into every one of their cars. We focused on the Mulsanne model with a starting price of around $265,000. We shot one other Ultimate Factories assignment in Italy where we filmed the Ferrari 599 sports car. With Ferrari it was all style; with the Bentley Mulsanne we concentrated on the craft of making a car that might well outlive the owner. Cameras used in the filming of the Mulsanne were the Varicam, Canon 5D Mark II, Sony EX 3, and 2 Go Pro cameras with waterproof PDFmyURL lets you convert a complete website to PDF automatically!
housings. We also had with us the Filmtools triangular car mount kit, Bill Go with Dolly, ABA C50 Jib Arm and the InnoVision Probe ll with lenses. Jib-dolly shooting interior of Bentley There were 5 people on the Team headed up by veteran producer Gareth Harvey; production assistant/2nd camera Peter Takacs; PDFmyURL lets you convert a complete website to PDF automatically!
sound tech my wife, Anne; grip/jib-dolly rigger my son, Scott and me as DP. We landed in Manchester, England in August of last year and immediately drove to Nantwich, a small town a few miles from the Bentley factory located in Crewe, England. We worked as two teams – if I was on sticks, Pete and Scott were moving ahead setting up the dolly or jib for the next shot. Pete would also go off to shoot other cover shots needed for the documentary with the EX3. Gareth would often run ahead of all of us prepping for the next sequences PDFmyURL lets you convert a complete website to PDF automatically!
Filming Inside The Bentley Factory Factory shoots can sometimes be a bit repetitious: machinery, robot arms, workers all performing the same thing over and over throughout the day. When I think of factories I try and think of the great photo works by Lewis Hine who in the mid 1900’s documented working class Americans, men, women and back then children, surrounded by machinery. PDFmyURL lets you convert a complete website to PDF automatically!
Lewis Hine Photo Of A Power House Mechanic Working On A Steam Pump Gareth Harvey, the producer, and I have been working on projects together for quite a few years. He is one of the best documentary producer/writers in the business and a fantastic organizer. During our pre- production discussions I brought up the subject of using the Canon 5D Mark II on the Bentley shoot. He said he had used a DP with the 5D on a previous shoot overseas with bad results. After some very careful conversations he agreed we could bring it along as an extra camera to the varicam that we were using as our primary camera. PDFmyURL lets you convert a complete website to PDF automatically!
Bentley Documentary Producer Gareth Harvey On the second day of shooting, after we had a chance to get a feel for our new surroundings and develop a workflow with the team, I pulled the 5D out for an interview of a factory worker on the factory floor. Using only a Kamio light ring for light and shooting with a Zeiss ZF.2 50mm lens I set the interview up compressing the machinery in the background and showed the shot to Gareth on my 7” Marshall monitor. He loved it. PDFmyURL lets you convert a complete website to PDF automatically!
This was my first shoot with the 5D; I had read about all of the problems DP’s had had shooting with this camera – the line skipping, on- board sound, compression artifacts – you have to remember the camera was designed and built as a still camera and was discovered as a video camera by still photographers. But despite all of the above mentioned problems the video coming off of this camera is wonderful, and when you take into consideration the price, the DSLR cameras are a no brainier for a DP’s kit. PDFmyURL lets you convert a complete website to PDF automatically!
Pete and Scott Setting-Up The-Dolly-Jib In-Side Bentley’s-Factory The Varicam was the main camera on this documentary, and was used for capturing scenes of workers on the factory floor via handheld, tripod, dolly and jib and many times the jib on the dolly. The Varicam is a workhorse camera for documentary production. But in certain situations other less expensive cameras do work out better. I brought the 5D along with Zeiss primes, Redrock micro DSLR cage and follow focus, Marshall Monitor and Kino Flo lighting for shooting interviews. Technically, documentary work is sometimes a run and gun affair, refined news shooting with a focus on the look especially when it comes to the interview. Budgets are very often small with a lot of the budget going to the important post production end of the doc for things such as editing, color correction, sound mix, music score and graphics. Two weeks of shooting in the field will often turn into 3 to 6 months in post. When working in the field you have to work efficiently and quickly. On Bentley we had two weeks with no days off to shoot a 1 hour documentary. Meticulous lighting of every single scene (especially the interviews in a factory) is not going to happen; you would end up with a lot of pretty interviews with no cover shots to tell the story. Employing a shallow depth of field where the subject is in sharp focus and everything behind drops off into a mix of soft shapes and colors will put you light years ahead and give an aesthetic look and feel to the scene PDFmyURL lets you convert a complete website to PDF automatically!
Interviewing The Bentley Designer With The Canon 5D Separation between subject and background is no longer a problem so you can eliminate the back light. You can also minimize or even eliminate background lighting, shallow depth of field allows your eye to now focus on the subject, the background definition is gone. Shooting with a 1/3, ½ or 2/3 inch sensor is difficult, if not impossible, to achieve the type of depth of field you get from using a super 35mm or a 5D 36 x 24 mm sensor unless you use a DOF adapter with primes. With the 5D, Zeiss 50mm and 85mm lenses I was able to shoot PDFmyURL lets you convert a complete website to PDF automatically!
interviews moving along very quickly with minimum lighting. I filled out the faces with a Kamio light ring when shooting on the factory floor and used a basic Kino Flo Diva lighting package for more formal interviews with the Bentley designers and executives. I had the 5D and prime lenses ready on a cart waiting for Gareth to say the word “interview” and I could quickly switch cameras and start shooting. I also used the 5D in spaces where the Varicam was too large a fit. Using some Filmtools mounts I was able to attach the suction mount to a glass window inside a robotic workstation and acquire action scenes of the robots without having to shoot through the safety glass. The 5D with the Zeiss 21mm ZF.2 worked out great for these types of situations, but where the 5D really stood out was as a car mount camera. A few years back we shot at Ferrari in Marenello, Italy for Ultimate Factories, back then we used a Toshiba cube camera for our car mount sequences. Ferrari didn’t give us a car for 3 days as Bentley did but they did give us a factory test driver and Ferrari 599 Fiorano for one day. I had no car mount kits for that camera so I had to use the next best thing, lots of gaffer tape and foam. Of course my main worry was doing harm to this already pre-sold car’s red body paint with the gaffer tape but I didn’t want to have the camera fall off and bang around the body while dangling from its video power cord either, so I used a lot of gaffer tape. We did this to several areas of the car without the camera falling off and harming the paint and with fairly good results but the process of aiming the camera and taping it to the car was slow. With that in mind for the Bentley shoot I invested in a Filmtools car mount kit. Halfway through our two week shoot at Bentley the factory executives gave us a Mulsanne Bentley for 3 days. Gareth, our producer, hired a well known crew driver in England, Steve Edwards, who has been driving crews around Europe for more than 30 years. Steve Edwards dressed in a smart British suit and drove the Bentley up to Wales followed by the documentary team in two mini vans. PDFmyURL lets you convert a complete website to PDF automatically!
Driver Steve Edwards In The Bentley-Mulsanne Along the way we stopped at an old English castle for some Bentley beauty shots and then on to Wales where we mounted the Filmtools triangular rig and 5D on every surface of the Bentley body. I also used a Filmtools seat mount rig and 5D inside the vehicle for interior shots of the car driving through the beautiful countryside of Wales. PDFmyURL lets you convert a complete website to PDF automatically!
Filmtools Car-Mount Rig with Canon 5D And 21mm Zeiss This setup could not have worked out better; Filmtools mounts are very fast to set up, giving us some spectacular shots of the car driving along the coast of the North Wales countryside. The Filmtools lightweight triangle camera mount will hold a camera with a weight of up to 22 pounds. The suction cups lock onto the car body and once the rods are in place and tightened the camera is solid. PDFmyURL lets you convert a complete website to PDF automatically!
Filmtools Car Mount On Hood Of Bentley Mulsanne On the Bentley, known for a ¼ million dollar ride, the shots were super smooth and when the rig was released from the car it left no marks. I used the Filmtools headrest mount for inside shots looking out. The unit clamps to the rods of the headrest, the clamps have a rubberized coating on them eliminating scratches to the headrest support surface. The camera mounts onto a small Bogen Manfrotto head allowing you to position the camera at any angle. The rig is totally adjustable using an allen key. PDFmyURL lets you convert a complete website to PDF automatically!
Filmtools Camera Seat Mount Inside Bentley Mulsanne I also wanted to try and shoot some jib movement of the Bentley out of the back of the van. My son Scott, now a senior in college, has PDFmyURL lets you convert a complete website to PDF automatically!
worked with me on various summer jobs since he was 14 years old. One of the pieces of gear I have owned for nearly 20 years now is a 30 foot Jimmy Jib. Scott has helped me build and work the jib many times so he understands the rigging and balance of a jib. We had an ABA C50 Jib Arm that Gareth rented in Italy and brought with him for this shoot. PDFmyURL lets you convert a complete website to PDF automatically!
Minivan Jib-Rig With Canon 5D As jibs go, the C50 built in Germany is very compact, it breaks down into a few small soft bags. It can be built from 3 meters out to 7 meters. The unit we used had a fixed head so we were limited to jib arm moments only. Scott took the pieces of this jib and rigged it into a back of our minivan. We mounted the 5D out front and mounted the Marshall monitor on the arm, everything was balanced perfectly. Movement was restricted to the rear opening of the minivan but I had enough room to pull off some nice tracking shots of the Bentley. PDFmyURL lets you convert a complete website to PDF automatically!
Filming Bentley Mulsanne From Back Of Van The downsides of using the 5D Mark II: there are a few but once again you have to keep in mind it was built and sold as a still camera. When folks knock this camera they knock it as a video camera which I feel is unfair. Having said that there are some difficulties with this DSLR, sound being one of them. When we bought our camera we also spent an extra $8,000 on top of the camera price for support gear to run it as a video rig, this is not counting the cost of the prime lenses. Anne and I agreed that we wanted to record high quality audio so two of the items we purchased were a Horita time code generator and Tascam HD-P2 digital audio recorder. I ran time code into the audio input on the 5D. I built a cable with a resistor built in because the Horita outputs 2Vpp which over modulated the audio channel on the 5D. With time code going into the 2nd channel of the 5D we would jam sync the time code from the Horita to the Tascam at the beginning of the day and go to work. PDFmyURL lets you convert a complete website to PDF automatically!
Horita Time-Code Sync Generator For Canon 5D My wife and I use Avid MC5 for editing and do our own productions from soup to nuts, so with this setup we could import the Canon 5D footage and Tascam audio files, transcode the video to DNxHD 145 and use Read Audio time code inside Avid to digitize the audio time code to the video and then auto sync the video and audio together for a sub clip synced and ready to edit. Sounded great on paper but we discovered that the Tascam was drifting throughout the day by up to 10 frames. We solved that problem by using a clap board on almost PDFmyURL lets you convert a complete website to PDF automatically!
every scene as a back-up so we could easily bring our footage back in sync. Once we discovered the drifting, we synced up with the Tascam before every interview and continued using the clapboard religiously on every shoot. There are various methods sold today to sync audio and picture together on the DSLRs and new ones coming on line every day, but to really to insure sync you have to use a clapboard. Anne Recording Sound-Inside And Outside The Mulsanne PDFmyURL lets you convert a complete website to PDF automatically!
We also purchased a Redrock micro DSLR cage, follow focus and matt box. I had a little bit of difficulty working with the Redrock rig, maybe it was just me, but to start with the matt box is enormous. When you set the rig down it would tip over if the matt box wasn’t attached, and loading the Scandisk CF cards in the side of the camera involved removing the camera from the rig so you could open the camera card slot. These are small and annoying things and when you compare price to other DSLR support rigs out there, Redrock wins. The plus side of the Redrock rig was being able to mount the Marshall monitor to it along with the Kamio ring light, Anton Bauer Dionc battery and Horita time code generator. I used the Dionc battery to run the camera via a Switronic power adaptor, time code generator, and Marshall Monitor and Kamio ring light. Switching from cage to shoulder mount was a snap and the modular versatility of the unit enabled me to reconfigure the platform for other needs. As the folks at Redrock say, it is like building with Lego’s. PDFmyURL lets you convert a complete website to PDF automatically!
Canon 5D Set Up for Bentley Documentary The HDMI cable port out of the camera has been known to go bad from time to time. On a subsequent shoot while monitoring HDMI out of my Canon the monitor suddenly went dead. I switched over to analog out of the camera and it worked. I had some extra HDMI cables with me that I tried with the same results so I sent the 5D camera back to Canon for service which they turned around in under 5 days with a note saying the HDMI port was fine. It wound up being the HDMI channel on the Marshall monitor that failed. You could go blind focusing an PDFmyURL lets you convert a complete website to PDF automatically!
image while reading the analog image on the monitor; luckily Marshall has a very good peaking function that saved me for the rest of that assignment. I have now completed four 5D projects three of which I’ve edited myself and luckily I’ve never seen rolling shutter or jello cam images from my 5D, but if you do notice it in your footage there are several programs out there that will fix it, one being RollingShutter by the foundry ($500) that works as a plug in for After Effects. While editing I have seen plenty of artifacts from the H.264 50mb/s compression. I mostly notice it on straight lines with lots of contrast, like a shinny piece of chrome trim on a car. I used DV Fixer, a plug-in by Boris, found in Boris Continuum Complete 6, which isolates and removes diagonal stair-casing or jaggies PDFmyURL lets you convert a complete website to PDF automatically!
Mounting Waterproof GoPro on A Chemical-Bath Rack Besides the Varicam and 5D Mark II we had two GoPro’s with underwater housings. Our production assistant/second camera person Peter Takacs was very good at mounting the GoPros. We had the GoPro on robot arms inside the paint shop; we had a mount on the computerized leather cutting machine and used the GoPro inside the engine test room. Anywhere we could not access with our cameras we used the GoPros to catch the action. The nice thing about the GoPro’s is they are so lightweight, when placed on robot arms they stay solid and are PDFmyURL lets you convert a complete website to PDF automatically!
not affected by the sudden jerky motion created by the robot arms mechanical movement. When we wanted to get a shot of a robot arm spraying lacquer on a handmade inlayed root wood dashboard, the safety officer in charge of company safety told us “no”. He feared the camera would possibly short out causing a spark that would, as he said, “start a fire in the paint shop”. Pete placed the GoPro inside the waterproof housing, showed it to the safety officer, and got the go ahead to mount it on the robot arm. The GoPro’s are relatively inexpensive and give you a great image for the cost. I now consider the GoPro a must for my kit. We also brought along an Innovision Probe ll, we used one on the Ferrari shoot with great success and Gareth wanted one on this shoot. With the Innovision mounted on the Varicam I was able to move the small size lenses into tight places like the inside of an engine cylinder, or do some extremely close visuals of pieces of the Bentley being built by factory employees. Subtle creative visuals help when shooting a documentary and the Innovision is one of those tools I like using for these types of docs. PDFmyURL lets you convert a complete website to PDF automatically!
Filming With InnoVision Lens We also had a Sony EX3, the XDCAM 35MB/s codec looks great in HD, a very affordable camera that works at 720 and 1080; 24, 25, 30, 50 and 60fps. Pete Takacs used the EX3 as a second camera for shots around the factory. It is a great second camera to the Varicam on any documentary shoot. PDFmyURL lets you convert a complete website to PDF automatically!
PDFmyURL lets you convert a complete website to PDF automatically!
Jib Set Up At English Castle Home Services Portfolio About Us Approach Blog Contact Us Copyright © 2016 Cocklins Digital Inc. Web Design Toronto by iMediaDesigns PDFmyURL lets you convert a complete website to PDF automatically!