Download
1 / 33
330 likes | 470 Views
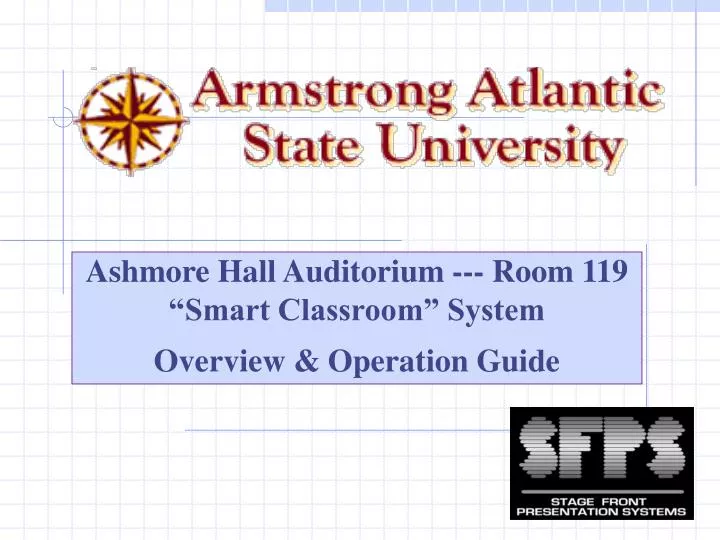
Ashmore Hall Auditorium --- Room 119 “Smart Classroom” System Overview & Operation Guide. Features of the system: Manually-Operated Front Projection Screen.

E N D
Ashmore Hall Auditorium --- Room 119 “Smart Classroom” System Overview & Operation Guide
Features of the system: Manually-Operated Front Projection Screen
Features of the system: High-Resolution XGA (1024x768) High Brightness (3000 ANSI lumens) LCD Projector suspended from the ceiling. Sharp XG-C50X
Other features of the system: New equipment has been added to the existing Equipment Rack located in the AV Room. DVD Player & New Control System w/Color LCD Touchpanel
Other features of the system: Desk-Mounted “Table Buddy” provides Laptop Computer Video & Audio inputs Laptop Input located on the edge of the desk in the 2nd row.
Desk-Mounted “Table Buddy” provides Laptop Computer Video & Audio inputs Connect to the 15-Pin HD jack from the (monitor) output of your laptop computer. Connect the audio from the laptop computer’s stereo headphone jack.
Desk-Mounted “Table Buddy” provides Laptop Computer Video & Audio inputs Front View Side View VGA 15-pin HD Connection for computer video and a 3.5mm Stereo MiniJack for computer audio. NOTE: VGA Cable with audio is available and stored in the drawer located in the equipment rack. Be sure this device does not get unplugged from the AC outlet located down near the floor. The laptop signal will not reach the projection system should either of the AC plugs be disconnected.
Other features of the system: Wall-Mounted Input Plates for Secondary Computer Input w/Audio and a Microphone Input Wired Microphone input to the sound system. The #2 computer input to the projection system is located near the floor, in the right-hand corner of the wall behind the projection screen.
Wireless Color LCD Touchpanel Remote Control Operates all Audio-Visual Equipment Wireless Touchpanel Charging Base The touchpanel is stored in the A/V Equipment Room. It should remain on the charging base “when not in use”.
Simply touch the surface of the panel and AASU Logo appears. This is referred to as the “START PAGE”. 2. Touch the “START PAGE” a second time and the system is activated. Once the system is activated all the video and audio equipment is “powered up” and ready for use. Touching the surface a second time also takes you directly to the “SYSTEM OPTIONS PAGE”. NOTE: The AASU logo also appears when system power is turned off.
Simply touch the “SOURCE MENU” button to select the equipment you want to operate. The “SOURCE MENU” will appear and provide you with the various choices of equipment you can operate during your presentation.
This is the “SOURCE MENU” as you can see you have various types of equipment and inputs to the LCD projection and sound system that you can utilize to present your information electronically to the students.
LCD Touchpanel Control: Source Selection – Audio Cassette Deck When you touch the “CASS” button the “Audio Cassette Functions” will appear. Select Source by pressing the surface of the touchpanel. Available sources for visual display: • VCR • DVD • Laser Disc • Computer– Input 1 • Aux Computer – Input 2 • Aux Video w/Audio Available sources and/or inputs for audio playback: • Audio Cassette Deck • CD playback via DVD Player • L/R Audio Jacks of the Aux Video Input Note: Source is highlighted when selected by depressing touchpanel surface.
Audio Cassette Function Page STOP --- Stops playback of cassette tape. PAUSE –-Press to pause playback of the cassette tape. PLAY--- Starts playback of audio cassette tape. FAST FORWARD: Provides high speed forward advance of the cassette tape. REWIND: Provides high speed reverse/rewind of the cassette tape. Note: Volume Control appears on all pages where it is required
LCD Touchpanel Control: Source Selection – DVD or Compact Disc When you touch the “DVD & CD” button the “DVD Menu Control” Navigation Page appears. Note: Source is highlighted when selected by depressing touchpanel surface.
MENU – Returns you to the DVD Main Menu DVD & CD Navigation Page Use the Up/Down and Left/Right Arrow buttons to navigate on-screen displays and DVD menus. Press this button to return to or select the DVD “Play Function Page” ENTER – Press ENTER to select an option or execute a commend. Note: Volume Control appears on all pages where it is required
LCD Touchpanel Control: Source Selection – DVD or CD Playback When you touch the “Back to DVD Play Controls” button the “DVD/CD Play Function Page appears. Note: Source is highlighted when selected by depressing touchpanel surface.
DVD/CD Play Function Page FWD Arrow – Press to start or resume playback STOP – Press to stop disc PAUSE --- Press to pause playback; press again to restart Dual FWD Arrow --- Use for forward slow motion playback, frame advance and forward scanning Press to jump to the next chapter or track Dual REV Arrow --- Use for reverse slow motion playback, frame reverse and reverse scanning Dual REV Arrow --- Press to jump to the beginning of the current chapter or track, then to previous chapters and tracks
LCD Touchpanel Control: Source Selection – VCR Operation When you touch the “VCR” button the “VCR Functions” will appear. Note: Source is highlighted when selected by depressing touchpanel surface.
VCR Function Page PLAY: Starts playback of ½” VHS video tape. STOP – Press to stop video cassette playback CHANNEL: Provides up/down selection of CATV channels PAUSE: Displays “still image” during video cassette playback. REWIND: While in PLAY, REW provides high speed visual search. Depressed after STOPPING tape provides high speed reversal of tape. FAST FORWARD: While in PLAY, FFWD provides high speed visual search. Depressed after STOPPING tape provides high speed forward advance of tape.
LCD Touchpanel Control: Source Selection – Auxiliary Video Input When you touch the “AUX” button the following message will appear. You will control your auxiliary video (i.e. camcorder, DVD, VCR etc.) source manually or with it’s own IR remote. Note: Source is highlighted when selected by depressing touchpanel surface.
Auxiliary Video w/Left & Right Stereo Audio Input The AUX Video & Audio inputs are located in the desk-mounted “Table Buddy” Input Plate.
LCD Touchpanel Control: Source Selection – Laser Disc Playback When you touch the “LD” (Laser Disc) button the “Laser Disc Player Functions” will appear. Note: Source is highlighted when selected by depressing touchpanel surface.
FWD Arrow – Press to start or resume playback Laser Disc Player Function Page STOP – Press to stop disc PAUSE --- Press to pause playback; press again to restart Dual REV Arrow --- Press to jump to the beginning of the current chapter or track, then to previous chapters and tracks Dual FWD Arrow --- Use for forward slow motion playback, frame advance and forward scanning Dual REV Arrow --- Use for reverse slow motion playback, frame reverse and reverse scanning Press to jump to the next chapter or track
LCD Touchpanel Control: Source Selection --- Microphone Level Adjustment When you touch the “MIC ADJ” button the “Microphone Adjustment Page” will appear. Note: Source is highlighted when selected by depressing touchpanel surface.
LCD Touchpanel Control: Source Selection When you touch the “Return” button the the “Previous Function Page” will appear. Note: Source is highlighted when selected by depressing touchpanel surface.
LCD Touchpanel Control: Source Selection – Computer Input #1 When you touch the “Computer 1” button the Laptop computer input located at the desk-mounted “Cable Buddy” is selected for display through the LCD projection system. Note: Source is highlighted when selected by depressing touchpanel surface.
LCD Touchpanel Control: Source Selection – Computer Input #2 When you touch the “Computer 2” button the computer input located in the right-hand corner of the wall behind the projection screen is selected for display through the LCD projection system.
LCD Touchpanel Control: Source Selection – Audio & Video Equipment When you touch the “Audio& Video” button you will be returned back to the Audio and Video Source Selection Page. Note: Source is highlighted when selected by depressing touchpanel surface.
LCD Touchpanel Control: Source Selection – System Options When you touch the “System Options” button you will be returned back to the Audio and Video Source Selection Page. Note: Source is highlighted when selected by depressing touchpanel surface.
LCD Touchpanel Control: Source Selection – System Help When you touch the “System Help” button the HELP page will appear. Note: Source is highlighted when selected by depressing touchpanel surface.
SERVICE INFORMATION Warranty & Maintenance • Four Years on All Equipment Consumable items such as video cassette recorder record/tape playback heads, lamps, and batteries, will be warranted in accordance with the original manufacturer's warranty only. Devices including, but not limited to, fuses and/or power and/or lightning transient protectors/suppressors, which are designed to fail in order to protect the system equipment(s) are not included in the warranty. • Four Years on Labor NOTE: Labor to correct warranty problems is provided only during normal working hours, Monday through Friday, 8:30 a.m. - 5:00 p.m., excluding holidays. • Manufacturer’s Warranty Coverage Service Contact • Local # 236-1345 • Toll Free Phone Support: (800) 736-9242 • Ask for Service Dept. and refer to JOB#22315 Warranty & Maintenance • Four Years on All Equipment Consumable items such asvideo cassette recorder record/tape playback heads, lamps, and batteries, will be warranted in accordance with the original manufacturer's warranty only. Devices including, but not limited to, fuses and/or power and/or lightning transient protectors/suppressors, which are designed to fail in order to protect the system equipment(s) are not included in the warranty. • Four Years on Labor (NOTE: Labor to correct warranty problems is provided only during normal working hours, Monday through Friday, 8:30 a.m. - 5:00 p.m., excluding holidays.) • Manufacturer’s Warranty Coverage Service Contact • Local # 236-1345 • Toll Free Phone Support: (800) 736-9242 • Ask for Service Dept. and refer to JOB#22315
THANK YOU FOR THIS OPPORTUNITY TO BE OF SERVICE!!