Download
1 / 244
2.44k likes | 2.57k Views
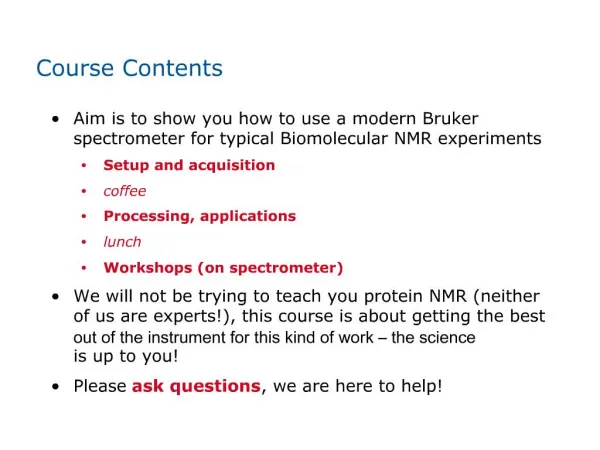
Course Contents. Table of Contents Enter A Request Search A Request Create Invoice (Funeral home request) Search Invoice Manage Security Paper Inventory Reports Print Letters Manage Your Profile Using the Work Queue. Select a topic from the Table of Contents to begin.

E N D
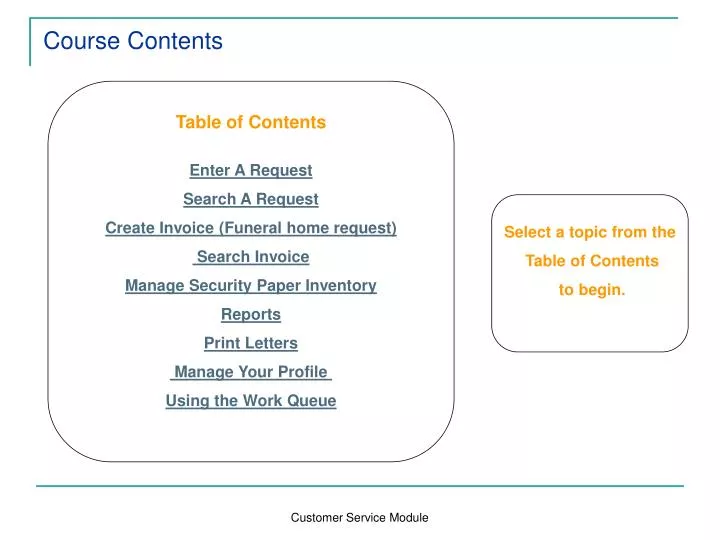
Course Contents Table of Contents Enter A Request Search A Request Create Invoice (Funeral home request) Search Invoice Manage Security Paper Inventory Reports Print Letters Manage Your Profile Using the Work Queue Select a topic from the Table of Contents to begin. Customer Service Module
Enter A Request Step by Step Return to Table of Contents
Login Page Type in your User name and Password and Click on “Login” Customer Service Module
Enter a request – Customer Service tab To get started, Click on the “Customer Service Tab” Customer Service Module
Customer Service Tab – Enter request Locate the task menu on the left side of the screen and select “Enter request” Customer Service Module
Enter Request Page – Request Information “Request Information” Page Customer Service Module
Request Information Page – Issuance office Select your location from the drop down menu Customer Service Module
Request Information Page – Request source Select source of the request from drop down menu Customer Service Module
Request Information Page – Add request item Select “Add request item” Customer Service Module
Enter request – Request item details This menu allows you to select document type Customer Service Module
Request Information Page – Request item type Select request item type from the drop down menu Customer Service Module
Request Information Page – Reason for waiving fee drop down menu If it is a no fee transaction, select reason for free record Customer Service Module
Enter request - Reason If one is given, select request reason from the drop down menu Customer Service Module
Requester Information Page This section allows you to enter the requester information. Mandatory fields are marked with an * Customer Service Module
Requester Information Page – Entering City Information Enter a partial or full name of the city and click on the search button. Choose the city from the drop down menu to the right of the search button. Customer Service Module
Pull Down Menu Reminder Required fields will automatically refresh to the top of the screen. Be prepared to use the scroll bar located on the right to continue your record entries. Customer Service Module
Enter request - Date of birth You can enter date information by use of the calendar function or keying data using the date slash mark Customer Service Module
Request Information Page – Entering Identification Type Use the drop down menu to select acceptable forms of ID Customer Service Module
Request Information Page – Notes Section Enter Notes if there is something unusual about this transaction. Customer Service Module
Enter request - Continue Select “Continue” Customer Service Module
Requester information – Save confirmation Select “OK” Customer Service Module
Customer Service Tab – Record Payment node “Record Payment” node Customer Service Module
Record Payment - Payment Summary – Add payment Select “Add payment” Customer Service Module
Record Payment – Payment type Select type of payment Customer Service Module
Record payment - Cash Enter payment amount Customer Service Module
Record Payment – Check details Required fields are marked with an * Customer Service Module
Record payment – Check details - Copy requester information Select “Copy requester info” if the information is the same on the check Customer Service Module
Check Details – Copy requester information Requester’s name and organization information will auto-populate Customer Service Module
Record Payment – Credit Card Select type of Payment-credit card Customer Service Module
Record payment – Credit card Enter payment amount and last four digits of the credit card number Customer Service Module
Record Payment - Continue and Save Select “Save” Customer Service Module
Record payment – Payment Summary This screen gives you a summary of the payment. You can add another payment at this time if necessary by selecting the “Add payment” button. Customer Service Module
Record Payment - Continue and Save Select “Continue” Customer Service Module
Record Payment – Save confirmation Select “OK” Customer Service Module
Enter a request – Search birth records link Select “Search birth records” in order to link a record to this request Customer Service Module
Enter request – Search record - Link This page allows you to enter the search criteria needed to locate the requested record Customer Service Module
Search birth records – search results This page gives you a summary of records that match your search criteria Customer Service Module
Search birth records – search results Click on the name of the record that you want Customer Service Module
Search birth records – Search results Choose the “select” button to the right of the listed record Customer Service Module
Search record – Select record The name on the selected record appears underneath “Request status” Customer Service Module
Search birth records - Tangible interest Select “Tangible interest” from the drop down menu Customer Service Module
Request Item Details – Add supporting document If it is necessary to prove tangible interest, select “Add supporting document” Customer Service Module
Enter a request – Add supporting documents This page allows you to enter information about documentation used to prove tangible interest Customer Service Module
Request Item details – supporting document type Select type of document from the drop down menu Customer Service Module
Add documentation – Document authentication Select document authentication from the drop down menu Customer Service Module
Add supporting documentation - Save Select “Continue” Select “Save” Customer Service Module
Select record – Save confirmation Select “OK” Customer Service Module
Enter request - Follow-on menu You can select from the Follow-on action drop down menu if necessary Customer Service Module
Request Information Page - “Follow-On action” Menu drop down Select “Update request status” Customer Service Module
Follow on action - Update request status This page allows you to view and change the status of a request Customer Service Module