Download
1 / 19
190 likes | 343 Views
Online Data Collection (OLDC). Working with ADD Forms October, 2004. Contents (click title to see that section or hit any key to proceed to the next slide). ADD Forms OLDC Menu Selection Screens Report Form Sections Summary Report Form Sections Report Forms Report Clone Help.

E N D
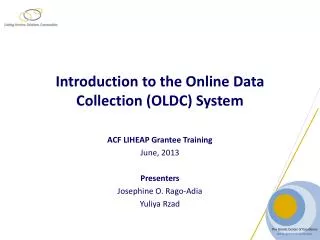
Online Data Collection (OLDC) Working with ADD Forms October, 2004
Contents (click title to see that section or hit any key to proceed to the next slide) • ADD Forms • OLDC Menu • Selection Screens • Report Form Sections Summary • Report Form Sections • Report Forms • Report Clone • Help
ADD Forms • The ADD forms covered in this tutorial include: • DDC Program Performance Report • DDC State Plan Reports (OLDC deployment date Summer 2005) • P&A Program Performance Report • P&A SGP
OLDC Menu Select “Report Form Entry” from the OLDC Menu
Help is available on every screen Selection Screens On the “Grantee Selection” screen, use the drop-down lists to select the Program, Grantee, and type of report. Click “Enter”
Selection Screens On the “Report Selection” screen, use the drop-down lists to select the Funding Period, Report Period, and Action* *Action types are defined on the next slide of this presentation The Report Display is already selected to best present the particular form or form section After the three step selections are made, click “Enter”
Selection Screens The “Select Action” drop-down list provides the following options: • New/Edit/Revise Report –opens report form for data entry • View/Print/Status Report –opens Status page where you can read, print, or determine the form’s workflow • Print Latest Version (HTML) –prints a formatted paper copy of the report form • View Latest Report – displays a quick view option • **Clone Report is only available under certain circumstances—see Section 5
Report Form Sections Summary • ADD report forms are presented in sections • Each section’s data is entered separately • A blank copy of a section may be created for multiple versions • Some section’s titles may be edited • Sections may be saved individually • The report status reflects the entire report, not just individual sections
Report Form Sections The top of the Report form shows the program, grantee, dates, and status of the report Any messages specific to this form are displayed under the Report Sections information Basic instructions and information about this form is also listed under the Report Sections data
Report Form Sections The middle of the screen contains action buttons such as add attachments, validate the form, and save section notes. The buttons that display depend upon an individual’s roles and the report status Sections of the ADD form are listed below the action buttons
Report Form Sections Form sections are listed toward the bottom of the Report Sections screen. Sections that allow name changes or the option to create a blank copy of a section have the “create” action available • Perform Action types include: • Create a blank copy of a section • Clear section information • Delete a section (the final section of a group may not be deleted) • Edit section data • Print the section
Report Form Sections “Create” action produces a blank copy of a section. Notice that the original section is automatically listed as “0” and the duplicate section is automatically listed as “1”. Enter a desired name in each section’s name field.
Action Buttons Report Forms The top of the Report form shows the program, grantee, dates, and status of the report The Report Progress bar shows the status of this form in relation to the entire workflow. Any messages particular to this form are displayed under the Report Progress bar
Report Forms Information about the Grantee and grant may already be entered from the database Open cells are available for data entry. Unavailable cells automatically calculate their values. Text boxes for narrative may allow between 2,000 and 4,000 characters
Use the breadcrumbs, or path, at the top of the page to navigate through OLDC The Report Progress Bar shows where this report is in the workflow The “Previous Section” and “Next Section” buttons move to another section, without having to return to the Report Sections screen Report Forms
Report Clone A special Action option is available--Clone Report--on the Report Selection screen. Cloning a report means to copy the report format and all report data to a current report period.
Report Clone After completing Steps 1-3 of “Report Selection”, for the report to receive the cloned information, click “Enter”. Steps 4 and 5 appear Select the funding period and report period for the original report Click “Clone”
Report Clone The special conditions required when cloning a report are: • Only a report from a different funding period can be cloned to the current funding period. Clones cannot be made from reports within the same funding period • Only submitted forms may be cloned. Forms with a status of saved, validated, or certified cannot be cloned • Forms may only be cloned as the first report of a funding period. Revisions cannot be a clone
Help • Grant Partners – contact your ACF Grants Office • ACF staff – contact your ACF Central Office Lead or call the IT Service Center