Download

1 / 30
300 likes | 437 Views
Training manual Supplier Self Service Training material for suppliers. Supplier Self Service (SUS) Process Flow. ECC. SUS. Email Notification. Create PO. PO In SUS. SUPPLIER. EPEDITOR. Message Communication. Create POR in SUS. POR in ECC PO. Create ASN. Inbound Delivery.

E N D
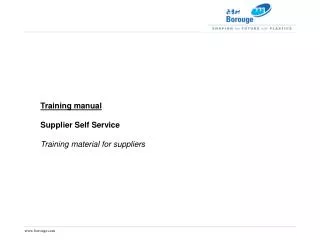
Training manual Supplier Self Service Training material for suppliers
Supplier Self Service (SUS) Process Flow ECC SUS Email Notification Create PO PO In SUS SUPPLIER EPEDITOR Message Communication Create POR in SUS POR in ECC PO Create ASN Inbound Delivery Create ASN Create ASN Goods Receipt Goods Returns
Step 1: Login to Borouge Portal This screen can be accessed via Borouge Home page.
Step 1: Login to Borouge Portal Supplier should use their respective user id and passwords to login
Step 1: Login to Borouge Portal • After logging Borouge SAP Portal Opens with two tabs. • Borouge Home – with information regarding the system • SUS Vendor User – as shown below Screen 1 Screen 2
Step 2: Creating a Purchase Order Response From the main menu, select the Purchase Order for which response needs to be sent.
Step 2: Creating a Purchase Order Response To open a PO user has the following options: All– To open all PO New– To open all new PO
Step 2: Creating a Purchase Order Response Click on ‘Process’ button to create a Purchase Order Response. Screen 1 Screen 2
Step 2: Creating a Purchase Order Response • Basic Data: Under Basic Data, supplier can assign their own Document Name to the • purchase order Response.Other fields like Document Number, Document Date, and • Purchase Order Number are defaulted.
Step 2: Creating a Purchase Order Response • Item Overview: Here suppliers can change the Quantity for responses in confirmed Quantity • field which is initially defaulted with reference to the Purchase Order. • In the Item Overview supplier can confirm or reject items individually by clicking the • ‘Confirm’ or ‘Reject’ icon. • Note: By clicking the item number or the description supplier can view the item level details
Step 2: Creating a Purchase Order Response • Change Item details: UnderBasic Data, supplier can enter the confirmed quantity. • Confirmed Quantity is usually defaulted by the PO order quantity. However, Supplier can change the same and enter the desired value for quantity. • In the “confirmed for” field, date for the delivery of the item could be entered, Note : Supplier should adhere to the terms and conditions of the PO
Step 2: Creating a Purchase Order Response • Schedule Lines: Under Enter Delivery Times, Suppliers can enter the delivery dates for a • new schedule line, as well as separate confirmed quantities for each delivery date if required. • This could be done by clicking on the “New Row” button and adding the Delivery date and • Confirmed Quantity. • Note : Supplier should adhere to the terms and conditions of the PO
Step 2: Creating a Purchase Order Response 5. Separate confirmed quantities for each delivery date if required. This could be done by clicking on the “New Row” button and adding the Delivery date and Confirmed Quantity. 6. Pricing Information (Item Detail Screen): Under Price information Net Value ordered is displayed and the Net Value confirmed is usually defaulted with reference to Net Value Ordered.
Step 2: Creating a Purchase Order Response • 7. Message (Item Detail screen): Under Messages, supplier can enter messages to the purchaser • and view any message from purchaser • Message from Purchaser: This could be viewed by clicking on the Message from • purchaser link. • Message to Purchaser: To Create a Message to Purchaser, Click on the link Message • to Purchaser and in the text box displayed enter the required text and save the text by • clicking the “Save Text” button • Note: Messages can be entered at header and item level
Step 2: Creating a Purchase Order Response 8. Partner Information (Item Detail Screen): Information regarding Sold – to – Party, Ship-To-Address is displayed. The Information includes Telephone, Fax and E-mail of Borouge. 9. Contract Reference (Item Detail Screen):The referred contract in the PO is displayed in this section along with contract item Number.
Step 2: Creating a Purchase Order Response • 10. Messages (Header Level):Under Messages, Supplier can enter messages to the purchaser and • view any message from purchaser. • Message from Purchaser: This could be viewed by clicking on the Message from purchaser link. • Message to Purchaser: To Create a Message to the Purchaser, Click on the link Message to Purchaser and in the text box displayed enter the required text and save the text by clicking the “Save Text” Button
Step 2: Creating a Purchase Order Response 11. Partner Information (Header Level): Information regarding Sold – to – Party, Goods Recipient and Ship-To-Address is displayed. The Information includes Telephone, Fax and E-mail details of Borouge. 12. Price Information (Header Level): This view displays the Net Value of the Confirmed & unconfirmed Items. -Non Editable
Step 2: Creating a Purchase Order Response 13. Attachments (Header Level): Under Attachments, any Attachment from Purchaser could be viewed by clicking the link displayed. Note: Borouge buyer will attach the soft copy of the PO with the terms and conditions
Step 3: Posting a Purchase Order Response To Post the Response Click on “Send” Button on the top half of the Header Screen
Step 3: Posting a Purchase Order Response Message “Success your changes have been adopted successfully” is displayed and the status will change from New to Confirmed Post the Purchase Order Response by clicking the button • Note: Every time a POR is created and saved, Borouge Buyer will enter a note in the PO to acknowledge that they have received your POR. The acknowledgement note would be displayed in the Header text of PO. For any change in the PO, which may be an addition to the note, change in quantity etc, you as a supplier will receive an email intimation informing that the PO has been updated/changed
Step 4: Creating Advance Shipping Notification This function enables suppliers to create Shipment Notifications in Supplier Self-Services (SUS), and send them to customers.
Step 4: Creating Advance Shipping Notification Purchase Order View: Choose the Purchase Order from the Displayed List to view the ASN Screen. Select the Purchase Order by clicking the Document Number for the corresponding PO
Step 4: Creating Advance Shipping Notification Shipment Notification Screen: Click on Button ‘Create ASN’ to start processing the Advanced Shipment Note. Note:Create ASN button will only appear if the POR is in synch with the PO.
Step 4: Creating Advance Shipping Notification Select the items from Item Overview –for which you are creating ASN, then clicking ‘Create ASN’ button.
Step 4: Creating Advance Shipping Notification A supplier can enter the following data while processing an ASN.
Step 4: Creating Advance Shipping Notification • A supplier can enter the following data while processing an ASN. • Basic Data (Header Level):In Basic Data supplier can enter Document Name (Supplier Reference) and can View the following Details: Shipping Notification Number, Document Date, Status of the Document 2. Delivery Information: Supplier can enter all delivery related information in this screen
Step 4: Creating Advance Shipping Notification 3. Item Overview (Header Level):In the Item overview, supplier can enter/edit Delivery Quantity for items Note: If one delivery Quantity shall be defaulted. If multiple delivery quantity will appear as 0. In this case Quantity should be entered. 4. Partner Information (Header Level): Information regarding Sold – to – Party, Goods Recipient and Ship-To-Address is displayed. The Information includes Telephone, Fax and E-mail details of Borouge.
Step 4: Creating Advance Shipping Notification 4. Basic Data (Item Level):Under Basic Data, supplier can add the Delivery Quantity 5. Mass (Item Level):Under Mass, supplier can add the Weight of each item if required (optional)
Step 4: Creating Advance Shipping Notification 6. Partner Information (Item Level): Information regarding Sold – to – Party, Goods Recipient and Ship-To-Address is displayed. The Information includes Telephone, Fax and E-mail details of Borouge. 7. Terms of Delivery (Item Level):I n the Terms of Delivery supplier can view the Inco term.
Step 5: Posting Advance Shipping Notification To post the Advance Shipment Notification click to go back to the header level, where you’ll find the button ‘Goods Delivered to Recipient’ at the top half of the Process ASN screen. On Successful posting supplier will receive a Success message.