Download
1 / 78
780 likes | 1.09k Views
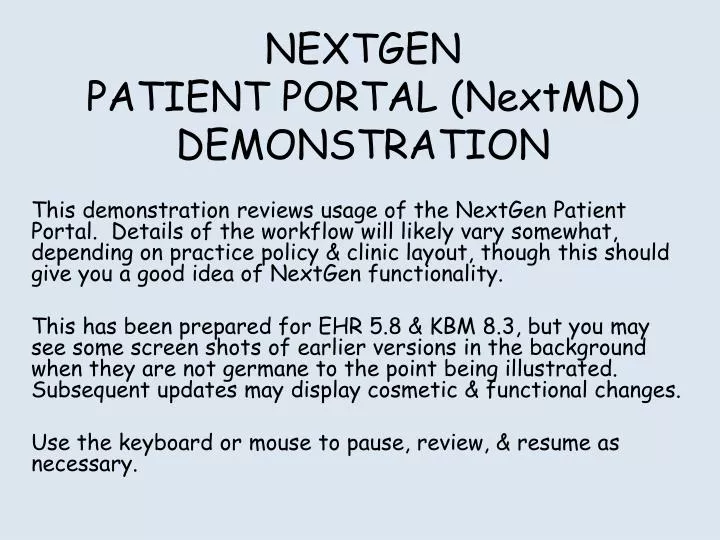
NEXTGEN PATIENT PORTAL ( NextMD ) DEMONSTRATION. This demonstration reviews usage of the NextGen Patient Portal. Details of the workflow will likely vary somewhat, depending on practice policy & clinic layout, though this should give you a good idea of NextGen functionality.

E N D
NEXTGENPATIENT PORTAL (NextMD)DEMONSTRATION This demonstration reviews usage of the NextGen Patient Portal. Details of the workflow will likely vary somewhat, depending on practice policy & clinic layout, though this should give you a good idea of NextGen functionality. This has been prepared for EHR 5.8 & KBM 8.3, but you may see some screen shots of earlier versions in the background when they are not germane to the point being illustrated. Subsequent updates may display cosmetic & functional changes. Use the keyboard or mouse to pause, review, & resume as necessary.
Introduction • The NextGen Patient Portal was formerly known as “NextMD.” While they are moving away from this name, for the near future you will continue to see the two names used interchangeably at various spots in the program. • Our initial usage of the portal will be somewhat basic, though more components will be added over the coming months. • The primary advantage of using a patient portal is to provide a secure means of communication between patients and medical practices, which should be more efficient than playing “Phone Tag”—hopefully improving patient care, as well as patient & provider satisfaction.
Introduction • The Patient Portal originated as a separate program component, so sometimes it feels a little “cobbled on.” This is getting better, but sometimes the workflow is a bit different from the general tasking workflow—and this presents the potential for confusion for infrequent users. • There are still some Ghosts in the Machine. While the Patient Portal isn’t perfect, it is usable as a step toward a more capable & user-friendly portal in the future. • The portal is currently only activated for Family Medicine as a running trial. The ultimate direction the HSF takes regarding patient portals in the outpatient & inpatient settings remains to be fully determined.
Enrollment The enrollment process will be handled primarily by the front office staff. Patients can be given enrollment information at the time of a visit, or over the phone—meaning that a new patient can enroll before the first visit, allowing the patient to enter medical history information ahead of time.
To begin the enrollment process, open the patient in NextGen & use the File menu as illustrated, clicking Manage Enrollment.
Enter the patient’s Email address. A unique Password Token will be generated for each patient. This can be printed or written down for the patient, or given to the patient over the phone. Tell the patient to watch for an Email with instructions on completing the enrollment process.
This is what the printed information looks like; they’ll receive identical information via Email.
Notice: As of the installation of KBM 8.3.6 on June 28, 2014, importing of online forms from patients is broken, so we should suspend sending online medical history forms until further notice. NextGen has not been particularly helpful in correcting this flaw. I’m leaving the instructions about online forms in place in hope that this problem is rectified soon.
For new patients who you are enrolling for an initial visit in the future, we want to send them some medical history forms to complete before that visit. Click Add.
Different practices may use various sets of forms in the future. Click the + sign to expand Online Forms. (You may have to clear the Send default attachments only checkbox if the selections appear grayed-out.) For this example, in Family Medicine, we’ll check New Patient Forms-FM to send this set of forms. Click OK then OK again to complete the process. The patient will receive some basic medical history forms to complete before the visit, speeding up the sign-in process on the day of the visit.
The patient will go to www.NextMD.com and follow simple instructions to create a logon and password known only to the patient. When enrollment has been completed, enrollment status will change to Enrollment Completed.
Children can be enrolled in a few ways. If the parent is not enrolled in the Patient Portal, the child could be enrolled as above, with the parent providing the Email address. The parent could then complete the enrollment on behalf of the child. This will often be the simplest procedure to follow.
Children can also be linked to their parents & other authorized caregivers during the enrollment process. Click Add Care Manager, then search for the parent. When located, double-click on the name.
The parent’s name & portal enrollment status now display. Additional parents/caretakers can be added.
This can also be done the other way around. Starting with an enrolled parent, you can click Add Dependant, then search for & select the child. An enrollment token will be generated for the child, to be given to the parent to complete the process. At the NextMD web site, the parent will be able to communicate with the practice about herself, & also about her child.
These Add Care Manager & Add Dependant options are available mainly for convenience & to speed the enrollment process for the staff when the patient wants to enroll multiple family members at once. It should be made clear to the parents that each patient, whether child or adult, has his/her own enrollment. If the mother is going to use the portal to ask a question about her child, she would log on to the portal using the child’s log on information. Note that you could establish similar care manager/ dependant relationships in other situations, e.g., between a demented/disabled senior & a caretaker daughter.
Viewing Portal In Workflow Users may need to make some configuration changes in the Workflow/Inbox to see Patient Portal messages. You also need to be able to tell when the patient is enrolled in the Patient Portal.
With the Patient Portal activated, users will reconfigure their Work Flow windows to include NextMD messages. If necessary, right-click on the Title Bar & choose Window Configuration.
When you have a patient’s chart open, you can tell that the patient is enrolled in the Patient Portal by looking At the NextMD status on the Information Bar.
Sending Forms and Documents As mentioned above in the enrollment process, various forms & documents can be sent to the patient via the Patient Portal. This may be performed by the front office staff, nurses, or providers.
Reminder: As mentioned above, the KBM 8.3.6 upgrade on June 28, 2014 broke importing of online forms. We’ll let you know when NextGen has restored this functionality.
For patients who have completed the enrollment process, you can use the File menu to send forms and documents. Suppose we want to send some history forms to a patient. Use the File menu as illustrated, clicking Send Online Form.
In the next window we’ll select New Patient Forms-FM, then click OK. The patient will receive an Email asking her to log on to NextMD to view & complete the form.
You can also send the patient any document generated within NextGen. Use the File menu as illustrated, clicking Send EHR Document.
Browse through encounters, select the desired document(s), then click OK. The patient will receive an Email telling her to log on to NextMD to receive the document (which can be printed or saved as a PDF). Note that one good use for this is to transmit the Patient Plan to the patient. While Meaningful Use requirements state that patients are to receive such summaries after every visit, many providers find the workflow of printing this before the patient leaves difficult. But these requirements are also met if the summary is sent via the portal within 3 business days.
From the History Bar, there is a simpler way to send a document to a patient. Right-click on the document, then choose Send to Patient Portal… You can type a message if desired, then click Send. A confirmation then displays.
Finally, note there is another option under the NextMD menu called Interactive Medical Forms. We are not using these at this time.
Receiving & Reviewing Forms When a patient returns a completed form via the Patient Portal, this will need to be imported to the chart by the staff, & reviewed by staff and/or providers in the clinic.
Once again: The KBM 8.3.6 upgrade on June 28, 2014 rendered importing of online forms dead in the water. Don’t you love it when an “upgrade” is a major step backwards?
Let’s say the Triage Nurse receives notice about an Online Form in the Patient Portal Online Forms Inbox. The nurse may wish to begin by clicking the (go to) Chart Button. This would be particularly necessary if you wanted to figure out who the PCP is, e.g., to send a task to the PCP that the Online Forms have been received.
You could then send a task to the provider notifying him about the Online forms. Click + To Do, then select the provider in the popup by clicking Assign To.
On the ensuing popup, in the Search users and groups box, type the name (e.g., Duffy) & click Search.
When the search results display, select the correct user & click Add. The recipient will appear on the list on the right. When done click OK. In the final screen click Add.
But whether or not you send a task to the provider, & whether or not you’ve opened the patient’s chart, the nurse’s main goal is to import the Online Form. Open the form by double-clicking on the entry (or selecting it & clicking + to Chart).
You can choose to import the forms to a specific encounter, or just allow the program to create a new encounter. A list of submitted forms appears on the left.
The forms can be accepted one at a time, but the Triage Nurse’s main task is to import the forms. So the easiest thing to do is click Accept & Import All.
The forms are imported & posted to the patient’s chart, & this item drops off the nurse’s NextMD Inbox. Note you don’t even have to have the patient’s chart open to perform this importation.
When the provider opens the chart, either in response to a task, or during the first visit with the patient, the Patient Portal forms (actually templates) can be seen on the encounter.
Select each template and review the entries. The general rule is that NextGen tries to import anything from a check box into the appropriate part of the chart, while anything in a Comments Box will have to be manually entered by the user.
Yes answers on the Health Maintenance Portal template will be imported to the Order_Management template—though sometimes the details will be incomplete.
Positive checkboxes in the Allergy section of the Medications and Allergies Portal template will be imported to the Allergy Module. You will have to enter other allergies & the medication list manually.
Most of the answers on the Social History Portal template will be imported to the Social History template—though you’ll want to double-check this. As of this writing, there appears to be some inconsistency as to how the tobacco details are imported.
Most of the check boxes on the Chronic Illnesses template will be imported to the Chronic Problem List. You’ll have to enter anything the patient typed in the Additional Chronic Illnesses box manually.
To reiterate: NextGen imports many of these items the best it can, but the import process is often incomplete, & the transition to KBM 8.3 in 2014 may further complicate the picture. It is still the provider’s responsibility to review these templates & make any manual additions or clarifications necessary when seeing the patient. Obviously, we’re still ahead of the game at the first visit if the patient has been able to submit this information ahead of time, instead of having to fill out paper forms that have to be reviewed & added to NextGen at the time of the visit.
Medical Questions Patients can send us medical questions, & we can respond through the Patient Portal.
Incoming medical questions will probably be routed to specific users in each clinic, such as a Triage Nurse Group. The Triage Nurse will see the message in the NextMD Communications Inbox. Some clinics may have established rules that allow the nurses to answer many of these questions. If so the nurse will probably want to begin by clicking Chart to review information necessary to answer the question.
In other clinics, or in other circumstances, however, the nurse may need to refer the question to a provider. In this case, let’s say the nurse has reviewed the chart, & needs to send the question to Dr. Duffy. Begin by double-clicking on the message.
Notice this looks more like conventional Email than the regular tasking function within NextGen. Click the Forward button.