Download
1 / 48
540 likes | 1.09k Views
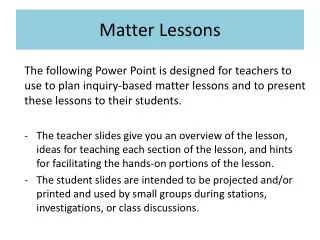
Changes in Matter Lessons. The following Power P oint is designed for teachers to use to plan inquiry-based physical and chemical change lessons and to present these lessons to their students.

E N D
Changes in Matter Lessons The following Power Point is designed for teachers to use to plan inquiry-based physical and chemical change lessons and to present these lessons to their students. • The teacher slides give you an overview of the lesson, ideas for teaching each section of the lesson, and hints for facilitating the hands-on portions of the lesson. • The student slides are intended to be projected and/or printed and used by small groups during stations, investigations, or class discussions.
Changes in Matter Physical Changes Teacher Slides 3 - 10. Student Slides 11 - 21. Chemical Changes Teacher Slides 22 - 30. Student Slides 31 - 37. Making Slime Teacher Slides 38 - 41. Student Slides 42 - 48.
Physical ChangesBased on Interconnections, Grade 5: Physical Change and Mystery Chromatography Lessons pg. 161 - 166 Teacher Slides
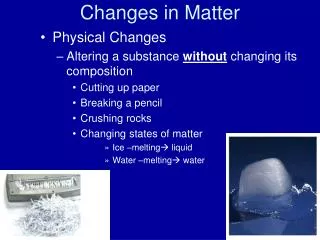
Physical Changes Objectives / Indicators Compare changes in substances that indicate a physical change has occurred. Describe the appearance of a substance before and after a physical change. Evaluate evidence that indicates a physical change has occurred. ILOs Observe simple objects, patterns, and events and report their observations. Compare things, processes, and events. Solve problems appropriate to grade level by applying science principles and procedures. Demonstrate a sense of curiosity about nature.
Physical Changes ENGAGE: Crush a Can Contest EXPLORE: Physical Change Stations EXPLAIN: Developing a Definition of Physical Change ELABORATE: Mystery Chromatography EVALUATE: Problem of the Week &Chemical / Physical Change Sort (complete after doing Chemical Change Lesson)
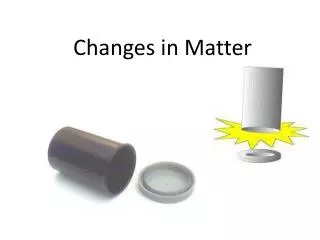
Engage: Physical Changes Bring in three empty aluminum cans. Ask students to describe the properties of the cans. Then ask students how they could change the can. After discussion, invite three students to the front of the room to have a can crushing contest. Then, ask class to explain how the cans have changed. Introduce the term physical change, and name can crushing as one example of a physical change. Tell the students that they will be visiting stations today based on physical changes to matter. Let them know that by the end of the activity they should be able to create their own definition for a physical change.
Explore: Physical ChangesBased on Interconnections, Grade 5: Physical Change Lesson, pg. 161 Students will visit up to 8 station that demonstrate a physical change to matter. At the stations students will need to make observations of the matter before and after the matter has changed and explain how the matter changed. You could have students record information on index cards. Each station would then have its own card. Teacher Note: Some stations take longer and you may want to do these as a class, with all students doing the activity at the same time. Longer stations include: • Homemade ice cream (takes 20 minutes to solidify) • Styrofoam cups (takes 10 minutes in a pressure cooker) • Polyacrylamide crystals (takes 4 hours to fully expand) • Epsom Salt, part 2 (takes a few days to a week for water to evaporate)
Explain: Physical Changes Have students share observations of changes from the stations. Guide students to make generalizations about the changes (expanded, contracted, new shape, new state of matter, etc.). Based on these generalizations have students develop a definition for physical change. Share the Physical Change Poem (from Discovery Gateway Museum) Sample Ideas from Class Discussion on Physical Changes Examples of Physical Change • New shape • Expansion • Contraction • New state of matter • Dissolving • Evaporating Definition of a Physical Change During a physical change matter changes form, but it is still the same substance.
Elaborate: Physical ChangesBased on Interconnections, Grade 5: Mystery Chromatography, pg. 163 In this problem solving investigation students use chromatography (the physical separation of a mixture) to solve a mystery. • Have students explore chromatography with a marker and coffee filter. Discuss how this shows a physical change. • (Optional) Let students explore more by doing their own chromatography experiment. Students might try different colored markers, different liquids, or different types of paper. • Have students solve the Mystery of the Cancelled Class by using what they know about chromatography to determine who wrote the class is cancelled note. See page 163 in Interconnections, Grade 5 for a detailed explanation of this activity.
Evaluate: Physical Changes Physical / Chemical Change Sort(available on the website) Complete this after finishing the Chemical Change Lesson. Problem of the Week: Physical Changes (available on the website)
Physical Changes Student Slides
Physical Change Stations Read the direction slide with your group. Make a BEFORE observation. Work together to complete the activity. Make an AFTER observation. Write a sentence about how the matter has changed.
Homemade Ice Cream Directions • Put ½ cup milk, 2 T of sugar, and ½ t of vanilla in a small Ziploc bag. • Seal the bag. Then add a second bag around it. • Put 2 cups of ice and 3 T of rock salt in a large Ziploc bag. • Put the small bag inside of the large bag. • Seal the large bag. Then shake the bag for about 20 minutes! Before • List the ingredients you used. After • Describe the ice cream you made. Explanation How are the ingredients and the final ice cream different?
Styrofoam Cups Before • Measure the height of your cup in centimeters. • Draw your cup. • Write your name on your cup with a permanent marker. • Give your cup to your teacher. She will put it in a pressure cooker for 20 minutes. After • Measure the height of your “changed” cup. • Draw your “changed” cup. Explanation Describe how the appearance of your cup changed. Include information about the height in your description.
Polyacrylamide Crystals Before • Take 3 crystals from the cup. • Make observations of the crystals. DO NOT TASTE THE CRYSTALS! • Draw and describe the crystals. • Place the crystals in a small container. • Pour water over the crystals so that the water is about 3 cm above the crystals. After (Wait 4 or more hours.) • Remove the crystals from the cup. • Make observations of the crystals. How do they look and feel? Explanation Describe how the appearance of your crystals changed.
Popcorn Before • Count 15 un-popped kernels and add them to a plastic cup. • Make observations of the kernels. • Find the weight of your 15 kernels and the cup in grams. After • Take 15 popped kernels and add them to a plastic cup. • Make observations of the popcorn. How do they look and feel? • Find the weightof your 15 pieces of popcorn and the cup in grams. • Watch the YouTube video by hotpopcornpopper: http://www.youtube.com/watch?v=ov78V20kAtI Explanation Describe how kernels change into popcorn.
Ivory Soap Before • Make observations of the soap. DO NOT TASTE THE SOAP! • Find the width, height, and length of the bar. Can you calculate the volume of the soap? • Draw and label a diagram of the bar of soap. Include measurements in your diagram • Microwave the soap for 60 seconds. • What do you predict will happen to the soap? Why? After • Make observations of the “changed” soap. How does it look? Feel? Can you wash your hands with it? • Measure the “changed” soap. • Draw a picture of the “changed” soap. Explanation Describe how the appearance of your soap changed. Why do you think this happened?
Paper Airplanes Before • Make observations of your paper. How does it feel? What size is it? • Record three observations. After – Make a paper airplane. Follow the instructions or make your own! • Draw and label a picture of your airplane. • You may fly your airplane 1 time. Be sure to aim away from others. Explanation Describe how the appearance of the paper changed. Airplane instructions: http://www.amazingpaperairplanes.com/Basic_Dart.html
Cereal Before • Take 4 pieces of cereal from the bag. • Make observations of your cereal. Use at least 3 of your senses. • Draw the cereal and record your observations. • Crush the pieces of cereal in your hand. After • Make observations of the crushed cereal. Use at least 3 of your senses. • Draw the crushed cereal and record your observations. Explanation What changed when you crushed the cereal? What remained the same?
Epsom Salt Before • Take one small container per group. • Fill the container ½ full of water. • Add 2 level spoons of salt. • Place the lid on the container. Gently shake the container so that the salt dissolves. Be careful not to spill. • Use a piece of paper to put a label under your container. Place the container on the windowsill. After (About a week later) • Make observations of your container. What do you see? • Discuss how this happened. Where did the water go? Explanation • Explain what happened when you mixed the salt and water. • Explain what happened to the saltwater after it was left on the windowsill for one week.
Chemical ChangesBased on Interconnections, Grade 5: Chemical Reactions and The Cookie Caper: A Chemical Mystery, pg. 167 - 173 Teacher Slides
Chemical Changes Objectives / Indicators Identify observable evidence of a chemical change. Investigate evidence for changes in matter that occur during a chemical reaction. Compare a physical change to a chemical change. ILOs Observe simple objects, patterns, and events and report their observations. Given the appropriate instrument, measure length, temperature, volume, and mass in metric units. Use data to construct a reasonable conclusion. Solve problems appropriate to grade level by applying science principles and procedures.
Chemical Changes ENGAGE: Making Pancakes EXPLORE: Chemical Change in a Bag EXPLAIN: Chemical Change Reading and Frayer Model ELABORATE: Chemical Change Mini-Experiments EVALUATE: Chemical / Physical Change Sort and Making Slime EXTEND: Cookie Capers
Engage: Chemical Changes Show students a picture of ingredients for making pancakes and ask students to predict what you will be making. Then discuss how the ingredients in pancakes change when you cook the batter. Explain that making pancakes is a chemical change because you have created a new substance. Share that two piece of evidence that scientists use to determine if a chemical change has occurred is the production of a gas and an unexpected color change.
Explore: Chemical ChangesBased on Interconnections, Grade 5: Chemical Reactions, pg. 167 In this investigation, students make a chemical reaction in a Ziploc bag. In the Interconnections lesson, students use water and calcium chloride to observe a temperature change. To observe color changes, production of gas, and temperature changes, consider doing this same experiment with baking soda and phenol red in the bag as well: http://www.omsi.edu/sites/all/FTP/files/chemistry/MM-U2.041-ReactionYesNo.pdf STUDENTS MUST WEAR SAFETY GOGGLES DURING THIS LAB! After the lab, discuss student observations. Name temperature changes, unexpected color changes, and a gas being produced as evidence for a chemical change.
Explain: Chemical Changes Have students list all of the clues, or evidence, that they have seen so far that show a chemical change has occurred (temperature change, color change, production of a gas). Share the Chemical Change Poem (from Discovery Gateway Museum) with students and the Evidence of a Chemical Change List. Have students create a Frayer Model graphic organizer for Chemical Changes in their notebook. For the characteristics focus on the evidence for chemical changes. To explore examples of chemical reactions in real life, visit the American Chemical Societies website for kids: https://acswebcontent.acs.org/scienceforkids/index.html#Reactions
Elaborate: Chemical Changes Have students complete the 4 mini experiments on the Chemical Change Experiments worksheet (available on the website). As students complete the experiments and fill in the student worksheet tell them to focus on the evidence that tells them that a chemical change has taken place. STUDENTS SHOULD WEAR SAFETY GOGGLES DURING THESE EXPERIMENTS!
Evaluate: Chemical Changes Discuss pictures of changes and have students determine whether the picture represents a physical or chemical change. (see pictures in student slides) Physical / Chemical Change Sort(available on the website) Problem of the Week: Chemical Changes (available on the website)
Extend: Chemical ChangesBased on Interconnections, Grade 5: Cookie Caper: A Chemical Mystery, pg. 171 In this problem solving investigation students use observations of chemical and physical changes to solve a mystery. Students test baking soda, baking powder, and flour with different liquids. Based on their observations they determine if a mystery powder is baking soda, baking powder, or flour. • Share the cookie caper mystery story with the students. • Give each student a chart to record observations. Also, make an extra chart for each group to use as a placemat for the cups of powders. Using the same chart to organize the materials really helps students with this experiment. • After the experiment discuss the answer to the mystery. Also discuss which tests resulted in chemical changes (iodine and flour = color change, baking soda and vinegar = gas produced, etc.) See page 171 in Interconnections, Grade 5 for a detailed explanation of this activity.
Chemical Changes Student Slides
What Am I Making? What happens to the batter as it is cooking? How is the pancake different from the batter?
Question: What changes take place when you mix calcium chloride, baking soda, and phenol red? Observations: Before After Conclusions: Mixing calcium chloride, baking soda, and phenol red is a ___________ ____________ because I observed _____________________________________________
Chemical Change A change in matter that produces new substances. Evidence of a Chemical Change • Gas is produced. • Change in temperature. • Change in odor. • Unexpected color change. • A solid is formed when combining 2 liquids (precipitate). • Light is emitted.
What is the difference between a chemical and a physical change?
Making Slime Teacher Slides
Making Slime Objectives / Indicators Compare a physical change to a chemical change. ILOs Describe or explain observations carefully and report with pictures, sentences, and models. Demonstrate a sense of curiosity about nature.
Making Slime Making slime with Elmer’s glue and a borax solution is a great way to engage students and have them apply their understanding of chemical and physical changes to a new investigation. Have students record observations of the glue and borax solution. Have students follow the directions to make their slime. Tell students that they may have to add a little more glue or borax to get the “right” consistency. Have students explore their slime. Then clean up and have students record observations of their slime in their notebooks. Have students decide whether making slime is a physical or chemical change and support their answer with evidence. Materials per Student 1 small cup (3 oz) 1 spoon Access to glue Access to borax solution (made with ½ cup of water to 1 t of laundry borax) Access to food coloring 1 Ziploc Teacher Note: This can be messy. Cover desks with newspaper and tell students to keep their hands over their desks.
Making Slime Explanation Making slime is a chemical change because you make a new substance, with properties that are different from the borax solution and glue. Slime acts more like a solid, while the glue and borax are liquids. So students might say that an unexpected state change is their evidence that a chemical change has taken place. For a more detailed explanation of why making slime is a chemical reaction see: http://chemistry.lsu.edu/Outreach/item1739.pdf For extension ideas see: http://www.sciencebob.com/experiments/polymer.php
Making Slime Student Slides
Science Notebook Set - Up Making Slime Question: Is making slime by mixing glue and borax solution a physical or a chemical change? Hypothesis:________________________________________________________________________________________________________________ Observations: Conclusion: Is making slime a physical or chemical change? Support your claim with specific observations that you made.
Observe the two substances on your table. List the properties of each substance on the chart in your science notebook. Glue and Borax Solution
Directions for Making Slime • Fill one small cup with about 1 inch glue. • Add 6 spoonfuls of water to the cup. • Add 1 drop of food coloring to your cup. • STIR. • Add 3 spoonfuls of borax solution into your cup. • Stir until it starts to form together. Then take it out and knead it. • Too sticky - add more borax solution. Too chunky - add a tiny bit of glue. Or just try adding a little of the leftovers that are still in your cup.
EXPLORING SLIME • Does it bounce? • Does it tear? • Can you make thin sheets? • What is the longest continuous strand you can make? • How is the product (slime) similar to the reactants (glue and borax), how is it different? What do you think…. Is making slime a chemical or a physical change? Be ready to defend your answer!
CLEAN UP • Put your slime in a plastic bag. • Throw away used cups. • Use a towel to clean up any spills.
Return to your science notebook. List the properties of slime on the chart in your science notebook. Write a conclusion. Is making slime a physical or a chemical change? Defend your answer! Slime