Download
1 / 14
140 likes | 356 Views
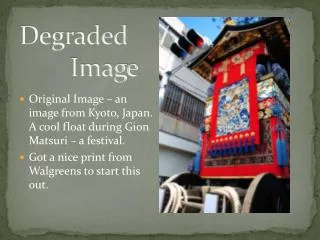
DEGRADED IMAGE. b y ally king. o riginal image. s tep 1: print image. I printed the image at the library with the color printer. The quality wasn’t very good, but it worked. I printed it out twice just in case I messed up or changed my mind during the process. . step 2: cut .

E N D
DEGRADED IMAGE by ally king
step 1: print image I printed the image at the library with the color printer. The quality wasn’t very good, but it worked. I printed it out twice just in case I messed up or changed my mind during the process.
step 2: cut • I cut out just our faces, bodies, and the car out of the background. • Then I changed my mind and decided to leave the background so I used the second image I printed and cut just the edges and words off of that one.
step 3: make a rocket • I drew a rocket with crayons and then cut it out. • Then I put our faces inside of the rocket.
step 4: put the rocket in a sky First, I taped the rocket to a black piece of poster board. Then, I cut out stars and a moon to make it look like the night sky.
step 5: shine a light through the stars • next, I had my roommate hold up the poster board in front of my wall. • I turned out all of the lights in my room. • then I had my roommate hold the flashlight on my phone in front of the star shape so that it would be shown on the wall. • I put the poster my boyfriend made me in the center of the star. • I took a picture of the star on the wall and uploaded it to my computer.
step 6: make a pattern • once I uploaded the image, I took it into photoshop and made it smaller and repeated it throughout the page to make a pattern. • then I printed it in black and white.
step 7: paint with coffee • I painted with coffee in my design fundamentals class my freshman year and it gave the paper a cool, older, rustic feel. I thought it would be cool to add that quality to the star pattern. • I didn’t have actual coffee though, just coffee beans. I tried mashing them up and then adding water, but when I painted with them it just made a big, dark mess.
step 7 redo:paint with milk • Then I thought, milk might make an interesting white quality to the image. I had printed out three pages of the star pattern so I had plenty to work with. I also stapled another sheet of computer paper to the back since I was covering it with liquid. • Painting with milk was a success! I also added salt to the picture with gave it a feel of little stars being sprinkled everywhere. • Then I let the two milk covered sheets of paper (and the coffee mistake) dry overnight.
step 8: cut out a star • I cut out one of the stars in my pattern for my next and final step to work.
step 9: put pattern in a candle • For my final step, I filled this huge candle holder with coffee beans and put the candle in the middle. • I then stuck the milky star pictures in the jar and placed the cut out star where you could see the candle. • I tried to light the candle so that the glow would come, but my lighter just wouldn’t work. I took the picture of the star anyway and it actually had a glow to it! So the picture turned out how I wanted it to look anyway. This picture is my final image!
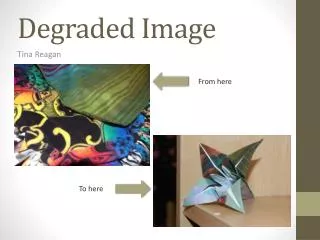
degraded image. from this… …to this.