Download
1 / 17
180 likes | 555 Views
Paula Banks & Wendy Hale. Death by PowerPoint Presentation 2: Drag and Drop. Thursday 31 st January 2008. Drag and Drop in PowerPoint. This feature is created using a specially adapted PowerPoint file. This file must be used if you wish to make use of this facility.

E N D
Paula Banks & Wendy Hale Death by PowerPoint Presentation 2: Drag and Drop Thursday 31st January 2008
Drag and Drop in PowerPoint • This feature is created using a specially adapted PowerPoint file. This file must be used if you wish to make use of this facility. • The ‘Drag and Drop’ feature is not supported by the standard version of Microsoft PowerPoint and has been created for the use of teachers only. *Further information about the use of this file can be found by contacting hw@ppt-user.de
Positiv Negativ einfach hässlich nervig faul langweilig schwierig freundlich interessant wunderbar anstrengend
Before you begin… • Once you have the file, you will need to alter the macro security settings on your computer. • Steps to take • Click on the ‘Tools’ tab at the top of the screen • Scroll down to ‘Macros’ • Move your curser across to the right and select ‘Security’ • On the ‘Security level’ tab select ‘medium’ (or less)
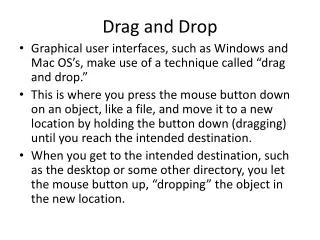
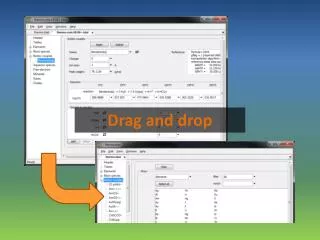
Steps to take (1) • Load up your ‘Drag and Drop’ slide and make sure ‘Macro Security’ is set to ‘medium’ or less • Insert a text box (it is a text box in this example, but can be any other object) • Select ‘Fill colour’ on the bottom tool bar to change colour of the text box • Type word(s) into text box • Right click on the outline of the text box • Select ‘Run Macro’ – it should have ‘drag and drop’ written in the box • Repeat as many times as required • When you have finished the presentation, you will need to move objects back to their normal position
Action Buttons in Drag and Drop • Steps to take • Select ‘Auto Shape’ • Select action button • Select action button type • Drag to size • Action setting menu will appear • Select hyperlink or action • Drop down to appropriate slide It is important to insert action buttons so that you can move easily between slides.
POLICE ARRÊT ARRÊT
du des de la
le nord le sud l'est l'ouest le centre le nord-ouest le nord-est le sud-est le sud-ouest