Download
1 / 51
510 likes | 677 Views
Chapter 9. Files, Printing, and Structures. Chapter 9 Introduction. Chapter 9 Topics. Saving data to sequential text files Reading the data back into an application Using the OpenFileDialog, SaveFileDialog, ColorDialog, and FontDialog controls

E N D
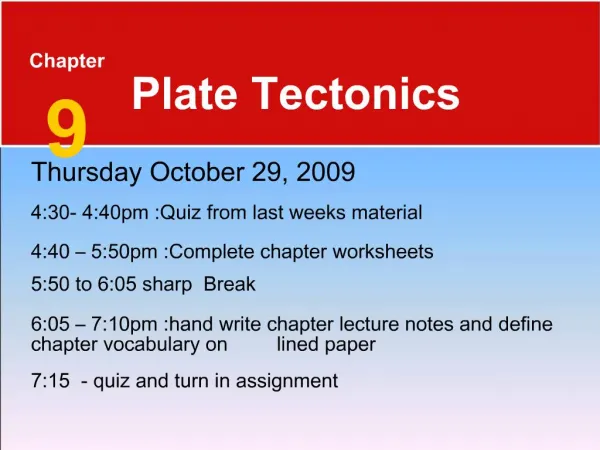
Chapter 9 Files, Printing, and Structures
Chapter 9 Topics • Saving data to sequential text files • Reading the data back into an application • Using the OpenFileDialog, SaveFileDialog, ColorDialog, and FontDialog controls • Using the PrintDocument control to print reports from your application • Packaging units of data together into structures
Section 9.1Using Files A File Is a Collection of Data Stored on a Computer Disk Information Can Be Saved to Files and Later Reused
The Life Span of Data • Thus far, all of our data has been stored in controls and variables existing in RAM • This data disappears once the program stops running • If data is stored in a file on a computer disk, it can be retrieved and used at a later time
Three Steps in Using a File • The file must be opened If it does not yet exist, it will be created • Data is read from or written to the file • The program closes the file
Reading and Writing to a File • Data must be in retrieved from disk and put in memory for an application to work with it • Data is transferred from disk to memory by: • Reading it from an input file • Placing it in variables or control properties • Data is transferred from memory to disk by: • Writing it to an output file • Getting it from variables or control properties • Data is frequently placed in the text property of a control
File Types/Access Methods • Text file type • Character based text • Contents can be viewed by Notepad • Binary file type • Pure binary form • Contents cannot be viewed with a text editor • Access Methods • Sequential access – a continuous stream of data written and read as a whole from beginning to end • Random access – access in any order with data written to or read from specific places in the file • Like the difference between a casette tape and a CD
Establishing StreamWriter Objects • A StreamWriter object is used to write to a sequential text file in the following way: • Declare a variable of type StreamWriter • Create a StreamWriter object and assign it to the StreamWriter variable using either the • CreateText method for new files • AppendText method for existing files • Variable phoneFile now defines a stream of data that can be written to phonelist.txt Dim phoneFileAs System.IO.StreamWriter phoneFile = System.IO.File.CreateText(“phonelist.txt”) phoneFile = System.IO.File.AppendText(“phonelist.txt”)
Using a String Variable as File Name • Filename can be a string literal as already shown but a string variable is more flexible • User can select the file they wish to edit • What if Notepad could only edit “textfile.txt”? • Example with string variable as filename • Can allow the user to enter the filename • Substitute txtFile.text for “customer.txt” • User can then enter filename in a text box Dim custFileAs System.IO.StreamWriter Dim fileName as String fileName = “customer.txt” custFile = System.IO.file.AppendText(fileName)
File Paths • Filename can include the file path • Can be a complete file path with drive letter “C:\WordProc\memo.txt" • Refer to a file in the default drive root directory "\pricelist.txt" • Or include no path information at all "mytext.txt“ • If no path information specified, the bin folder of the current project is used
Writing Data to a File • The WriteLine method of a StreamWriter object actually writes data to the file ObjectVar.WriteLine(Data) • Streamwriter object identified by ObjectVar • The method’s Data argument consists of constants or variables with data to be written • WriteLine appends an invisible newline character to the end of the data • Omit argument to write a blank line to a file ObjectVar.WriteLine()
Closing a StreamWriter Object • Should close files when finished with them • Avoids losing data • Data is initially written to a buffer • Close writes unsaved data from the buffer to the file • The Close method of a StreamWriter object clears the buffer and closes the file ObjectVar.Close() • Streamwriter object identified by ObjectVar
Writing Data to a File Example • Tutorial 9-1 is an example of an application that writes data to a file Dim studentFile As System.IO.StreamWriter studentFile = System.IO.File.CreateText("StudentData.txt") studentFile.WriteLine("Jim") studentFile.WriteLine(95) studentFile.WriteLine("Karen") studentFile.WriteLine(98) studentFile.WriteLine("Bob") studentFile.WriteLine(82) studentFile.Close() The Resulting File, StudentData.txt Jim 95 Karen 98 Bob 82
Importing a Namespace • System.IO is referred to as a namespace • A group of logically related classes • System.IO contains StreamWriter and other file related classes • Can shorten references to such classes by importing the namespace in your code Imports System.IO • Allows us to use Dim custFileAs StreamWriter • Instead of Dim custFileAs System.IO.StreamWriter
Appending to a File • If opening an existing file with CreateText • Existing contents are removed • New text overwrites the old text • If opening an existing file with AppendText • Existing contents are retained • New text adds on to the end of the old text • If adding a new friend to friendFile, you’d use friendFile = System.IO.File.AppendText("MyFriends.txt")
The StreamWriter Write Method • The Write method does not place a newline character after each data item • Usually need to provide some sort of delineation or delimiter between data items • A blank space could be used • Comma is a more common delimiter ObjectVar.Write(Data)
Write Method Example Dim name As String = "Jeffrey Smith" Dim idNum As Integer = 47895 Dim phone As String = "555-7864" outputFile.Write(name) outputFile.Write(" ") outputFile.Write(idNum) outputFile.Write(" ") outputFile.WriteLine(phone) The Resulting File Jeffrey Smith 47895 555-7864
StreamReader Objects • Use StreamReader objects to read from a file • Define and open similar to StreamWriter: • Sample code: • Variable phoneFile now defines a stream of data that can be read from phonelist.txt Dim ObjectVar As System.IO.StreamReader ObjectVar = System.IO.File.OpenText(Filename) Dim phoneFile As System.IO.StreamReader phoneFile = System.IO.File.OpenText(“phonelist.txt")
Reading Data from a File • The ReadLine method of a StreamReader object actually reads data from the file dataVar = ObjectVar.ReadLine() • Streamwriter object identified by ObjectVar • The result of the method, the data read from the file, is assigned to string variable dataVar • Sample code: Dim custFile As System.IO.StreamReader custFile = System.IO.File.OpenText("customer.txt") custName = custFile.ReadLine() • custName holds the data read from the file • StreamReader also has a Close method
Determining Whether a File Exists • The File.OpenText method issues a runtime error if the file does not exist • Avoid this by using the File.Exists method • Format is File.Exists(filename) • Returns a boolean result that can be tested: • Tutorial 9-2 shows how to read text file data If System.IO.File.Exists(filename) Then ' Open the file. inputFile = System.IO.File.OpenText(filename) Else MessageBox.Show(filename & " does not exist.") End If
Detecting the End of a File • The Peek method tests if you’ve reached end of file (no more characters to read) • Format is objectvar.Peek • If no more characters, the value -1 is returned • Tutorial 9-3 demonstrates the Peek method Imports System.IO Dim scoresFile As StreamReader Dim input As String scoresFile = File.OpenText("Scores.txt") Do Until scoresFile.Peek = -1 input = scoresFile.ReadLine() lstResults.Items.Add(input) Loop scoresFile.Close()
Read Method • Read method returns the integer code of the next character in the file • Chr function converts integer code to character • This loop appends one character at a time to input until no more characters are in the file Imports System.IO Dim textFile As StreamReader Dim input As String textFile = File.OpenText("names.txt") Do While textFile.Peek <> -1 input &= Chr(textFile.Read) Loop textFile.Close()
ReadToEnd Method • ReadToEnd method returns the rest of the file from the current read position to end of file • Functions differently from ReadLine method • ReadToEnd method ignores line delimiters • The statement input =textFile.ReadToEndreads the file contents and stores it in input Imports System.IO Dim textFile As StreamReader Dim input As String textFile = File.OpenText("names.txt") input = textFile.ReadToEnd textFile.Close()
Write Then Read an Entire Array Imports System.IO Dim intValues(9) ------------------------------------------------ Dim outputFile as StreamWriter outputFile = File.CreateText("values.txt") For count = 0 To (intValues.Length – 1) outputFile.WriteLine(intValues(count)) Next count outputFile.Close() ------------------------------------------------ Dim inputFile as StreamReader inputFile = File.OpenText("values.txt") For count = 0 To (intValues.Length – 1) intValues(count) = Val(inputFile.ReadLine) Next count inputFile.Close()
Section 9.2The OpenFileDialog,SaveFileDialog, FontDialog,and ColorDialog Controls Visual Basic Provides Dialog Controls That Equip Your Applications With Standard Windows Dialog Boxes for Operations Such As Opening Files, Saving Files, and Selecting Fonts and Colors
OpenFileDialog and SaveFileDialog • Windows has a standard method of allowing a user to choose a file to open or save • Provides users the ability to browse for a file • The OpenFileDialog and SaveFileDialog controls provide this capability in VB • To use the OpenFileDialog control • Double click on this tool in the Toolbox • Appears in component tray • Use ofd as standard prefix when naming • SaveFileDialog is used in a similar way
Displaying an Open Dialog Box • Display control with the ShowDialog method ControlName.ShowDialog() • Method returns a value indicating which dialog box button the user selects, either • DialogResult.OK, or • DialogResult.Cancel • For example: If ofdOpenfile.Showdialog() = DialogResult.OK Then MessageBox.Show(ofdOpenFile.FileName) Else MessageBox.Show(“You selected no file”) End If
Dialog Box Filter Property • FileDialog controls have a Filter property • Limits files shown to specific file extensions • Specify filter description shown to user first • Then specify the filter itself • Pipe symbol (|) used as a delimiter • Following Filter property lets user choose: • Text files (*.txt), displays all .txt files • All files (*.*), displays all file extensions ofdOpenFile.Filter = "Text files (*.txt)|*.txt|" & _ "All files (*.*)|*.*"
Other OpenFileDialog Properties • InitialDirectory property specifies folder to use • Default if not specified is current folder • To set dialog box initial directory to C:\Data: ofdOpenFile.InitialDirectory = “C:\Data” • Title property specifies the text on the title bar • Default title is Open if not specified ofdOpenFile.Title = “Select a File to Open” • Filename property returns file selected from dialog box by user, in this case to selectedFile selectedFile = ofdOpenFile.Filename
Open Dialog Box Example • User may choose to display .txt files or all files • Files from Data folder of hard drive are shown • Dialog box title shows Select a File to Open • Variable inputFile holds file selected by user ' Configure the Open dialog box and display it. With ofdOpenFile .Filter = "Text files (*.txt)|*.txt|" & _ "All files (*.*)|*.*" .InitialDirectory = "C:\Data" .Title = "Select a File to Open" If .ShowDialog() = DialogResult.OK Then inputFile = System.IO.File.OpenText(.Filename) End If End With
SaveFileDialog Control • SaveFileDialog uses the same methods: • ShowDialog() • The same properties: • Filter • InitialDirectory • Title • Filename • And the same result constants: • DialogResult.OK • DialogResult.Cancel • Tutorial 9-4 uses these controls in a text editor
ColorDialog Control • Displays a typical Windows color dialog box • Provides users the ability to choose a color • To use the ColorDialog control • Double click the tool in the Toolbox • Appears in component tray • Use cd as standard prefix when naming • The following code sets the text in control lblMessage to the color selected by the user cdColor.ShowDialog() If cdColor.ShowDialog() = DialogResult.OK Then lblMessage.ForeColor = cdColor.Color End If
FontDialog Control • Displays a Windows font selection dialog box • Allows users to choose font, font size, etc. • To use the FontDialog control • Double click the tool in the Toolbox • Appears in component tray • Use fd as standard prefix when naming • The following code sets the text in control lblMessage to the font selected by the user fdFont.ShowDialog() If fdFont.ShowDialog() = DialogResult.OK Then lblMessage.Font = fdFont.Font End If
Section 9.3The PrintDocument Control The PrintDocument Control Allows You to Print Data to the Printer
PrintDocument Control • Allows you to send output to the printer • To use the PrintDocument control • Double click the tool in the Toolbox • Appears in component tray • Use pd as standard prefix when naming • PrintDocument control has a Print method • This method starts the printing process • Format is: PrintDocumentControl.Print() • This triggers a PrintPage event
PrintPage Event Handler • The code in the PrintPage event handler performs the actual printing • Double click PrintDocument control in tray • This creates the PrintPage event handler • Insert your print code inside event handler • Basic format of event handler is as follows: Private Sub pdPrint_PrintPage(ByVal sender As System.Object, _ ByVal e As System.Drawing.Printing.PrintPageEventArgs) _ Handles pdPrint.PrintPage ‘Your print code here End Sub
DrawString Method • The DrawString method is used inside the PrintPage event to: • Specify data to send to the printer in string • Set font, font size, and font style • Determine horizontal position (HPos) of text • Determine vertical position (VPos) of text • DrawString method is formatted as follows: e.Graphics.DrawString(String, _ New Font(FontName, Size, Style), _ Brushes.Black, HPos, VPos)
Specifying Fonts, Sizes, Styles • Fonts are specified with the string which names the font to be used • "Times New Roman" • Sizes are specified with a number • 12 • Styles are specified with provided constants • FontStyle.Regular • FontStyle.Bold • FontStyle.Underline
Sample PrintPage Event Procedure Private Sub pdPrint_PrintPage(ByVal sender As System.Object, _ ByVal e As System.Drawing.Printing.PrintPageEventArgs) _ Handles pdPrint.PrintPage Dim inputFile As System.IO.StreamReader Dim x As Integer = 10 ‘Horizontal Position Dim y As Integer = 10 ‘Vertical Position inputFile = System.IO.File.OpenText(filename) Do While inputFile.Peek <> -1 e.Graphics.DrawString(inputFile.ReadLine, _ New Font("Courier", 10, FontStyle.Regular), _ Brushes.Black, x, y) y += 12 ‘Increment Vert Pos Loop inputFile.Close() End Sub • Tutorial 9-5 adds a print feature to Tutorial 9-4
Printing Column Based Reports • Business reports typically contain a: • Report header printed at the top of the page • Report body with the data, usually in columns • Optional footer, often totalling certain columns • Report header usually has column headings • Monospaced font used for column reports • Each character takes same amount of space • This allows columns to be aligned • String.Format used to align data along column boundaries
String.Format Example String.Format("{0, 10}{1, 10}{2, 10}", 50, "Arg 1", 6) Argument 0 Specifies the argument number Argument 1 Argument 2 Specifies field width for arg negative - left justified positive - right justified Results in the following output: 50 Arg 1 6 10 spaces 10 spaces 10 spaces
Section 9.4Structures Visual Basic Allows You to Create Your Own Data Types, in Which You May Group Multiple Data Fields
Structures vs. Arrays • Arrays: • Multiple fields in one array • All of the same data type • Distinguished by a numerical index • Structures • Multiple fields in one structure • Can be of differing data types • Distinguished by a field name
Syntax for Declaring a Structure • StructureName is a name that identifies the structure itself • FieldDeclarations are the declarations of the individual fields within the structure [AccessSpecifier] Structure StructureName FieldDeclarations End Structure
Structure Declaration Example • Following declares a structure with six fields intended to record employee payroll data • Structure name is EmpPayData Structure EmpPayData Dim empNumber As Integer Dim firstName As String Dim lastName As String Dim hours As Single Dim payRate As Decimal Dim grossPay As Decimal End Structure
Creating and Initializing a Structure • Using the EmpPayData structure just defined • Define variable deptHead of type EmpPayData • deptHead contains the six fields in the structure • Access each field using varName.fieldName Dim deptHead As EmpPayData deptHead.empNumber = 1101 deptHead.firstName = "Joanne" deptHead.lastName = "Smith" deptHead.hours = 40 deptHead.payRate = 25 deptHead.grossPay = deptHead.hours * deptHead.payRate
Passing Structure Variables to Procedures and Functions • Structures can be passed to procedures and functions like any other variable • The data type to use in the specification is the name of the structure Sub CalcPay(ByRef employee as EmpPaydata) ‘ This procedure accepts an EmpPayData variable ‘ as its argument. The employee’s gross pay ‘ is calculated and stored in the grossPay ‘ field. With employee .decGrossPay = .sngHours * .decPayRate End With End Sub
Structures Containing Arrays • Structures can contain arrays • Must ReDim after declaring structure variable Structure StudentRecord name As String testScores() As Single End Structure Dim student As StudentRecord ReDim student.TestScores(4) student.name = "Mary McBride" student.testScores(0) = 89 student.testScores(1) = 92 student.testScores(2) = 84 student.testScores(3) = 96 student.testScores(4) = 91
Arrays Containing Structures • Can declare an array of structures • Example below declares employees as an array of type EmpPayData with 10 elements • Can refer to each field using the format arrayName(index).fieldName • Tutorial 9-6 examines an application with a structure Dim employees(9) As EmpPayData ' Refer to the empNumber of the first employee employees(0).empNumber = 1101