Download
1 / 22
220 likes | 338 Views
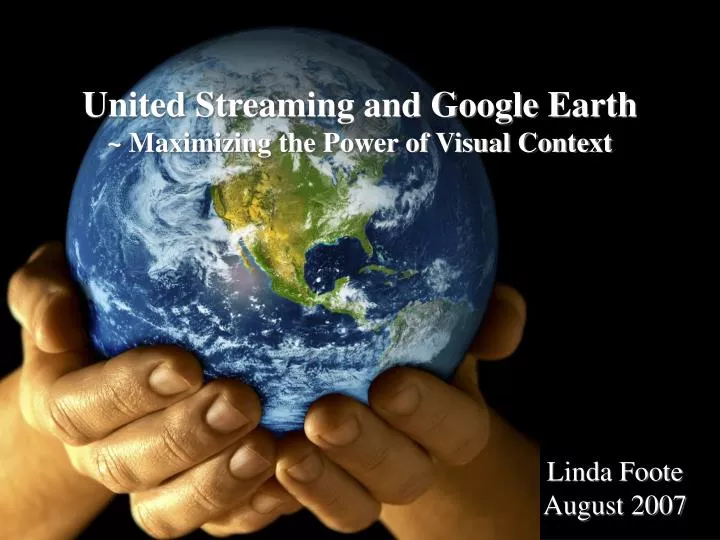
United Streaming and Google Earth ~ Maximizing the Power of Visual Context. Linda Foote August 2007. Today’s Goals. Google Earth Explore Google Earth, learn the available tools, and brainstorm the instructional applications

E N D
United Streaming and GoogleEarth~ Maximizing the Power of Visual Context Linda FooteAugust 2007
Today’s Goals • Google Earth • Explore Google Earth, learn the available tools, and brainstorm the instructional applications • Develop a classroom project using the resources available in Google Earth
The Google Interface • Search Panel -Use to find places and directions • Overview Map – Use for an additional perspective • Hide/Show sidebar – Click to conceal or display side bar • Placemark – Click to add a placemark • Polygon – Click to add a polygon • Path – Click to add a path • Image Overlay- Click to add an image • Measure – Click to measure a distance • Email – Click to email view or image • Print – Click to print current view • Navigation controls – Use to tilt, zoom, and move • Layers Panel – Use to display points of interest • Places Panel- Use to locate, save, and organize placemarks • 3D Viewer – View the globe and terrain • Status Bar – View streaming status
Adding Placemarks • First Things First • Create a Folder (Ctrl+Shift+N) • This will help us keep our placemarks organized. Other 20% Network 80%
Adding Placemarks • 2. Add Placemark (Ctrl+Shift+P) • To change the placemark icon, click the icon to the right of the placemark name. • To include a description type in the white box. Other 20% Network 80%
Adding Placemarks to playvideo Adding Sounds or Video from free sites • Find media online • Click to Stream. • As it streams Right Click, then click properties, and copy location. • Paste in Google Earth Placemark Description box. 1 2 • Adding Video from fee sites (unitedstreaming) • Right Click on play icon • Copy short cut. • Paste in Placemark Description box. 80% 3 4 / c http://www.archive.org/video/28786/prg28786_256k.asf http://www.archive.org/video/28786/prg28786_256k.asf
Adding Placemarks to play audio Adding Sounds, Stories, or Streaming Podcasts • Find media, stories, sounds, etc., online • Click to Stream. • As it streams Right Click screen, then click properties, and copy location. Or, if the URL is available, copy the location from the browser. 1 2 80% 3
Adding Placemarks to playaudio Adding Sounds, Stories, or Streaming Podcasts • Copy location from Properties window or from the web address line in the browser (e.g., Explorer) • Paste in Google Earth Placemark Description box. 80% 3
Adding Image Overlays There are two kinds Image Overlays: From the Web - works anywhere in the world From your hard drive - works only on your computer • To add an Image Overlay press (Ctrl+Shift+O) or from the menu bar click “Add” then “Image Overlay” • Web - Right Click on web image, then click properties and copy and paste address. (Note: Make sure you get all correlating lines of the address) • Hard Drive - Browse to the folder with images. (Note: Don’t move them later!) • Adjust green box to desired image size • Paste image address in the link box Other 20% 80%
Fly Over and Saving • When you are ready to save your file. Highlight your folder, then click on “File” “Save” “Save Place as…” • This will save it as a .kmz. This small file can easily be emailed. • When someone opens the .kmz file, Google Earth will automatically be launched or users will be encouraged to download the program. Other 20% Network • To fly over all your place marks click, highlight your folder and click the play button.
Ruler Tool • To find the distance traveled, from the menu bar select “Tools” then “Ruler” • By clicking different points with your mouse you can create a line or a path. • To convert units of measure select from the drop down menu. Other 20% Network 80%
Preferences: Touring • You can control the flying speed • You can control or eliminate pauses • You can repeat the tours (for Open House) or reinforcement You can open information balloons on tours Other 20% Control Driving Tours here Network 80%
Layers: Turning them on or off Layers: Featured Content Discovery Video layer has free video!
Layers: 3D Buildings • To turn on 3D buildings, go down to the “Layers” menu and check “3D Buildings” • For added fun, zoom in, tilt your screen and fly through the streets Other 20% Network 80%
Layers: Earthquakes • In the “Layer” menu under “Geographic Features” is a check box for “Earthquakes” • When you enable this icon, images will be displayed of the locations of a variety of earthquakes. Click on the icon to see date, magnitude, and a weblink. • To view several earthquakes along a fault line type in “Area 51” in the fly to box. Other 20% Network 80%
Community For extra help, support, and unique and interesting places, visit the Google Earth Community under the “Help” menu.
Find Businesses • To look for businesses (i.e. Starbucks, Pizza Parlors) in a particular location, type in the name of the company, city or zip code and enter. • You will be able to find reviews, addresses, phone numbers, and even get directions. Network 80%
You Don’t Have to be Live! • You can use a screen capture program to record the tours and features in Google Earth. The high end versions of Google Earth work well (but take LOTS of RAM). You can use screen capture software to record the action in Google Earth and save it as a video file. • Windows - SnagIt Techsmith.com • Mac - Snapz Pro Ambrosia Softward Network 80% QuickTime file of Google Earth tour.
You Don’t Have to be Live! • Launch Google Earth. • Launch the screen capture program. (Snapz Pro shown on Mac) • Choose Movie option. • Draw movie window over section of screen to capture. • Start the movie capture. Do what you want in Google Earth. Stop the capture when done. That’s it! • Bonus: Pull into a video authoring program and take out pauses, speed up or slow down video action, and add music or narrative. Try iMovie (Mac),Adobe Premiere Elements (PC)or MovieMaker (wmv files) Network 80%
Google Lit Trips for Educators Samples Grades 9-12
Slides 3-20 Courtesy of Hall Davidson 2007 Discovery Educator Network Slides 1, 21, 22 Linda Foote