Download
1 / 26
260 likes | 319 Views
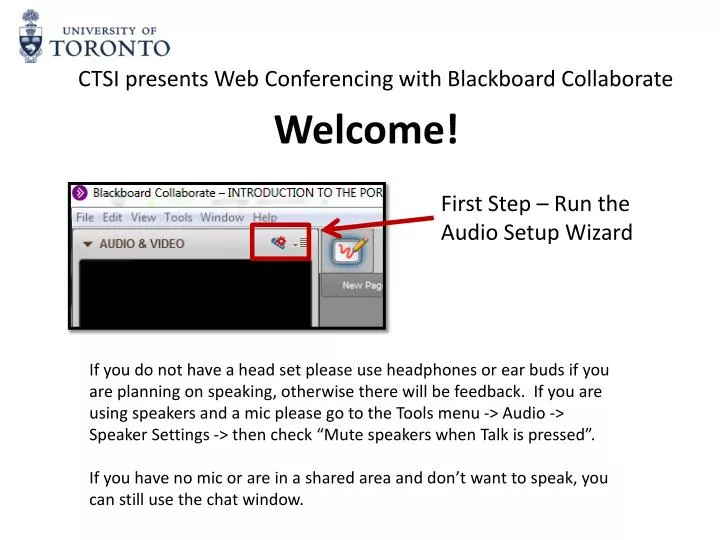
Welcome!. CTSI presents Web Conferencing with Blackboard Collaborate. First Step – Run the Audio Setup Wizard.

E N D
Welcome! CTSI presents Web Conferencing with Blackboard Collaborate First Step – Run the Audio Setup Wizard If you do not have a head set please use headphones or ear buds if you are planning on speaking, otherwise there will be feedback. If you are using speakers and a mic please go to the Tools menu -> Audio -> Speaker Settings -> then check “Mute speakers when Talk is pressed”. If you have no mic or are in a shared area and don’t want to speak, you can still use the chat window.
Communicating in Collaborate 1 – The volume of your microphone 2 – The volume of your speakers 3 – The Talk button, click to activate your mic, click again to mute 4 – The Video button, click to activate your webcam 1 2 3 4 The blue microphone will display beside whomever is speaking
The Collaborate User Interface 1 1 – The Audio and Video Panel 2 – The Participants Panel 3 – Emotion menu 4 – Away from keyboard (AFK) button 5 – Raise Hand button 6 – Respond to Poll button 7 – List of Participants 8 – Chat Panel 9 – Chat message text box 2 3 5 4 6 7 Note: Panels can be detached and dragged around, as well as resized, to customize your view. 8 9
What is Collaborate? A Web Conferencing tool that can: host hundreds of simultaneous attendees Up to 6 live audio and video synchronous streams Interactive Whiteboard File Transfers Application Sharing Web tours Allows for: Online Office hours Broadcast and Record Lectures Online meetings Virtual training Online Labs or Tutorials
Itinerary • Gaining Access to and Scheduling Collaborate Sessions • Preparing for a Session • Running the Session • Recording • Using the Whiteboard • Conducting a Web tour • Using Application Sharing • Transferring Files • Moderating a Session • Watching attendees • Changing Permissions • Conducting Polls Somewhere in the middle a 5 minute break ?
Gaining Access to Collaborate How many of you currently have access to Collaborate? - For Yes. - For No. To get Access, all you need to do is: Send a request to portal.help@utoronto.ca Remember to include the Portal Course or Organization
Scheduling Collaborate Sessions Done via Portal Courses or Organizations Application Sharing demo
Preparing for a Session • Send the link to the Test room, available on the Portal Information site: • www.portalinfo.utoronto.ca/webinar Create a welcome slide with instructions to run the Audio setup wizard and anything else they might need to do at the start Arrive early! • First – Run the Audio Setup Wizard (needs to run each time you start a session) • N.B. No one can hear you while you are running the wizard Second – Pre-load your content - Very large PPTs can take a while Third – Plan some warm-up or ice breaker activities to get your attendees used to how you want to run the session
Running a Session Recording Using the Whiteboard Conducting a Web tour Using Application Sharing Transferring Files
Recording When you, as the moderator, first enter the session you will be prompted to started recording. No one, at this point, does! Once you are ready, hit the record button at the top right. It will then change to a ‘Recording’ button. Click it again to pause, and then again to un-pause. The Recording will automatically stop one the session is ended.
Finding your Recordings Recordings are accessible through the Blackboard Collaborate tool in the Portal Course or Organization the session was created it. Recordings are queued for processing once the session is completed. Depending on the length of the session the processing can take a while. Once completed the Recording will automatically appear under the Recordings link.
Whiteboard Whiteboard Controls Whiteboard Tools
Whiteboard It’s Interactive! Everyone draw a happy face here! Selection Tool Pointer Tool Pen Tool Text Tool Filled Shape Tool Shape Tool Line Tool Screen Capture Tool Clip Art Tool
Loading Content into the Whiteboard PowerPoint presentations (.ppt .pptx) and OpenOffice presentations (.ppt, .pptx, .sxi and .odp) can be loaded into Collaborate using the Load Content button • You will need to have PowerPoint or OpenOffice installed • All animations and links will be lost, plan accordingly • Any other content loaded using the Whiteboard will be sent to the File Transfer library
Whiteboard • Can develop complex slides and activities directly in Collaborate (PowerPoint not needed) • Whiteboards can be saved as whiteboard files for future use – faster loading • Whiteboards can be saved as PDFs for later distribution • If animations are required Application Sharing can be used instead
Web tour Can take participants to any publically accessible website Participants can interact with the page, and can navigate away Best method for showing videos!
Application Sharing Yellow border indicates what the participants can see Participants can be granted permission to interact with the application
Application Sharing • Can be resource intensive • Prepare your Applications ahead of time • Keep your Panels in view
File Transfer Any files added to the File Transfer Library can be downloaded at any time by participants Files are also available while watching recordings
Moderating a Session Keep an eye on your Participants! Status indicators Yellow dots = Moderate delay Red dots = Significant delay Icon represents which tool or content is delayed Slow down to help participants catch up. Pause on one slide or page and wait for the indicators to disappear. Audio will catch up automatically by being sped up. Users will hear a “chipmunk” voice.
Permissions You can add or remove permission, or access to the tools, from all or individual students. Global Permissions Individual Permissions Quick Activity – Giving Everyone Moderator Privileges!
Polling and Publishing Results • Do you plan to use Collaborate in the next: • Week • Two weeks • One month • In the fall term • Someday, maybe...
Hints and Tips Ask for help – in large classes get a TA or colleague to manage the chat and any questions Adjust your Panels – move and increase the chat window, especially if you are on your own Prepare, Prepare, Prepare – Conduct dry runs of activities, test that multimedia displays correctly, collect and save any files you will share in one place Keep your participants awake – conduct an activity every 5-10 minutes Check out the documentation on our Help site: www.portalinfo.utoronto.ca
Help Resources http://www.portalinfo.utoronto.ca/webinar Portal.help@utoronto.ca Ryan Green Ryan.green@utoronto.ca 416.946.7729