Download
1 / 14
180 likes | 543 Views
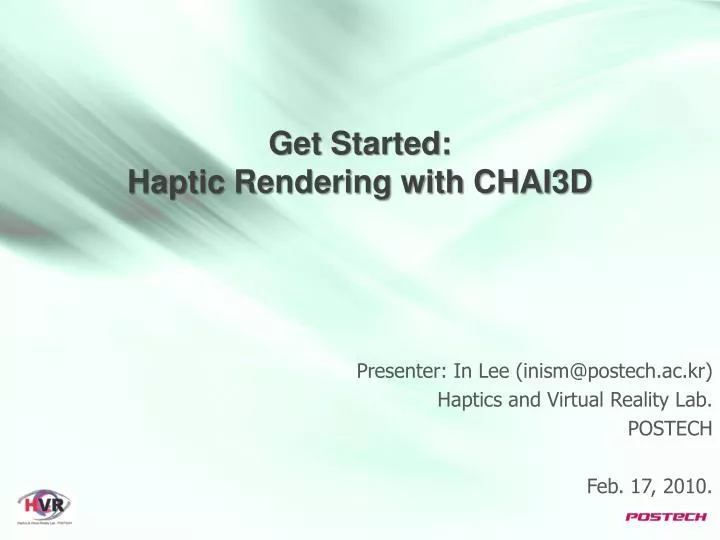
Get Started: Haptic Rendering with CHAI3D. Presenter: In Lee (inism@postech.ac.kr) Haptics and Virtual Reality Lab. POSTECH Feb. 17, 2010. Typical Procedures of Haptic Rendering. HAPTICS LOOP 1. GET the POSE of haptic device. (in cases of dynamic VEs) UPDATE the environment.

E N D
Get Started:Haptic Rendering with CHAI3D Presenter: In Lee(inism@postech.ac.kr) Haptics and Virtual Reality Lab. POSTECH Feb. 17, 2010.
Typical Procedures of Haptic Rendering • HAPTICS LOOP • 1. GET the POSE of haptic device.(in cases of dynamic VEs) UPDATE the environment. • 2. DETECTCOLLISIONS with the environment (collision detection). • 3. CALCULATE appropriate feedback FORCE (collision resolution). • 4. COMMAND the FORCE to the device. • GRAPHICS LOOP • Render the haptic interface point as well as the environment.
How can we get the pose and command the force? • Every manufacturers provide their own Application Programming Interfaces (APIs). • We have devices of … • SensAble: PHANToM Omni, 1.0A, 1.5A, 1.5A HF • Force Dimension: Omega.3 • Barrett Technology: WAM
How can we detect collisions and determine the force? • Lots of algorithms are exist. • COLLISION DETECTION • RAPID, AABB tree, OBB tree, spherical hierarchy, … • spatial partitioning, distance map, … • implicit function, … • COLLISION RESOLUTION • penalty-based method, … • god-object, virtual proxy, … • Do we have to implement the algorithms by ourselves? • In general, NO. We can use existing libraries. • YES, if you want to have your own code or you are trying to develop a new algorithm.
Haptics Libraries • OpenHaptics • A commercial product of SensAble Inc. • Operates with PHANToM devices and Windows XP or above • HL library: easy but no room for modification • HD library: provides very basic functions only. • CHAI3D • Open library from chai3d.org • Platform Independent (Windows, Linux, Mac OS-X) • Supports several devices including PHANToM and Omega. • Provides a lot of useful classes and functions.
File Structure of CHAI3D Example binaries Documentations on the library Example source codes External library materials Library files of CHAI3D Codes for cooperating with the external libraries Project files of CHAI3D Source codes of CHAI3D You can get CHAI3D from http://www.chai3d.org/download.html
Prerequisites and Project Settings • Prerequisites • PHANToM device driver 4.2 • OpenHaptics 3.0 Academic Edition • CHAI3D 2.0 • I recommend you to have all include files and library files within the project folder as well as your own codes. • .h and .cpp: $PROJECT_FOLDER$/include/ • .lib: $PROJECT_FOLDER$/lib/ • .dll: $PROJECT_FOLDER$/ • Project setting (Project Property pages/Configuration Properties/) • [./C/C++/Additional Include Directories] Add “./include” or $CHAI3D$/src/ • [./Linker/General/Additional Library Directories] Add “./lib”or $CHAI3D$/lib/$COMPILER_NAME$/ • [./Linker/Input/Additional Dependencies] Add “winmm.lib glut32.lib chai3d-release.lib”
Code Explanation on the Basic Code: InitScene() void initScene() { // create a new world. world = new cWorld(); // set the background color of the environment // the color is defined by its (R,G,B) components. world->setBackgroundColor(0.0, 0.0, 0.0); // create a camera and insert it into the virtual world camera = new cCamera(world); world->addChild(camera); // position and oriente the camera camera->set( cVector3d (0.5, 0.0, 0.0), // camera position (eye) cVector3d (0.0, 0.0, 0.0), // lookat position (target) cVector3d (0.0, 0.0, 1.0)); // direction of the "up" vector // set the near and far clipping planes of the camera // anything in front/behind these clipping planes will not be rendered camera->setClippingPlanes(0.01, 10.0); // create a light source and attach it to the camera light = new cLight(world); camera->addChild(light); // attach light to camera light->setEnabled(true); // enable light source light->setPos(cVector3d( 2.0, 0.5, 1.0)); // position the light source light->setDir(cVector3d(-2.0, 0.5, 1.0)); // define the direction of the light beam }
Code Explanation on the Basic Code: InitHD() void initHD() { // create a haptic device handler hd_handler = new cHapticDeviceHandler(); hd_handler->getDevice(hd, 0); // retrieve information about the current haptic device if (hd) { hd_info = hd->getSpecifications(); } // create a 3D tool and add it to the world tool = new cGeneric3dofPointer(world); world->addChild(tool); // connect the haptic device to the tool tool->setHapticDevice( hd ); tool->start(); // map the physical workspace of the haptic device to a larger virtual workspace. tool->setWorkspaceRadius(hd_info.m_workspaceRadius); // define a radius for the tool tool->setRadius(0.005); // 5 mm // set the physical radius of the proxy. for performance reasons, it is // sometimes useful to set this value to zero when dealing with // complex objects. tool->m_proxyPointForceModel->setProxyRadius(0.005); }
Code Explanation on the Basic Code: main() int main(intargc, char* argv[]) { initScene(); initHD(); // OPEN GL - WINDOW DISPLAY; I’LL SKIP THIS PART … // START SIMULATION UINT m_interval = 1; TIMECAPS m_TimerCaps; timeGetDevCaps(&m_TimerCaps, sizeof(TIMECAPS)); if ( m_interval< m_TimerCaps.wPeriodMin|| m_interval> m_TimerCaps.wPeriodMax ) exit(-1); m_nTimerID = timeSetEvent(m_interval, 0, updateHaptics, NULL, TIME_PERIODIC | TIME_CALLBACK_FUNCTION); // start the main graphics rendering loop glutMainLoop(); // close the haptic loop timeKillEvent(m_nTimerID); // close the haptic device tool->stop(); // exit return (0); }
Code Explanation on the Basic Code: loop functions void CALLBACK updateHaptics(UINT uID, UINT uMsg, DWORD_PTR dwUser, DWORD_PTR dw1, DWORD_PTR dw2) { // compute global reference frames for each object world->computeGlobalPositions(true); // update position and orientation of tool tool->updatePose(); // compute interaction forces tool->computeInteractionForces(); // send forces to device tool->applyForces(); } void updateGraphics(void) { // render world camera->renderView(displayW, displayH); // Swap buffers glutSwapBuffers(); }
Caution Y monitor screen Z X Z Y X CHAI3D uses meter (m) as the distance metric,and Newton (N) as the force metric. Hence, stiffness is represented by N/m. CHAI3D uses a different coordinate frame with OpenGL. Yellow: OpenGL axes Black: corresponding CHAI3D axes
Assignment 1. Make a bunny touchable The bunny is a mesh object. It is allowed to use any functionality of CHAI3D. 2. Make a box touchable You have to implement your own collision detection algorithm and collision response algorithm (i.e., it is not allowed to use cGeneric3dofPointer of CHAI3D). The box should be able to be grabbed/dragged by pressing the button while you are contacting with the box and moving the stylus. During the grabbing/dragging, the box and the HIP should be coupled with each other by a spring and a damper. The bonny model (.obj) and the basic code will be provided. It is up to you that the exact value of constants such as stiffness, viscosity, size and color. It’s a two-week assignment. No class in next week. I’m expecting you to make me be pleased with further implementations. Have fun. ;)
Reference Materials • Example codes • Binary: $CHAI3D$/bin/Source Code: $CHAI3D$/examples/ Documentation $CHAI3D$/doc/API-documentation.html