Download
1 / 82
820 likes | 1.02k Views
MANAGE DATA DEVELOPMENT. Module Table of Contents (By Section) Authorize Planned Data Development Tasks Citrix Web Interface & Load Data Artifacts Acquire Base Map Develop Topographic Data Perform Field Survey Develop Hydrologic Data Develop Hydraulic Data Perform Floodplain Mapping

E N D
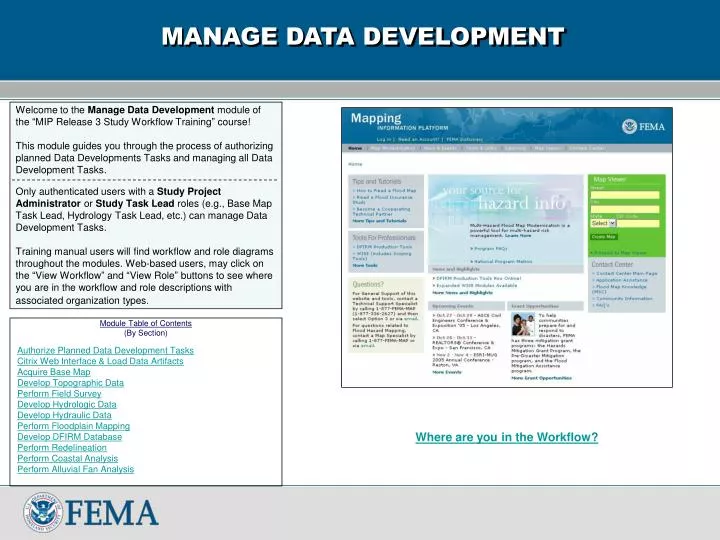
MANAGE DATA DEVELOPMENT Module Table of Contents (By Section) Authorize Planned Data Development Tasks Citrix Web Interface & Load Data Artifacts Acquire Base Map Develop Topographic Data Perform Field Survey Develop Hydrologic Data Develop Hydraulic Data Perform Floodplain Mapping Develop DFIRM Database Perform Redelineation Perform Coastal Analysis Perform Alluvial Fan Analysis Welcome to the Manage Data Development module of the “MIP Release 3 Study Workflow Training” course! This module guides you through the process of authorizing planned Data Developments Tasks and managing all Data Development Tasks. Only authenticated users with a Study Project Administrator or Study Task Lead roles (e.g., Base Map Task Lead, Hydrology Task Lead, etc.) can manage Data Development Tasks. Training manual users will find workflow and role diagrams throughout the modules. Web-based users, may click on the “View Workflow” and “View Role” buttons to see where you are in the workflow and role descriptions with associated organization types. Where are you in the Workflow?
MANAGE DATA DEVELOPMENT Authorize Planned Data Development Task/Data Development Tasks Study Project Administrator SD00 To authorize a planned Data Development Task, choose an available task from the list of planned tasks by clicking “Modify.” Any tasks that you do not modify and authorize will remain planned and the “Authorize Planned Data Development Task” work item will remain on your Work Item List. Note: The Study Project Administrator will not receive this activity unless Data Development Tasks were planned during the “Obligate Project Funds” task. Also, note that the Study Project Administrator will not receive this activity until 6 hours after the “Obligate Project Funds” task was completed. Throughout this module the role performing the activity and a numerical or descriptive identifier for the screen are displayed in bold on the bottom left and right hand corners of the screen shot to the right. Manage Data Development ROLE: Study Project Administrator Description of Role: Responsible for initiating new projects (i.e., entering all required information about project geography, responsible organization, cost, and schedule) and updating the cost and schedule information throughout the project. Organization Type: Same org that completed SM01. ModRMC, ModHQ, FEMARegion, or FEMA HQ could register to do this task. SD00Authorize planned data development tasks (if tasks are planned)
MANAGE DATA DEVELOPMENT Authorize Planned Data Development Task/Data Development Tasks (Continued) This screen appears after a planned task is selected. The tasks and areas were previously selected and associated during the “Obligate Project Funds” task. These appear as read-only (e.g. Perform Alluvial Fan Analysis) and cannot be changed at this point. Tasks that were planned during “Obligate Project Funds” cannot be deleted and must be completed prior to making preliminary maps for the selected area. (Tasks can be added or deleted by contacting miphelp@mapmodteam.com.) Reminder: Online Help content provides assistance to users and is available throughout the MIP. Note: Clicking the Save Work button will save the data a user has entered; however, a user can not save a screen that is only partially completed. Study Project Administrator SD00 Top Half Where are you in the Workflow?
MANAGE DATA DEVELOPMENT Authorize Planned Data Development Task/Data Development Tasks Study Project Administrator SD00 Top Half (Continued) To authorize the task, uncheck the “Planned Task” box (otherwise the task will remain planned.) If you did not previously select the proposed organization that will be performing the task and enter the contract information (click “Modify” to adjust the proposed cost information), select the organization performing the task at this time. Correct selection of “Organization Type” and “Organization Name” ensures the task is routed to the Work Item List of all potential task lead(s) (e.g. Hydrology Task Lead) of that organization once the Authorize Planned Data Development Task screens are completed.The baseline “Start Date” and “End Date,” and “Cost” information, refers to the selected Data Development Task. Click “Add Cost” and proceed to authorizing or planning Independent QA.
MANAGE DATA DEVELOPMENT Authorize Planned Data Development Task/Data Development Tasks Study Project Administrator SD00 Bottom Independent QA for a planned Data Development Task can be authorized, planned or dropped at this point regardless of what was selected previously during “Obligate Project Funds.” Check “Independent QA Required” if you would like to authorize Independent QA. Then, if you did not previously select the proposed organization that will be performing the QA task, select the type of organization (e.g. CTP) and the organization performing the QA task. Correct selection of “Organization Type” and “Organization Name” ensures the QA task is routed to the Work Item List of all potential Independent QA Task Lead(s) of that organization. The QA task will appear after the Data Development Task has been completed and the content has been validated by the NSP.
MANAGE DATA DEVELOPMENT Authorize Planned Data Development Task/Data Development Tasks Study Project Administrator SD00 Bottom (Continued) Enter the baseline “Start Date” and “End Date,” and “Cost” information (click “Modify” to adjust the proposed cost information), for the Independent QA Task. The contract information is not tied to any MIP functionality but it will appear in the reports. Click “Add Cost” and repeat for each negotiated cost. To authorize Independent QA later, check the “Planned Task” box AND the “Independent QA Required” box. Caution: If you select the “planned” box without the “QA required” box, the QA task will be dropped. The MIP allows you to select the proposed organization (e.g. CTP) that will be performing the task and the contract information at this point but these fields can be left blank. (Click “Add Cost” to save contract data.)
MANAGE DATA DEVELOPMENT Authorize Planned Data Development Task/Data Development Tasks Study Project Administrator SD00 Bottom (Continued) If “Authorize Independent QA” was planned, after the Data Development Task has been completed and the content has been validated by the NSP, the “Authorize Independent QA” task will appear on your Work Item List. All planned Data Development Tasks (and associated QA) will need to be authorized and completed for an area prior to making a preliminary map. If you do not want to perform Independent QA on the Data Development Task leave this section blank. Even if the QA task was previously authorized for the planned task, it can be deleted at this point.
MANAGE DATA DEVELOPMENT Authorize Planned Data Development Task/Data Development Tasks Study Project Administrator SD00 Bottom (Continued) If Independent QA for an authorized task is not required (authorized or planned), the NSP will have the option of auditing the task after validating the content. Once you have authorized a Data Development Task (and optional Independent QA Task) for the corresponding area affected by the task, click “Add Task” to enter the information into the MIP… Select the next available planned Data Development Task from the list of planned tasks by clicking “Modify.” For all study workflow tasks, there will be a Review screen (where all task information entered can be reviewed) and a Complete Task screen.
Citrix Web Interface & Load Data Artifacts MANAGE DATA DEVELOPMENT New Functionality in MIP Release 3: There are several places throughout the workflow where the Citrix Web Interface and the Load Data Artifacts portlet are available. While in the workflow, you will notice the Citrix Web Interface and the Load Data Artifacts portlet under each of the Data Development Task screens. Note: The Area Selector portlet will only be displayed for multi-area tasks. Click the Online Help button for detailed help content about logging into Citrix (MIP Production Tools) through the Citrix Web Interface and uploading data to the MIP through the Load Data Artifacts portlet. Note: Area Selector is only displayed for multi-area tasks.
Citrix Web Interface & Load Data Artifacts MANAGE DATA DEVELOPMENT New Functionality in MIP Release 3:Regarding the Citrix Web Interface, Single Sign-on Capability is now available. Upon initial sign-on from the MIP portal, single sign-on capability provides registered Citrix users access to the MIP Production Tools (e.g., DFIRM Tools and WISE Tools) with each subsequent log in to the MIP. Contact MIPHelp at miphelp@mapmodteam.com or call 1-877-FEMA-MAP (1-877-336-2627), select option 2, to sign up for a Citrix account or to verify your account information. All of the Data Development Task screens will provide access to the MIP Production Tools through Citrix. You can upload task-specific data (e.g., topo maps, hydrologic, and hydraulic data) via the Load Data Artifacts portlet. The Area Selector portlet enables you to designate the area in multi-area tasks to which you are uploading data/metadata. Note: Area Selector is only displayed for multi-area tasks.
Acquire Base Map/Task Information MANAGE DATA DEVELOPMENT The Task Information screen of the “Acquire Base Map” task should be updated once a month or as required by your contract. Enter the “Actual Cost to Date,” the physical “Percent Complete to Date,” and the reporting date in the “As of” field. The “Percent Complete to Date” field is limited to values between 0% and 90% to allow for data development rework if the task fails QA. For a single area project, enter 90% when you are ready to complete the task and send it to QA. For a multiple area project, enter the overall percent complete for the group of areas. You can complete the task for an individual area and send it to QA even if the overall percent complete for the group is less than 90%. Base Map Task Lead SD01 Top Half Manage Data Development ROLE: Base Map Task Lead Description of Role: Responsible for base map data deliverables. Organization Type: Assigned Task Org. Any org type could register to do this task. SD01 Acquire Base Map Where are you in the Workflow?
Acquire Base Map/Task Information MANAGE DATA DEVELOPMENT (Continued) The “Percent Complete to Date” field is used for the reports and dashboard but has no functionality in directing the workflow. Important Note: For multiple area projects, the cost and percent complete are tracked together for the group of areas. Be sure to enter the overall cost and percent complete for the group of areas associated with the task. Select “Update Status” to save the project information to the MIP (if a Special Problem Report (SPR) is needed, the SPR notification is sent to FEMA at this time). The task will remain on the Base Map Task Lead’s Work Item List for further updates. Base Map Task Lead SD01 Top Half
Acquire Base Map/Task Information MANAGE DATA DEVELOPMENT Base Map Task Lead SD01 Bottom (Continued) Enter leverage data that was contributed to the study project. This information is used in reports and for calculating KPIs. Click “Add Mapping Partner” to add leverage data to the MIP. For a project update only select the “Update Status” button. To enter additional information such as datum information, proceed to the next screen by clicking “Continue.” Caution: You will not be able to save a partially completed page of information. If you continue to the next screen you may need to enter temporary data in some of the fields in order to save work or go back.
Acquire Base Map/Task Information MANAGE DATA DEVELOPMENT Base Map Task Lead SD01 Bottom (Continued) If your Data Development Task is completed for one of the project areas, select “Continue.” Caution: Be sure that all of your work is complete for the area before completing the task in the MIP. If you continue through all of the screens and select “Complete Task,” the task will be sent to QA regardless of the percent complete you entered on the first page.
Acquire Base Map/Task Information MANAGE DATA DEVELOPMENT SD01 Base Map Task Lead If you are ready to proceed to QA with one or more areas associated with this Data Development Task, select the completed areas from the drop-down list. For a multiple area project, individual areas may complete the task together or separately. The task will remain on the task lead’s Work Item List until all the areas associated with the task are completed, but the completed areas will no longer appear in the drop-down list. Once “Complete Task” is selected for the last area associated with the task, the task will move forward in the workflow. Select the projection and datum information. Use the read-only information on the previous screen as a reference for the overall project requirements.
Acquire Base Map/Completed Areas MANAGE DATA DEVELOPMENT SD01 Base Map Task Lead (Continued) Certify that an internal QA was performed, that the work performed adheres to the Guidelines and Specifications, and that the data was submitted to the NSP. Note: Task-specific data can be uploaded via the Load Data Artifacts portlet at the bottom of this screen. Once this task has been completed, the “Validate Content Submission” task will appear on the Work Item List of the NSP QA Task Lead. If you are not ready to complete this task you will have to save your work; however, a user can not save a screen that is only partially completed. In order to save your work, you may need to enter temporary data in some of the fields. Alternatively, you may select the “Cancel and Back” button, if available. This allows you to go back a page, but will not save your work.
Develop Topographic Data/Task Information MANAGE DATA DEVELOPMENT Topography Task Lead SD02 Top Half The Task Information screen of the “Develop Topographic Data” task should be updated once a month or as required by your contract. Enter the “Actual Cost to Date,” the physical “Percent Complete to Date,” and the reporting date in the “As of” field. The “Percent Complete to Date” field is limited to values between 0% and 90% to allow for data development rework if the task fails QA. For a single area project, enter 90% when you are ready to complete the task and send it to QA. For a multiple area project, enter the overall percent complete for the group of areas. You can complete the task for an individual area and send it to QA even if the overall percent complete for the group is less than 90%. Manage Data Development ROLE: Topography Task Lead Description of Role: Responsible for topographic data deliverables. Organization Type: Assigned Task Org. Any org type could register to do this task. SD02 Develop Topographic Data Where are you in the Workflow?
Develop Topographic Data/Task Information MANAGE DATA DEVELOPMENT SD02 Bottom Topography Task Lead (Continued) The “Percent Complete to Date” field is used for the reports and dashboard but has no functionality in directing the workflow. Important Note: For multiple area projects, the cost and percent complete are tracked together for the group of areas. Be sure to enter the overall cost and percent complete for the group of areas associated with the task. Select “Update Status” to save the information to the MIP (if a Special Problem Report (SPR) is needed, the SPR notification is sent to FEMA at this time). The task will remain on the Topography Task Lead’s Work Item List for further updates.
Develop Topographic Data/Task Information MANAGE DATA DEVELOPMENT SD02 Bottom Topography Task Lead (Continued) Enter leverage data that was contributed to the study project. This information is used in reports and for calculating KPIs. Click “Add Mapping Partner” to add leverage data to the MIP. For a project update only select the “Update Status” button. To enter additional information such as datum information, proceed to the next screen by clicking “Continue.” Caution: You will not be able to save a partially completed page of information. If you continue to the next screen you may need to enter temporary data in some of the fields in order to save work or go back.
Develop Topographic Data/Task Information MANAGE DATA DEVELOPMENT SD02 Bottom Topography Task Lead (Continued) If your Data Development Task is completed for one of the project areas, select “Continue.” Caution: Be sure that all of your work is complete for the area before completing the task in the MIP. If you continue through all of the screens and select “Complete Task,” the task will be sent to QA regardless of the percent complete you entered on the first page.
Develop Topographic Data/Completed Areas MANAGE DATA DEVELOPMENT Topography Task Lead SD02 Top Half If you are ready to proceed to QA with one or more areas associated with this Data Development Task, select the completed areas from the drop-down list. For a multiple area project, individual areas may complete the task together or separately. The task will remain on the task lead’s Work Item List until all the areas associated with the task are completed, but the completed areas will no longer appear in the drop-down list. Once “Complete Task” is selected for the last area associated with the task, the task will move forward in the workflow. Enter the source and type of topographic data, and the contour interval. If the data was obtained within the past year, check the “New Data” box.
Develop Topographic Data/Completed Areas MANAGE DATA DEVELOPMENT Topography Task Lead SD02 Bottom (Continued) Enter the datum information. Use the read-only information on the previous screen as a reference for the overall project requirements. Select “Add Source” to save the information to the MIP. Multiple sources can be entered. Certify that an internal QA was performed, that the work performed adheres to the Guidelines and Specifications, and that the data was submitted to the NSP. Note: Task-specific data can be uploaded via the Load Data Artifacts portlet at the bottom of this screen.
Develop Topographic Data/Completed Areas MANAGE DATA DEVELOPMENT Topography Task Lead SD02 Bottom (Continued) Once this task has been completed, the “Validate Content Submission” task will appear on the Work Item List of the NSP QA Task Lead. If you are not ready to complete this task you will have to save your work; however, a user can not save a screen that is only partially completed. In order to save your work, you may need to enter temporary data in some of the fields. Alternatively, you may select the “Cancel and Back” button, if available. This allows you to go back a page, but will not save your work.
Perform Field Survey/Task Information MANAGE DATA DEVELOPMENT Field Survey Task Lead SD03 Top Half The Task Information screen of the “Perform Field Survey” task should be updated once a month or as required by your contract. Enter the “Actual Cost to Date,” the physical “Percent Complete to Date,” and the reporting date in the “As of” field. The “Percent Complete to Date” field is limited to values between 0% and 90% to allow for data development rework if the task fails QA. For a single area project, enter 90% when you are ready to complete the task and send it to QA. For a multiple area project, enter the overall percent complete for the group of areas. You can complete the task for an individual area and send it to QA even if the overall percent complete for the group is less than 90%. Manage Data Development ROLE: Field Survey Task Lead Description of Role: Responsible for field survey data deliverables. Organization Type: Assigned Task Org. Any org type could register to do this task. SD03 Perform Field Survey Where are you in the Workflow?
Perform Field Survey/Task Information MANAGE DATA DEVELOPMENT Field Survey Task Lead SD03 Middle (Continued) The “Percent Complete to Date” field is used for the reports and dashboard but has no functionality in directing the workflow. Important Note: For multiple area projects, the cost and percent complete are tracked together for the group of areas. Be sure to enter the overall cost and percent complete for the group of areas associated with the task. Select “Update Status” to save the information to the MIP (if a Special Problem Report (SPR) is needed, the SPR notification is sent to FEMA at this time). The task will remain on the Field Survey Task Lead’s Work Item List for further updates.
Perform Field Survey/Task Information MANAGE DATA DEVELOPMENT Field Survey Task Lead SD03 Bottom (Continued) Enter leverage data that was contributed to the study project. This information is used in reports and for calculating KPIs. Click “Add Mapping Partner” to add leverage data to the MIP. For a project update only select the “Update Status” button. To enter additional information such as datum information, proceed to the next screen by clicking “Continue.” Caution: You will not be able to save a partially completed page of information. If you continue to the next screen you may need to enter temporary data in some of the fields in order to save work or go back.
Perform Field Survey/Task Information MANAGE DATA DEVELOPMENT Field Survey Task Lead SD03 Bottom (Continued) If your Data Development Task is completed for one of the project areas, select “Continue.” Caution: Be sure that all of your work is complete for the area before completing the task in the MIP. If you continue through all of the screens and select “Complete Task,” the task will be sent to QA regardless of the percent complete you entered on the first page.
Perform Field Survey/Completed Areas MANAGE DATA DEVELOPMENT Field Survey Task Lead SD03 Top Half If you are ready to proceed to QA with one or more areas associated with this Data Development Task, select the completed areas from the drop-down list. For a multiple area project, individual areas may complete the task together or separately. The task will remain on the task lead’s Work Item List until all the areas associated with the task are completed, but the completed areas will no longer appear in the drop-down list. Once “Complete Task” is selected for the last area associated with the task, the task will move forward in the workflow. Enter the datum information. Use the read-only information on the previous screen as a reference for the overall project requirements.
Perform Field Survey/Completed Areas MANAGE DATA DEVELOPMENT Field Survey Task Lead SD03 Bottom (Continued) Certify that an internal QA was performed, that the work performed adheres to the Guidelines and Specifications, and that the data was submitted to the NSP. Note: Task-specific data can be uploaded via the Load Data Artifacts portlet at the bottom of this screen. Once this task has been completed, the “Validate Content Submission” task will appear on the Work Item List of the NSP QA Task Lead. If you are not ready to complete this task you will have to save your work; however, a user can not save a screen that is only partially completed. In order to save your work, you may need to enter temporary data in some of the fields. Alternatively, you may select the “Cancel and Back” button, if available. This allows you to go back a page, but will not save your work.
Develop Hydrologic Data/Task Information MANAGE DATA DEVELOPMENT Hydrology Task Lead SD04 Top Half The Task Information screen of the “Develop Hydrologic Data” task should be updated once a month or as required by your contract. Enter the “Actual Cost to Date,” the physical “Percent Complete to Date,” and the reporting date in the “As of” field. The “Percent Complete to Date” field is limited to values between 0% and 90% to allow for data development rework if the task fails QA. For a single area project, enter 90% when you are ready to complete the task and send it to QA. For a multiple area project, enter the overall percent complete for the group of areas. You can complete the task for an individual area and send it to QA even if the overall percent complete for the group is less than 90%. Manage Data Development ROLE: Hydrology Task Lead Description of Role: Responsible for hydrologic data deliverables. Organization Type: Assigned Task Org. Any org type could register to do this task. SD04 Develop Hydrology Data Where are you in the Workflow?
Develop Hydrologic Data/Task Information MANAGE DATA DEVELOPMENT Hydrology Task Lead SD04 Bottom (Continued) The “Percent Complete to Date” field is used for the reports and dashboard but has no functionality in directing the workflow. Important Note: For multiple area projects, the cost and percent complete are tracked together for the group of areas. Be sure to enter the overall cost and percent complete for the group of areas associated with the task. Select “Update Status” to save the information to the MIP (if a Special Problem Report (SPR) is needed, the SPR notification is sent to FEMA at this time). The task will remain on the Hydrology Task Lead’s Work Item List for further updates.
Develop Hydrologic Data/Task Information MANAGE DATA DEVELOPMENT Hydrology Task Lead SD04 Bottom (Continued) Enter leverage data that was contributed to the study project. This information is used in reports and for calculating KPIs. Click “Add Mapping Partner” to add leverage data to the MIP. For a project update only select the “Update Status” button. To enter additional information such as datum information, proceed to the next screen by clicking “Continue.” Caution: You will not be able to save a partially completed page of information. If you continue to the next screen you may need to enter temporary data in some of the fields in order to save work or go back.
Develop Hydrologic Data/Task Information MANAGE DATA DEVELOPMENT Hydrology Task Lead SD04 Bottom (Continued) If your Data Development Task is completed for one of the project areas, select “Continue.” Caution: Be sure that all of your work is complete for the area before completing the task in the MIP. If you continue through all of the screens and select “Complete Task,” the task will be sent to QA regardless of the percent complete you entered on the first page.
Develop Hydrologic Data/Analysis MANAGE DATA DEVELOPMENT Hydrology Task Lead SD04 Top Half Select the model or method used for the hydrologic study. Caution: The models listed in the drop-down list are not necessarily acceptable. Many of them are not related to hydrology and other acceptable models may be missing from the list. Refer to the Guidelines and Specifications document and your contract for the required model to use for the hydrologic study. If the hydrologic model or method does not appear in the drop-down list, enter it in the “Other” field. Provide additional information about the model or method in the comment box. Enter the datum information. Use the read-only information on the previous screen as a reference for the overall project requirements.
Develop Hydrologic Data/Analysis MANAGE DATA DEVELOPMENT Hydrology Task Lead SD04 Bottom (Continued) Select “Add Model/Method” to save the information to the MIP. Multiple models can be entered, although the comment field is shared among all added entries. Indicate if the data is new (developed within the past year), or existing for both leveraged data (contributed by a partner) and non-leveraged data (FEMA funded). It is possible to have both new and existing hydrology data that are incorporated into the study project.
Develop Hydrologic Data/Completed Areas MANAGE DATA DEVELOPMENT Hydrology Task Lead SD04 If you are ready to proceed to QA with one or more areas associated with this Data Development Task, select the completed areas from the drop-down list. For a multiple area project, individual areas may complete the task together or separately. The task will remain on the task lead’s Work Item List until all the areas associated with the task are completed, but the completed areas will no longer appear in the drop-down list. Once “Complete Task” is selected for the last area associated with the task, the task will move forward in the workflow.
Develop Hydrologic Data/Completed Areas MANAGE DATA DEVELOPMENT Hydrology Task Lead SD04 (Continued) Certify that an internal QA was performed, that the work performed adheres to the Guidelines and Specifications, and that the data was submitted to the NSP. Note: Task-specific data can be uploaded via the Load Data Artifacts portlet at the bottom of this screen. Once this task has been completed, the “Validate Content Submission” task will appear on the Work Item List of the NSP QA Task Lead. If you are not ready to complete this task you will have to save your work; however, a user can not save a screen that is only partially completed. In order to save your work, you may need to enter temporary data in some of the fields. Alternatively, you may select the “Cancel and Back” button, if available. This allows you to go back a page, but will not save your work.
Develop Hydraulic Data/Task Information MANAGE DATA DEVELOPMENT Hydraulics Task Lead SD05 Top Half The Task Information screen of the “Develop Hydraulic Data” task should be updated once a month or as required by your contract. Enter the “Actual Cost to Date,” the physical “Percent Complete to Date,” and the reporting date in the “As of” field. The “Percent Complete to Date” field is limited to values between 0% and 90% to allow for data development rework if the task fails QA. For a single area project, enter 90% when you are ready to complete the task and send it to QA. For a multiple area project, enter the overall percent complete for the group of areas. You can complete the task for an individual area and send it to QA even if the overall percent complete for the group is less than 90%. Manage Data Development ROLE: Hydraulic Task Lead Description of Role: Responsible for hydraulics data deliverables. Organization Type: Assigned Task Org. Any org type could register to do this task. SD05 Develop Hydraulic Data Where are you in the Workflow?
Develop Hydraulic Data/Task Information MANAGE DATA DEVELOPMENT Hydraulics Task Lead SD05 Bottom (Continued) The “Percent Complete to Date” field is used for the reports and dashboard but has no functionality in directing the workflow. Important Note: For multiple area projects, the cost and percent complete are tracked together for the group of areas. Be sure to enter the overall cost and percent complete for the group of areas associated with the task. Select “Update Status” to save the information to the MIP (if a Special Problem Report (SPR) is needed, the SPR notification is sent to FEMA at this time). The task will remain on the Hydraulics Task Lead’s Work Item List for further updates.
Develop Hydraulic Data/Task Information MANAGE DATA DEVELOPMENT Hydraulics Task Lead SD05 Bottom (Continued) Enter leverage data that was contributed to the study project. This information is used in reports and for calculating KPIs. Click “Add Mapping Partner” to add leverage data to the MIP. For a project update only select the “Update Status” button. To enter additional information such as datum information, proceed to the next screen by clicking “Continue.” Caution: You will not be able to save a partially completed page of information. If you continue to the next screen you may need to enter temporary data in some of the fields in order to save work or go back.
Develop Hydraulic Data/Task Information MANAGE DATA DEVELOPMENT Hydraulics Task Lead SD05 Bottom (Continued) If your Data Development Task is completed for one of the project areas, select “Continue.” Caution: Be sure that all of your work is complete for the area before completing the task in the MIP. If you continue through all of the screens and select “Complete Task,” the task will be sent to QA regardless of the percent complete you entered on the first page.
Develop Hydraulic Data/Analysis MANAGE DATA DEVELOPMENT Hydraulics Task Lead SD05 Top Half Select the model or method used for the hydraulic study. Caution: The models listed in the drop-down list are not necessarily acceptable. Many of them are not related to open channel hydraulics and other acceptable models may be missing from the list. Refer to the Guidelines and Specifications document and your contract for the required model to use for the hydraulic study. If the hydraulic model or method does not appear in the drop-down list, enter it in the “Other” field. Provide additional information about the model or method in the comment box. Enter the datum information. Use the read-only information on the previous screen as a reference for the overall project requirements.
Develop Hydraulic Data/Analysis MANAGE DATA DEVELOPMENT Hydraulics Task Lead SD05 Bottom (Continued) Select “Add Model/Method” to save the information to the MIP. Multiple models can be entered, although the comment field is shared among all added entries. Indicate if the data is new (developed within the past year), or existing for both leveraged data (contributed by a partner) and non-leveraged data (FEMA funded). It is possible to have both new and existing hydraulic data that are incorporated into the study project.
Develop Hydraulic Data/Completed Areas MANAGE DATA DEVELOPMENT Hydraulics Task Lead SD05 If you are ready to proceed to QA with one or more areas associated with this Data Development Task, select the completed areas from the drop-down list. For a multiple area project, individual areas may complete the task together or separately. The task will remain on the task lead’s Work Item List until all the areas associated with the task are completed, but the completed areas will no longer appear in the drop-down list. Once “Complete Task” is selected for the last area associated with the task, the task will move forward in the workflow.
Develop Hydraulic Data/Completed Areas MANAGE DATA DEVELOPMENT Hydraulics Task Lead SD05 (Continued) Certify that an internal QA was performed, that the work performed adheres to the Guidelines and Specifications, and that the data was submitted to the NSP. Note: Task-specific data can be uploaded via the Load Data Artifacts portlet at the bottom of this screen. Once this task has been completed, the “Validate Content Submission” task will appear on the Work Item List of the NSP QA Task Lead. If you are not ready to complete this task you will have to save your work; however, a user can not save a screen that is only partially completed. In order to save your work, you may need to enter temporary data in some of the fields. Alternatively, you may select the “Cancel and Back” button, if available. This allows you to go back a page, but will not save your work.
Perform Floodplain Mapping/Task Information MANAGE DATA DEVELOPMENT Floodplain Mapping Task Lead SD06 Top Half The Task Information screen of the “Perform Floodplain Mapping” task should be updated once a month or as required by your contract. Enter the “Actual Cost to Date,” the physical “Percent Complete to Date,” and the reporting date in the “As of” field. The “Percent Complete to Date” field is limited to values between 0% and 90% to allow for data development rework if the task fails QA. For a single area project, enter 90% when you are ready to complete the task and send it to QA. For a multiple area project, enter the overall percent complete for the group of areas. You can complete the task for an individual area and send it to QA even if the overall percent complete for the group is less than 90%. Manage Data Development ROLE: Floodplain Mapping Task Lead Description of Role: Responsible for floodplain mapping data deliverables. Organization Type: Assigned Task Org. Any org type could register to do this task. SD06 Perform Floodplain Mapping Where are you in the Workflow?
Perform Floodplain Mapping/Task Information MANAGE DATA DEVELOPMENT Floodplain Mapping Task Lead SD06 Middle (Continued) The “Percent Complete to Date” field is used for the reports and dashboard but has no functionality in directing the workflow. Important Note: For multiple area projects, the cost and percent complete are tracked together for the group of areas. Be sure to enter the overall cost and percent complete for the group of areas associated with the task. Select “Update Status” to save the information to the MIP (if a Special Problem Report (SPR) is needed, the SPR notification is sent to FEMA at this time). The task will remain on the Floodplain Mapping Task Lead’s Work Item List for further updates.
Perform Floodplain Mapping/Task Information MANAGE DATA DEVELOPMENT Floodplain Mapping Task Lead SD06 Bottom (Continued) Enter leverage data that was contributed to the study project by entering the number of linear miles studied by redelineated, approximate, detailed, and limited detailed methods, as well as the limited detailed actual cost. This information is used in reports and for calculating KPIs. Click “Add Mapping Partner” to add leverage data to the MIP. For a project update only select the “Update Status” button. To enter additional information such as datum information, proceed to the next screen by clicking “Continue.” Caution: You will not be able to save a partially completed page of information. If you continue to the next screen you may need to enter temporary data in some of the fields in order to save work or go back.
Perform Floodplain Mapping/Task Information MANAGE DATA DEVELOPMENT Floodplain Mapping Task Lead SD06 Bottom (Continued) If your Data Development Task is completed for one of the project areas, select “Continue.” Caution: Be sure that all of your work is complete for the area before completing the task in the MIP. If you continue through all of the screens and select “Complete Task,” the task will be sent to QA regardless of the percent complete you entered on the first page.
Perform Floodplain Mapping/Completed Areas MANAGE DATA DEVELOPMENT Floodplain Mapping Task Lead SD06 Top Half If you are ready to proceed to QA with one or more areas associated with this Data Development Task, select the completed areas from the drop-down list. For a multiple area project, individual areas may complete the task together or separately. The task will remain on the task lead’s Work Item List until all the areas associated with the task are completed, but the completed areas will no longer appear in the drop-down list. Once “Complete Task” is selected for the last area associated with the task, the task will move forward in the workflow. Enter the datum information. Use the read-only information on the previous screen as a reference for the overall project requirements.