Download
1 / 56
580 likes | 746 Views
Introduction to PowerPoint. CPAP Koç University. Outline. Creating and Formatting From scratch Templates Adding and formatting graphics Footers Advanced Slide Master Creating and setting up a custom show Adding slide transitions & animations Using more than one theme .

E N D
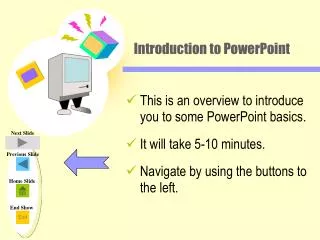
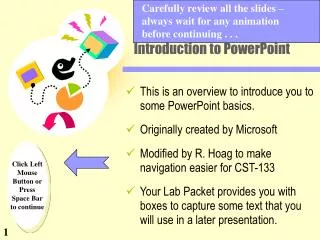
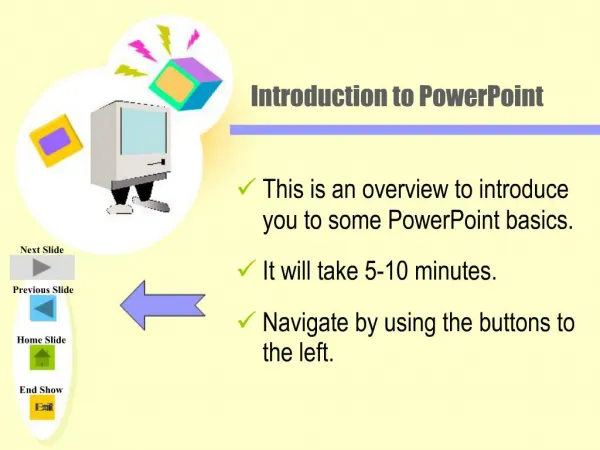
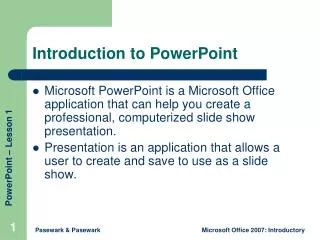
Introduction to PowerPoint CPAP Koç University
Outline • CreatingandFormatting • Fromscratch • Templates • Adding andformattinggraphics • Footers • Advanced • SlideMaster • Creating andsettingup a custom show • Addingslidetransitions & animations • Usingmorethanonetheme. • Handout, NotesandPrinting
What Can You Create? • On screen presentations • Web pages for web use • Color and B&W overheads • 35 mm slides • Audience handouts • Speaker notes • etc..
When You Open Power Point Power Point menu and toolbars are just like the other Office applications Home Toolbar : Insert Toolbar : Design Toolbar :
When You Open Power Point Animations Toolbar : Slide Show Toolbar : Review Toolbar :
WhenYouOpenPowerPoint View Toolbar : Developer Toolbar :
When You Open Power Point By default Power Point opens a blank project. You can change the presentation templates by clicking “New” from the menu pops from the Office Button
Office Button Click on “New” You can change the template and theme of the presentation
Installed Templates & Themes You can choose the installed templates and themes of Office for the new presentation Installed Templates Installed Themes
Slide Master • A master is a slide that contains the text and other objects that appear on all slides of the same type. • PowerPoint presentations have two types of masters: • The Title Master contains objects that appear on the title slide • The Slide Master contains objects that appear on all slides except the title slide • You will use the masters to make design changes that you want to appear on every slide: • If you want your company logo to appear on the bottom right of every page, you will add it to the Slide Master • If you want a picture of your office on a single slide, you add the picture to only that slide
Slide Master You can change the design and layout of the master slide. To open the master slide window click on the “Slide Master” icon on the view toolbar Slide Master window
Slide Master You can choose the desired slide master from pane.
Start From Scratch Slide Master choices • Pick a layout from Slide Master Pane in the Slide Master window. • Choose a Layout that best matches the information you want to put on the presentation. Scroll to see more Layouts
Placeholder in Layout Title Placeholder • Follow the on-screen instructions to click and type your text into the placeholders on the slides • Click on“New Slide” from the Home toolbar. Bulleted Text Placeholder
Content in PlaceholdersbecomeLists Slide layoutsthatinclude a content placeholder where you can add text, or use graphical commands to insert tables, charts, SmartArt graphics, pictures, clip art, and media clips. On these slides, a bullet appears to the left of the placeholder text. If you choose to add text, rather than using one of the graphical commands to insert an item, the text is formatted into a list by default.
Creating a new presentation from an existing design template • Click Office Button and then click New • Click the Installed Templates link in the New Presentation window • Click the design template you want to use • You can save the existing template from New From Existing link
Creating a new presentation from an existing design template • Templates give you a starting point and make it easier to complete your presentation quickly. You can modify a template's text and design, add a company logo, add your own images, or delete text or other content from the template.
Changing the Slide Layout You can change the layout of a slide by selecting a design from the drop down menu of Layout icon in Home toolbar.
Working with Different Views • Normal view • Outline view • Slide view • Slide sorter view • Notes Page • Slide show You can acces the presentation view options from “View” toolbar.
Views: Normal View…3 Views in 1 Slide Pane • The text outline of your presentation is in the left pane. • The current slide with all your graphics and objects is in the right pane. • Notes appear in the small pane below the Slide Pane. Outline Pane Notes
Inserting footers and slide numbers You can insert Header&Footer and Slide Numbers from Insert toolbar All open the Header & Footer dialog box which allows you to insert footer, date, and slide number
Inserting footers and slide numbers When you click on “Header & Footer”or “Slide Number” buttons, Header and Footer dialog box will be opened. Select to show Date and Time on the slide Select to show slide number on each slide Indicates position of the slide number text box Footer text Select to hide footer text boxes on title slide
Inserting Graphics • On the slide you wish to insert the graphics, from Home toolbar click on the little arrow next to“Layout” • Choose a slide layout containing a content placeholder • Click the content button of your choice in the content placeholder (clipart, file, etc.) • Locate the graphic you wish to insert, and click the OK button
Insert and resize pictures and clip-art images • PowerPoint comes with a gallery of clip art that you can insert into your presentations. • You can modify clip art by changing its size, grouping or ungrouping its components, changing some of its colors, or applying animation effects. • You can also insert and modify pictures from other file sources, such as a CD, into your presentations. • When you insert a picture or clip art, you might need to adjust the size of the object to fit your layout. • To do so, click on the resize handles that appear when the object is selected and drag in or out
InsertingChart • You can embedand insert a chart in your presentation (embedded object: Information (object) contained in a source file and inserted into a destination file. Once embedded, the object becomes part of the destination file. Changes you make to the embedded object are reflected in the destination file.) When you embed data from a chart in PowerPoint, you edit that data in Office Excel 2007, and the worksheet is saved with the PowerPoint file. • You can paste an Excel chart into your presentation and link to data in Office Excel 2007 When you copy a chart from Office Excel 2007 and paste it into your presentation, the data in the chart is linked to the Excel worksheet. If you want to change the data in the chart, you must make your changes to the linked worksheet in Office Excel 2007. The Excel worksheet is a separate file and is not saved with the PowerPoint file.
Embed and insert a chart in your presentation • In PowerPoint, click the InsertCharticon in theplaceholder that you want to contain the chartor on the Insert toolbarclick Chart. • In the Insert Chart dialog box, click a chart, and then click OK.
Embed and insert a chart in your presentation • Note After you update the worksheet, the chart in PowerPoint will be updated automatically with the new data. • Office Excel 2007 opens in a split window and displays sample data on a worksheet. • In Excel, to replace the sample data, click a cell on the worksheet, and then type the data that you want. You can changethecharttypeandaxesoptions as seen in Excel lectures.
Paste an Excel chart into your presentation and link to data in Excel • You can create and copy the chart in Office Excel 2007 and then paste it into your PowerPoint presentation. When you update the data in Office Excel 2007, the chart in PowerPoint is updated as well. • In Excel, select the chart by clicking its border, and then on the Hometoolbarclick Cut. • In PowerPoint, click the placeholderon the slide that you want to insert the chart on. • On the HometoolbarclickPaste.
Create a table • PowerPoint enables you to insert tables into slides in much the same way that you would insert tables into a Word document. • Tables are useful on slides when you want to arrange information horizontally in rows and vertically in columns. • To insert a table: • Change the layout to Title and Content and click on Table icon from the content part. • Define the number of columns and rows • Add information to the table
Insert a movie 1-To Insert a Movie from a File on Your Computer: Select the slide where you wish to insert the movie. Select the Insert tab. Click the drop-down arrow on the Movie command in the Media Clips group. Select Insert a Movie from File from the menu. The Insert Movie dialog box will appear. Locate the file you want to insert from your computer. Click the file name. Click OK. The movie will appear on the slide. The Movie Tools Options tab and Picture Tools Format tab appears on the Ribbon when the movie is inserted. A dialog box will appear. Click Automatically or When Clicked. Automatically will start the movie automatically as soon as the slide appears in slide show view and When Clicked will start the movie when you click.
Working with Movies 1-To Preview the Movie: Select the movie on the slide. Select the Options tab. Click the Preview command in the Play group. Press the Preview command again to stop the movie before it finishes playing. 2- To Change the Movie Volume: Select the movie on the slide. Select the Options tab. Click the Slide Show Volume command in the Movie Options group. Select Low, Medium, High, or Mute to change the movie volume.
Working with Movies 1-To Change When the Movie Starts: Select the movie on the slide. Select the Options tab. Select the drop-down menu next to Play Movie: in the Movie Options group to change whether the movie playsAutomatically or When Clicked. 2-Other Options Click a box to select and deselect movie options on the Movie Tools Options tab. These options are: Hide During Show Play Full Screen Loop Until Stopped Rewind Movie After Playing NOTE: Picture Tools Format Tab Many of the commands on the Format tab cannot be used to modify the video in a significant way; however, a picture style can be applied to the movie.
Working with Sounds To Insert a Sound File from Your Computer: Select the slide where you want to add sound. Select the Insert tab. Click the drop-down arrow on the Sound command in the Media Clips group. Select Sound from File from the menu. The Insert Sound dialog box will appear. Locate the sound file on your computer. Select the file. Click OK. A sound icon and a dialog box will appear. Select Automatically or When Clicked. Click Automatically or When Clicked. Automatically will start the sound automatically as soon as the slide appears in slide show view and When Clicked will start the sound when you click
Sound Options Preview: Listen to the sound that will play. Slide Show Volume: Change the volume to low, medium, high, or mute. Hide During Show: Hide or display the sound icon during the slide show. Loop Until Stopped: Sound will play until you stop it by clicking or advancing to the next slide. 1-To Play Tracks from a CD: Select the Insert tab. Click the drop-down arrow on the Sound command. Select Play CD Audio Track from the menu. The Insert CD Audio dialog box will appear. Enter the Start at track: and End at track: information in the Clip selection section.
AddVisualEffectsToCreateAnimatedSlideShows • AnimationSchemes • CustomAnimation • Slidetransition • ActionButtons
Working with Animation Effects • 1-To Animate Text with a Default Animation: • Select the text box or text you wish to animate on the slide. • Select the Animations tab. • Click the Animate drop-down menu in the Animations group to see the animation effects for the selected text. The effects vary based on the selected item. • Select an animation effect. • All at Once: The selected text appears all at once. The entire text is labeled with one number on the slide. Click the drop-down arrow in the task pane to expand the contents and see that the text is labeled with one number. By 1st Level Paragraphs The text will appear bullet by bullet, or paragraph by paragraph. Each level of text is labeled with a different number on the slide. Click the drop-down arrow in the task pane to expand the contents and see that the text is labeled with multiple numbers.
Working with Animation Effects • 1-To Modify a Default or Custom Animation Effect: • After you apply an animation effect, drop-down menus will appear at the top of the Custom Animation task pane. The menus vary based on the animation effect. • Select an option from a drop-down menu to change the default setting. • Repeat until all menu options are the desired setting. • 2- To Remove an Animation Effect: • Select the text or object on the slide you wish to modify. • Select the Animations tab. • Click Custom Animation in the Animations group. The Custom Animation task pane will appear on the right. • Select the animation in the Custom Animation task pane list, if it is not already selected. • Click Remove. The animation label will disappear from the slide and from the Custom Animation task pane list
Working with Animation Effects 1-More Ways to Modify an Animation Effect Select an animation effect in the Custom Animation task pane list. Click the arrow to display a drop-down menu. Select Effects Options or Timing. A dialog box will appear. In the dialog box, add enhancements such as sounds and define what happens after the animation effect is applied to the selected item. The dialog box name is based on the animation effect name. In the example above, the animation effect is Fade. The tabs and the options on the tabs will vary based on the animation effect that is being modified.
Applying Animation Effects 1-To Apply a Default Animation Effect: Select the text or object on the slide you wish to animate. Select the Animations tab. Click the Animate drop-down menu in the Animations group to see the animation options for the selection. The options change based on the selected item. Move your cursor over each option to see a live preview of the animation on the slide. Click an option to select it.
CustomAnimation 1-To Apply a Custom Animation Effect: Select the text or object on the slide you wish to animate. Select the Animations tab. Click Custom Animation in the Animations group. The Custom Animation task pane will appear on the right. Click Add Effect in the task pane to add an animation effect to the selected text or object.
CustomAnimation • Select Entrance, Emphasis, Exit, or Motion Path to display a sub menu of animation effects for the category. • Entrance animation effects: Changes how the selected item appears on the page • Emphasis animation effects: Draws attention to the selected item while the slide is displayed • Exit animation effects: Changes the way the selected item disappears from the slide • Motion Path animation effect: Animates the selected item so that it moves to a specific place on the screen
CustomAnimation The animation will display on the selected item on the slide and will appear listed in the Custom Animation task pane. A number label appears on the slide next to the animated object . Also, a matching number label appears next to the animation in the Custom Animation task pane list. Drop-down menus appear at the top of the Custom Animation task pane. You can define the animation effect in greater detail here. The star Play Animations icon appears beneath the slide on the Slides tab in the task pane on the left. It indicates that the slide has an animation effect.
Inserting Transitions Animations Toolbar Set the transition sound and speed. Click Apply to All Slidestoapply a scheme to all slides. Choose the transition type
Slide Transitions To Apply a Transition to One Slide: Select the slide you wish to modify. Select the Animations tab. Locate the Transition to This Slide group. By default, No Transition is applied to each slide. Click the More drop-down arrow to display all the transition effects. Click a slide transition effect to apply it to the selected slide.
Slide Transitions To Apply a Slide Transition All Slides: Select the slide you wish to modify. Select the Animations tab. Locate the Transition to This Slide group. By default, No Transition is applied to each slide. Click the More drop-down arrow to display all the transition effects. Click a slide transition effect to apply it to the selected slide. Click Apply To All to apply the transition to all the slides in the presentation. A star Play Animations icon will appear beneath any slide that has a transition effect applied to it, as well as any slide that uses animation effects for text or objects. The icon is visible on the Slides tab in the task pane on the left and in slide sorter view. Click the star Play Animations icon to preview the animation or transition effect.
ActionButtons • ActionButtons • An actionbutton is a ready-madebuttonthatyou can insert intoyourpresentationand define hyperlinksfor. • InPowerPoint, hyperlinksbecomeactivewhenyourunyourpresentation, not whenyouarecreating it. • Useactionbuttonswhenyouwanttoincludebuttonswithcommonlyunderstoodsymbolsforgoingtothenext, previous, first, andlastslides. PowerPointalso has actionbuttonsforplayingmoviesorsounds. Actionbuttonsaremostcommonlyusedfor self-runningpresentations— forexample, at a boothorkiosk.
Action Buttons • First, choose the object that you want to add an action. • Then, click on the Action button from the Insert toolbar. Add an action to the selected object to specify what should happen when you click on it or hover it with your mouse
Apply multiple themes to a presentation Do the following to apply a theme to a second slide master and a second set of layouts: • NOTE Repeat this step to add more themes to additional slide masters and sets of layouts. • In Slide Master view, in the slide master and layout thumbnail task pane, scroll down to the last layout thumbnail in the set. • Click just below the last slide layout in the set. • On the Slide Master tab, in the Edit Theme group, click Themes. • Do one of the following: • Under Built-In, click the theme that you want. • To apply a newly-created theme or an existing theme that you modified and saved, under Custom, click the theme that you want.