Download
1 / 21
220 likes | 360 Views
Introduction to Matlab’s Graphical User Interface (GUI). Type “guide” “Guide” creates interface on a Figure window and code in an M-file. Some hidden code. The M-file and the Figure window usually have the same name.

E N D
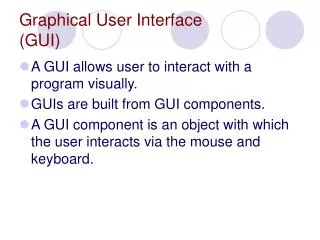
Introduction to Matlab’s Graphical User Interface (GUI) • Type “guide” • “Guide” creates interface on a Figure window and code in an M-file. Some hidden code. • The M-file and the Figure window usually have the same name. • We add “objects” in the “Layout editor” and complete “Callback functions” in M-file editor.
Try it. • Type “guide”. • The layout window appears. • Add a slider and an edit text box. • We want the text to represent the “value” of the slider. • Right click in the slider, go down to “view callbacks”, and select “Callback”
Try it. • You are invited to save the untitled document and then taken to an M-file editor, with the start of you callback function already written. • Notice that the M-file has the same name as the figure.
Handles • The main figure has a “handle” in the Matlab environment. • Handles allow Matlab to keep track of figures and graphic objects. • Within the main figure each of our objects (the slider and the text box) also have a handle. Child objects.
Handles • We differentiate between or identify objects by their handle. • Matlab has functions to keep track of and list these gui handles. • Run the M-file by typing “h=<yourfunctionname>”. • It doesn’t do much yet! • Don’t confuse the Figure with the Layout editor.
Handles • The handle of the figure is returned in variable “h”. • Although “h” only admits to being a double, it gives us access to all the properties of the figure. get(h) returns a copy of the figure’s (object’s) properties including its children. • The “children” are the objects that we have placed on the figure: slider and edit text.
Handles, Try it • Type “maindetails=get(h)” • maindetails lists all the properties in the figure. • The structure includes handles to the child objects. • We can use the handles to gain access to the child objects and alter their properties.
Properties, get() and set() • We can retrieve a copy of the values associated with a graphic object through its handle by using S=get(h) • The structure contains all the properties of the graphic object. • However, since it is a copy we cannot change the actual information associated with the graphic object.
Properties, get() and set() • So in true “OO’” style we must use an access method/function to adjust parameters.. • Set(h,'PropertyName',PropertyValue) • Get(h) or Get(h, ‘PropertyName’) returns the property. • Note ‘quotes’
Properties, get() and set() • Alter the ‘visible’ property of the slider using the handles to the child objects of your gui. • Put it back to what it was. • You will need to get the child handles array from the main gui and use set to change the visible property.
Example • g=test • get(g) • cld=get(g.Children) • cld=get(g, 'Children') • set(cld(1), 'Visible', 'off') • set(cld(1), 'Visible', 'on')
Reference to objects • In the GUI an object’s handles are passed to the callback function in the variable hObject. • Also, the self generated code produces a list of all objects handles in the structure “handles” (see later).
Other callbacks • CreateFcn • DeleteFcn • ButtonDownFcn • More….
Guihandles() • This function returns an structure of handles of all handle in the gui. • It passes the structure to your callback function in the variable “handles” • So we can access other objects through this structure. • handles.edit1 for example gives us the handle of the edit box.
Write some callbacks • Write a call back to display the slider’s position in the edit box. • Do the same, but make the slider move (‘value’) when a value between 0 and 1 is entered in the edit window.
Properties we need • We want to display the value of the slider in the edit box. • So we need something to retrieve the value from the slider. • And we need something to give the value to the edit box.
Properties we need • We use slider ‘value’ • And edit text ‘string’. • Also need string conversion from num2str and str2num
Examples In the slider1 callback get(hObject, 'Value') set(handles.edit1, 'String', num2str(v)) In the edit1 callback • s=get(hObject, 'String') • set(handles.slider1, 'Value', str2num(s))
Plot picture to axis • Image(a) will send an image to the current axis • You may need • gca Get current axes • axes Set current axes
Lets load a picture • Place an axes on your form. • Place a button which is going to load and display a picture. • Write the callback.
Example • In button1 callback • im=imread('test2.bmp'); • image(im)