Download
1 / 18
180 likes | 252 Views
City and County of San Francisco User Reference. Web Presentment Services.

E N D
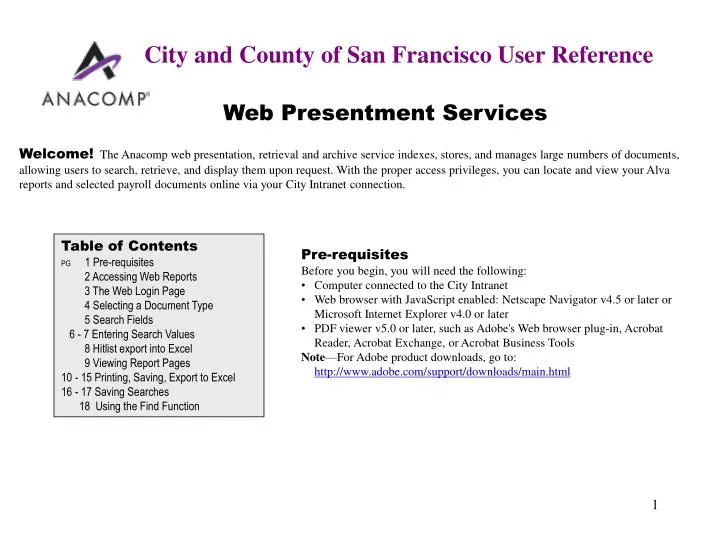
City and County of San Francisco User Reference Web Presentment Services Welcome!The Anacomp web presentation, retrieval and archive service indexes, stores, and manages large numbers of documents, allowing users to search, retrieve, and display them upon request. With the proper access privileges, you can locate and view your Alva reports and selected payroll documents online via your City Intranet connection. Table of Contents PG 1 Pre-requisites 2 Accessing Web Reports 3 The Web Login Page 4 Selecting a Document Type 5 Search Fields 6 - 7 Entering Search Values 8 Hitlist export into Excel 9 Viewing Report Pages 10 - 15 Printing, Saving, Export to Excel 16 - 17 Saving Searches 18 Using the Find Function • Pre-requisites • Before you begin, you will need the following: • Computer connected to the City Intranet • Web browser with JavaScript enabled: Netscape Navigator v4.5 or later or Microsoft Internet Explorer v4.0 or later • PDF viewer v5.0 or later, such as Adobe's Web browser plug-in, Acrobat Reader, Acrobat Exchange, or Acrobat Business Tools • Note—For Adobe product downloads, go to: http://www.adobe.com/support/downloads/main.html
Accessing Web Reports via the Intranet To begin, open your web browser and go to the Office of the Controller’s intranet page at: http://www.sfgov.org/wcm_controller/ControllersPolicies/index.html#PPSD Single-click on the Reports on Web Login link under the Payroll and Personnel sub-heading. Click here to login to Web Reports
Help Guides, Training class materials and the Electronic Document Retrieval System Access Form are available via a hyperlink. The Web Login Page Enter your assigned User ID and Password. If you encounter problems logging in, contact DTIS Security at 554-4040. Enter your assigned User ID and Password
ClickHelp to open WebHelp Click a report to select Selecting a Document Type Alva and print reports are displayed in alphanumeric order under the “Choose document type” heading. Use your mouse to drag the scroll bar, or to press the scroll buttons, to locate the desired report, then highlight the document type you wish to view.
Helpful hints The not empty operator will retrieve all available data. Search Fields After you select a report, the system displays the search fields available to the user. Each search field is usually followed by a drop-down operator list. The default operator for PPE Date and Last Name index fields is not empty. Helpful hints may appear after each text box to assist you in entering data in the correct format. You must enter a value for at least one search field in order to view the report. Remember! Employee Number and Social Security Number are no longer search fields as they are now masked.
Entering Search Values When you select empty or not empty as an operator, the text boxes are not displayed. If you select an operator (such as is) that requires a value but leave the text box empty, you will be prompted to fill in the field. Hint: View each search request as a short sentence. When searching for John Smith for Pay Period End 12/31/2004, you would set up your search fields as: PPE Date is 12/31/04 Last Name is Smith The ”And condition” enables you to enter additional search values for the corresponding search field. There is no limit to the number of conditions that can be entered for a search field. To add a new search value, simply click on the “Add condition” button. At the right side of the screen are three search mode choices: 1. First Hit- Finds and displays only the first hit that matches your search. 2. Current Period - Finds and displays all hits that match your search for the current period. This is your default and current period is set for one year. 3. All – Finds and displays all hits that match your search within the last 7 years. Enter additional search values In this search, is is acceptable since Last Name is set to not empty. Current period lists the last 12 months. .
Entering Search Values cont’d Click on Help to learn more about search operators With the “starts with”, “ends with”, “contains”, and “does not contain” operators, you can enter wildcard characters in your search value when you do not know the exact value or if you want to group your results. The % (percent sign) is the wildcard character used to indicate zero or more characters The _ (underscore) is the wildcard character used to indicates a single character The \ (backslash) negates any special meaning of the following character (which is typically '%', '_' or another '\'). For example, \% causes the system to read the % as a percent sign, not as a wildcard. Refer to Help for more information on Operators The % (percent sign) is a good choice in many cases.
Hitlist Export into Excel Click on the “Export all rows” and a window will pop up with Save or Open options. Selecting Open will display the document hitlist entries in an Excel spreadsheet.
Click on 01/14/2005 link to view the report page Click on New Search to return to the Search page Click on Show 101 to 164 link to view more hit list entries Viewing Report Pages • To view a report page from the list, click the PPE Datelink to the left of the search field. The page will open in a separate window. • To view another page of hit list results from a partial list, click the Show 101 to 200 link at the bottom of the page. Once you are on the second page in the list, you can move using the Show 1 to 100 and Show 201 to 300 links at the bottom of the lists. Your setting is 100 entries per page, a maximum of 1000 entries per query. • To perform a new search, click the New Search link at the bottom of the page which will take you back to the query screen.
Click the Show Printer Friendly icon Printing , Saving , Export to Excel Documents To print document(s) click on the Printer Friendly icon. A window will pop up with page number selections: All, Current page, andPages. You can only print/save/export 1000 pages at a time.
Printing, Saving, Export to Excel Documents (con’t) Click to view report pages. Adobe Acrobat Reader opens automatically. After you have selected your page numbers, click OK. A new window will pop up displaying a link to the report. Click on the link. Adobe Acrobat Reader will automatically open to display the pages you have selected. You can either click Save a Copy to save the pages to your network drive or Print to print the pages. Click to print Snapshot Tool for selective printing Click to save
Click on Save Click the Download Text icon Printing, Saving, Export to Excel Documents (con’t) Saving pages as text has the same procedure as Printing, Please choose the Save option. The Open option does not work at this time.
Type anew file name (do not use the default) Click on Save This should display Text Document. Printing, Saving, Export to Excel Documents (con’t) Enter a file name to save the pages in the download dialog and press Save. The page will be save in a text format.
Click the Export to XLS icon Printing, Saving, Export to Excel Documents (con’t) Saving pages to Excel requires a two-step process since the Microsoft Excel application is not automatically opened by this request.
Click this empty cell to select the “spreadsheet” Printing, Saving, Export to Excel Documents (con’t) The “spreadsheet” displayed cannot be saved or printed. To copy into Excel, first click on the upper-left cell to select the spreadsheet contents. Use the shortcut Cntl-C to then copy the spreadsheet contents. Finally, open Microsoft Excel and paste the contents into an empty spreadsheet.
Type a name for your saved search and click Save Enter your search values Saving Searches • You can save your search values for future queries. Up to ten (10) queries per user id can be saved. • To save a search: • 1. Create the search you want to save by selecting the document type and entering the appropriate search values • Type a name in the text box under Saved Searches. The saved query name can have up to twenty (20) characters and can contain letters and numbers. Spaces and special characters are invalid. • Click the Save link to the right of the box. Your saved search appears in the pull-down menu for future queries
Access Saved Searches by clicking on the menu Saving Searches To load a previously saved search, either: 1. Select a saved search from the pull-down menu or. 2. Click the Reload button. Your preset search criteria appear. To update a previously saved search: 1. Load a previously saved search by following the steps above. 2. Change any values in the group, document type, search fields, and/or search mode. 3. Click the Update button. The search criteria in the chosen search are updated for future queries. To Delete a saved search: 1. Load a previously saved search by following the steps above. 2. Click the Delete button. The chosen search disappears from the saved search pull-down menu.
Matches are highlighted in orange Enter search value Find link Hint: Your position in the report will determine if youselect Find Prior or Find Next Using the Find Function • Click on the Expand Find button The Find button box appears. • Enter the word(s) to search for in the Find edit box. Optionally, select Match case or Match whole word options. • Press the button to Find Previous in the document or the button to Find Next in the document. • The viewer highlights the first occurrences of the word(s) in a different color than the other items. • To clear the highlighted items, press the button. • To close the find button bar, press the button.