Download
1 / 17
170 likes | 351 Views
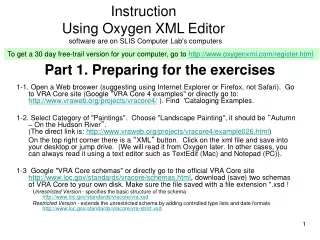
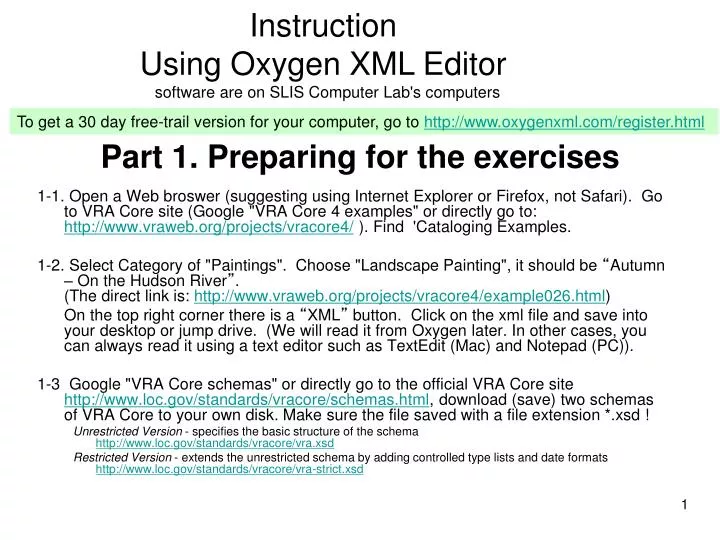
Instruction Using Oxygen XML Editor software are on SLIS Computer Lab's computers. Part 1. Preparing for the exercises. To get a 30 day free-trail version for your computer, go to http://www.oxygenxml.com/register.html.

E N D
Instruction Using Oxygen XML Editor software are on SLIS Computer Lab's computers Part 1. Preparing for the exercises To get a 30 day free-trail version for your computer, go to http://www.oxygenxml.com/register.html 1-1. Open a Web broswer (suggesting using Internet Explorer or Firefox, not Safari). Go to VRA Core site (Google "VRA Core 4 examples" or directly go to: http://www.vraweb.org/projects/vracore4/ ). Find 'Cataloging Examples. 1-2. Select Category of "Paintings". Choose "Landscape Painting", it should be “Autumn – On the Hudson River”. (The direct link is: http://www.vraweb.org/projects/vracore4/example026.html) On the top right corner there is a “XML” button. Click on the xml file and save into your desktop or jump drive. (We will read it from Oxygen later. In other cases, you can always read it using a text editor such as TextEdit (Mac) and Notepad (PC)). 1-3 Google "VRA Core schemas" or directly go to the official VRA Core site http://www.loc.gov/standards/vracore/schemas.html, download (save) two schemas of VRA Core to your own disk. Make sure the file saved with a file extension *.xsd ! Unrestricted Version - specifies the basic structure of the schema http://www.loc.gov/standards/vracore/vra.xsd Restricted Version - extends the unrestricted schema by adding controlled type lists and date formatshttp://www.loc.gov/standards/vracore/vra-strict.xsd
element attribute value Part 2. Reading a VRA XML record 2-1. Starting the software • Start All Programs Oxygen XML Editor Oxygen XML Editor • It will take a while for the software to start! • Close the “Did You Know?” box. • The first screen is blank.
element attribute value 2-2. Element1. Choose FILE OPEN to open up the XML record example you downloaded. Now you can see the XML record in the center part of the screen. 2. Click on the hierarchy icon to view elements displayed hierarchically. 1 2 4 3 4. Elements available for this set 3. Outline view of the record: wrapper element subelements ? What sub-elements are available for <agent>? (Click on <agent> tag, see in box ). 5
element attribute value 2-3 Attributes 1. When clicking on an element, the attributes that are available for it will show on the upper right box. ? What attributes are available for <agent >? ? What attributes have been used for the name of this agent? And for the dates? 1. Attributes available for an element 1
element attribute value ? What attributes are available for <name >? (cont.) 2-3 Attributes: Another way to find out attributes: 1. Inside a tag, type a space, then a list of attributes will open. 2. Clicking on an attribute, you may see the explanations of the attribute. 1 2
Part 3. Editing an XML record 3-1 Add a new element <agent> and its sub-elements • Type "<agent>" after the last set of agent, right below the closing tag"</agent>". • Start a new line below <agent> tag in order to add subelements. (Hit a return key between <agent></agent> pair .) • Add sub-elements under <agent> by typing "<name>"; or double click on the “name” subelement from the lower-right box to get it onto the record. • Add two other subelements: ‘dates’, and ‘role’ in the record. • (Not required: For <dates>, it also two sub-subelements. You can insert them in the <dates></dates> set.) 1 2 3 4
3 1 2 3-5 Attribute values Now try your own name. • Inside the <name> tag, before ">", type a space after ‘name’ to get the list of the attribute. • Choose ‘type’ attribute. its allowable values will show on the screen like a pop-up list. (When there is already a list of restricted values, the values will show on the screen like a pop-up list. If no pre-defined values, there will be no list.) 3. For #2, this can also be done by clicking on the attribute name on the upper- right box of the screen. ? What ‘type’ values are listed for <name >? ? What ‘type’ values are listed for <dates?
3-3 Values – use controlled vocabularies • Add a person’s name, dates, role. • Follow the example provided by the record. Add a person’s name, dates, role.(For practice, make any name and dates you like.) • For 'role', go to AAT to find the term ‘painter’ and see if the reference id is the same: • Google ‘AAT” Art and Architecture Thesaurus. At AAT site, search “painter” (with quotation marks) Find “painters (artists)”, open the record to see the concept ID and all other information. • For a person's refid, back to AAT and switch to ULAN -> Union List of Artist Names search Jasper Francis Cropsey view record and find out the ID. 1 2 2 1 • Save the revised record with another name.
Part 4. Doing your own project 4-1 Create a 'project' file 1. Click on Project on the tool bar for a New project. It is like to create a folder for your project. Your xsd, xml, and other files for the same project can be stored under this project. 1 2. Right-mouse click on "newProject.xpr" Add Files; Add the vra-4.0-restricted.xsd file you downloaded from VRA site. 2 3. File Save all Give a name to the project and save into a place you want.
4-2 Start a new VRA record' xml file.1.To create a new file, click on File New2. A list is offered of different file types. The default is XML, so click on OK. 1 2
A new window will pop-up. • At the URL you can point to the VRA Core 4.0 'restricted' schema xsd file. • The namespace will automatically be filled.Leave the prefix empty for now. • It is very important to choose a Root Element correctly. In VRA Core 4.0, it is 'vra'. (In CDWA Lite, the Root Element is 'cdwalite'.) These could be the prefix as well. But for this assignment, we will not be using a prefix now. • It is also very important to check the box 'Add Optional content' so all elements (not just the required ones) will show up. 1 2 3 4
4-3 Work on the XML template • 1. Save your file for use in the future. • 2. From the left-lower box, you will see collection, work, or image. Click the type that you will NOT need to use (e.g., collection and image here) and DELETE them so that only the elements for work will stay in the central workspace. • The elements at each level can be seen from the Outline pane at the left lower box. • (Note for this version of software, when you just keep WORK type, the XML record will include both a work and an image. You can either put your two records here together, or separate them.) 2
(cont.) 3-3 Work on the XML template 3. Save the file after you did editing. 4. Add this file into your ‘project’ space if your file is in a different place. • Click on project’s file right-mouse-click Add Files 5. Submit your xml file on Blackboard. 6. Print: If you like to keep a copy, you may directly print the record from SLIS 310A printer. Or, open the file from your text editor and print. 4
[Additional notes] Part 5. Using Tree-editor --- a Non-XML way to edit a recordTools Tree EditorOption A: 1. Click on the tag (e.g., agentSet) that you want to add sub-ordinate element, (e.g., agent) 2. Choose ‘Insert Element’from the icon or menu to get the available elements or sub-elements.Option B: 3. Obtain an element tag from the lower-right box, give the position (after, first, last), double click. 4. =2. Choose ‘Insert Element’from the icon or menu If you are not confortable with XML, you can try these. 2 2 1 3
5. Click on an element (e.g., name), choose ‘Insert attribute’ from the icon or menu. 6. Select the attribute you need (e.g., type) and click to insert it under the element agent. 7. Choose ‘Start Editing’ icon in order to add an attribute. 8. The attribute will be filled in by you. Find the available attributes on the upper-right box. 5 5 8 7 5 6
In order to type a real personal name into the record, click on the element tag (e.g., name). • Click on the T icon to obtain a text box. • Now you can type the text into the box. 10 9 11
[Additional Notes] Part 6. Grid view of the record1. Switch to ‘Grid view’. 2. Click the sign to open up the description 2 1 You can also use this interface to edit. For example, right-mouse-click on an element to insert before or after an element, or to append sub-elements, attributes, etc. You will need to have a clear idea what you want to add and what attributes values are available.