Download
1 / 120
1.21k likes | 1.4k Views
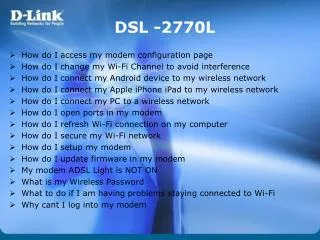
DSL-2750B. DSL-2750B T1 EWAN-NBN-UFB Setup Guide v.1.00(AU) DSL-2750B T1 QSG v.1.00(AU) How do I access my modems configuration pages How do I change ADSL Username or Password settings in my modem How do I change my Wi-Fi Channel to avoid interference

E N D
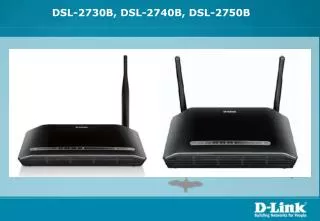
DSL-2750B • DSL-2750B T1 EWAN-NBN-UFB Setup Guide v.1.00(AU) • DSL-2750B T1 QSG v.1.00(AU) • How do I access my modems configuration pages • How do I change ADSL Username or Password settings in my modem • How do I change my Wi-Fi Channel to avoid interference • How do I configure my modem using Setup Disk • How do I enable or disable wireless in my modem • How do I enable remote management • How do I setup parental control in my modem • How do I setup Time and Date in my modem • How to configure DHCP Reservation • How to Configure Port Forwarding • How to Enable MAC Filtering • How to Enable Wireless Security • IPTV Setup on DSL-2740B-Rev.F and DSL-2750B-Rev.B • What is the button on the side of my router used for
Step 1. Open your Internet Browser and in the URL field type in http://192.168.1.1. Step 2. Type in the default Username and Password then click on the Log In button. These values are provided below: Username: admin Password: admin
Step 3. You should now be present with the DSL-2750B Revision T1 Web Configuration: Step 4. Please click on [SETUP] > [Internet Setup], select [ETH WAN] then click on [Add] button
Step 5. Select [MAC Encapsulation Routing (MER)] then click on [Next] button at the bottom of the page
Step 6. Click on [Apply] button at the bottom of the page to save the changes.
QUICK SETUP GUIDE • PPPoE • PPPoA • BRIDGE MODE • ETHERNET WAN 1. ACCESSING THE WEB UI • To access the Web UI of the DSL-2750B, connect your computer to the DSL-2750B using the • Ethernet cable provided. Then connect the power cable to the DSL-2750B. The power light will • display as solid green. • Then simply open a browser window and enter the IP address in the browser address field:
Internet Connection type: PPPoE (Australian Users) PPPoA (New Zealand Users) Bridge Mode (If you want to use this Router as a Modem only) Ethernet WAN Mode (NBN / UFB Customers)
2. SETUP PPPoE CONNECTION PPP over Ethernet (Australia) SETUP > WIZARD Click on the Setup Wizard button to start the wizard, below we will go through the required settings to setup a PPPoE connection.
Click on Next to start the Setup Wizard. It is recommended to setup a new password for your DSL-2750B. Please enter the current password "admin" and then enter a new password below. Once you have entered your new passwords click on Next.
Cont... It is recommended to configure the Time Settings to synchronize with the Internet Time Servers. Please enable the check box and select your Time Zone, then click Next.
In this example we will be configuring the Internet connection as PPPoE which is the most common for Australian users. Ensure the WAN Services type is set as DSL. Select Australia from the Country selection dropdown, then select your Internet Service Provider (ISP) from the list. Once you have selected these two entries, you will notice the majority of the fields are completed for you. Lastly enter your Username and Passwords that have been provided by your ISP. Click on Next when you have entered your information.
If you wish to use Wireless on your router you will now be able to configure it below. It is recommended to change the Wireless Network Name and also use WPA2-PSK for security. Once you have made the required changes click on Next.
Please review the details to ensure they are correct. Click on Apply to make the changes effective immediately. You should now have an active Internet Connection.
3. SETUP PPPoA CONNECTION PPP over ATM (New Zealand) SETUP > WIZARD Click on the Setup Wizard button to start the wizard, below we will go through the required settings to setup a PPPoA connection.
Click on Next to start the Setup Wizard. It is recommeded to setup a new password for your DSL-2750B. Please enter the current password "admin" and then enter a new password below. Once you have entered your new passwords click on Next.
Cont... It is recommended to configure the Time Settings to synchronize with the Internet Time Servers. Please enable the check box and select your Time Zone, then click Next.
In this example we will be configuring the Internet connection as PPPoA which is the most common for New Zealand users. Ensure the WAN Services type is set as DSL. Select New Zealand from the Country selection dropdown, then select your Internet Service Provider (ISP) from the list. Once you have selected these two entries, you will notice the majority of the fields are completed for you. Lastly enter your Username and Passwords that have been provided by your ISP. Click on Next when you have entered your information.
If you wish to use Wireless on your router you will now be able to configure it below. It is recommended to change the Wireless Network Name and also use WPA2-PSK for security. Once you have made the required changes click on Next.
Please review the details to ensure they are correct. Click on Apply to make the changes effective immediately. You should now have an active Internet Connection.
4. SETUP BRIDGE MODE BRIDGE MODE (Modem Only Mode) SETUP > WIZARD Click on the Setup Wizard button to start the wizard, below we will go through the required settings to setup a Bridge Mode connection.
Click on Next to start the Setup Wizard. It is recommended to setup a new password for your DSL-2750B. Please enter the current password "admin" and then enter a new password below. Once you have entered your new passwords click on Next.
Cont... It is not required to configure the Time Settings while in Bridge Mode, please click Next.
In this example we will be configuring the Internet connection as Bridge Mode. This is mostly used in Australia. Ensure the WAN Services type is set as DSL. Select the Country Australia from the list, then the Internet Service Provider (ISP) as Others. Then Change the Protocol to Bridge and enter the VPI as 8 and the VPI as 35. Once you have completed this click on Next.
Since we are not using the Routing features of the DSL-2750B the Wireless LAN feature is not required for Bridge Mode. Please uncheck the Enable Your Wireless Network checkbox and click on Next.
Please review the details to ensure they are correct. Click on Apply to make the changes effective immediately. Your DSL-2750B is now configured in Bridge Mode. You can now connect this device to your existing Router and use PPPoE on the existing Router's WAN/Internet connection settings to connect to the Internet.
5. SETUP ETHERNET WAN MODE ETHERNET WAN (NBN / UFB Customers) SETUP > WIZARD Click on the Setup Wizard button to start the wizard, below we will go through the required settings to setup a Ethernet WAN connection.
Click on Next to start the Setup Wizard. It is recommended to setup a new password for your DSL-2750B. Please enter the current password "admin" and then enter a new password below. Once you have entered your new passwords click on Next.
Cont... It is recommended to configure the Time Settings to synchronize with the Internet Time Servers. Please enable the check box and select your Time Zone, then click Next.
In this example we will be configuring the Internet connection for an Ethernet WAN which is the most common for NBN / UFB customers. Ensure the WAN Services type is set as ETH WAN. Select the required Protocol from the list. In this example we will use Dynamic IP but your Internet Service Provider (ISP) may use a different protocol. Please ensure you select the appropriate Protocol as instructed by the ISP then click Next.
If you wish to use Wireless on your router you will now be able to configure it below. It is recommended to change the Wireless Network Name and also use WPA2-PSK for security. Once you have made the required changes click on Next.
Please review the details to ensure they are correct. Click on Apply to make the changes effective immediately. Connect the Ethernet cable that comes from the Network Termination Device (NTD) in your home that was installed by the ISP to LAN Port 4 on the DSL-2750B. You should now have an active Internet Connection.
How to access the Configuration Pages (Web GUI) of my modem • Please note: Accessing your modem’s configuration pages does not require Internet connection as these pages are stored inside your modem. Your computer just needs to be connected to the modem. 1. Open your Internet browser e.g. Internet Explorer, Firefox, Chrome, Safari, etc. and enter the IP address of your D-Link modem in the address bar: http://192.168.1.1 2. When prompted type in the Username and Password then click on the “Log In” button. If you have not changed the password for the modem administration, the factory settings are: Username: admin Password: admin
3. You should now be presented with the modem’s configuration pages (Web-based Configuration):
Troubleshooting Below are the troubleshooting steps to follow if you are not able to access the configuration page of your modem via its default address http://192.168.1.1. If step 1 does not help, then try step 2 and so on until the problem is resolved. Step 1. Access the modem’s configuration page. Accessing your modem’s configuration pages does not require Internet connection as these pages are stored inside your modem. Your computer just needs to be connected to the modem. First try connecting your computer to the modem using a network cable. Open your Internet browser e.g. Internet Explorer, Firefox, Chrome, Safari, etc. and enter the IP address of your D-Link modem in the address bar: http://192.168.1.1. This should open the login page for your modem’s configuration pages. Use the instructions provided with your product to login and complete the configuration.
Step 2. Check connectivity. Verify physical connectivity by checking for solid link light on the Ethernet (LAN) port of the modem. If you do not get a solid link light, try using a different cable or connect to a different LAN port on the device if possible. If the computer is turned off, the link light may not be on. Recycle the power on the modem. To do that, switch the power off. Wait 30 seconds. Switch the power on and wait for the lights to stabilize. Restart the computer. After your computer restarts check the link light on the modem’s Ethernet (LAN) port. Step 3. Check your Internet Browser settings. Make sure your Internet browser is not set to use a proxy server. In Internet Explorer you can check this by going to Tools > Internet Options > Connections > LAN Settings. Try accessing your modem with “Automatically detect settings” option disabled. Close all your browser windows and re-open it after changing the settings.
Step 4. Check Network Adapter settings (For Windows Only). If you are using Windows XP, Vista, 7 or 8 - Please go to Control Panel >Network and Internet > Network Connections... Make sure that your Local Area Connection is enabled and not bridged with any other connection. If you see any icon there which is called “Bridge” - delete it. If you see your Local Area Connection marked as Bridged - right-click and select Remove from Bridge.
Step 5. Set your computer with static IP address. Windows XP: Control Panel > Network Connections > Local Area Connection > Properties > Internet protocol TCP/IP > Properties... Windows Vista: Control Panel > Network and Internet > [Network and Sharing Centre] > View Network Status and Tasks > View Status > Properties > Internet Protocol v4 > Properties... Windows 7 and 8: Control Panel > Network and Internet > [Network and Sharing Centre] > Click on [Change adapter settings] on the left hand side menu. Right click on [Local Area Connection] > [Properties] > [Internet Protocol Version 4] > [Properties] Select the "Use the following IP address" option: IP address: 192.168.1.99 Subnet mask: 255.255.255.0 Default Gateway: 192.168.1.1 (your modem's address) DNS: 192.168.1.1 and 61.88.88.88 (or whichever your provider is using). Click on OK.
Step 6. Factory reset the modem. While the modem is powered on - press and hold the reset button for 10 sec. Release the button and wait until the modem boots up (1 min). Please NOTE: the factory reset will change all the modem’s settings back to factory defaults, which means all the changes you applied to the modem will be reverted (including passwords). Please have your Internet Provider’s login details (your Username and Password) with you, which you will need to re-enter into the modem’s Internet Settings field. Step 7. Configure your Internet settings. Go to Start > Settings > Control Panel. Double click the Internet Options Icon. From the Security tab, click the button to restore the settings to their defaults. Click to the Connection tab and set the dial-up option to Never Dial a Connection. Click the LAN Settings button. Nothing should be checked. Click OK. Go to the Advanced tab and click the button to restore these settings to their defaults. Click OK out to the desktop and close any open windows. Step 8. Disable any Internet security software running on the computer. Software firewalls like Zone Alarm, Black Ice, Sygate, Norton Personal Firewall, etc. may block access to the configuration pages of your modem. Check the help files included with your firewall software for more information on disabling or configuring it.
Below is an example screenshot of firewall software configuration options.
Step 9. Try to access the router using a different Internet Browser. Open an alternative Internet browser e.g. Internet Explorer, Firefox, Chrome, Safari, etc. and enter the IP address of your D-Link modem in the address bar: http://192.168.1.1. Try these options in the address bar of your Internet Browser: 192.168.1.1 http://192.168.1.1 http://192.168.1.1:88 Step 10: Try accessing the modem from a different computer.
How to change ADSL Username and Password Step 1. Open your Internet Browser and in the address field type in http://192.168.1.1. Step 2. When prompted type in the Username and Password then click on the “Log In” button. If you have not changed the password for the modem administration, the factory settings are: Username: admin Password: admin
Step 3. After logging in you will be presented with the modem’s configuration pages. Please click on [Internet Setup], and then click on [Wan service] button:
Step 6. Please type in your NEW account details as given by you Internet Service Provider: • In the "PPP Username" field – type in your new username given by your Internet Service Provider • In the "PPP Password" field – type in your new password given by your Internet Service Provider • Then click on the Next button: