Download
1 / 83

E N D
Swing and AWT • To this point, you have seen only how to write programs that take input from the keyboard, fuss with it, and then display the results on a console screen. This is not what most users want now. Modern programs don’t work this way and neither do web pages. This chapter starts you on the road to writing Java programs that use a graphical user interface (GUI). • There are actually two sets of java GUI components(Swing and AWT) • In Java’s early days, GUI’s were built with components from the abstract window tool kit(AWT) In package java.awt. • The Swing GUI components are from javax.swing package • In particular, you learn • how to write programs that size and locate windows on the screen, display text, images in a window. • how to process events, such as keystrokes and mouse clicks, and how to add interface elements, such as menus and buttons, to your applications.
Swing VS AWT • When Java 1.0 was introduced, it contained a class library, which Sun called the Abstract Window Toolkit (AWT), for basic GUI programming. • But AWT become difficult to write a high-quality portable graphics library that depended on native user interface elements. User interface elements such as menus, scrollbars, and text fields can have subtle differences in behavior on different platforms. It was hard, therefore, to give users a consistent and predictable experience with this approach.
As a result, GUI applications built with the AWT simply did not look as nice as native Windows or Macintosh applications, nor did they have the kind of functionality that users of those platforms had come to expect. More depressingly, there were different bugs in the AWT user interface library on the different platforms. • Sun worked to perfect this approach, creating a user interface library with the code name “Swing.” Swing was available as an extension to Java 1.1 and became a part of the standard library in Java SE 1.2. • Swing is not a complete replacement for the AWT—it is built on top of the AWT architecture. Swing simply gives you more capable user interface components. You use the foundations of the AWT. • Nowadays most java user interface programming are done in swing
Creating a Frame A top-level window (that is, a window that is not contained inside another window) is called a frame in Java. The AWT library has a class, called Frame, for this top level. The Swing version of this class is called JFrame and extends the Frame class. A simple programme displays an empty frame on the screen import javax.swing.*; public class SimpleFrameTest { public static void main(String[] args) { SimpleFrame frame = new SimpleFrame();
frame.setDefaultCloseOperation(JFrame.EXIT_ON_CLOSE); frame.setVisible(true); } } class SimpleFrame extends JFrame { public SimpleFrame() { setSize(DEFAULT_WIDTH, DEFAULT_HEIGHT); } public static final int DEFAULT_WIDTH = 300; public static final int DEFAULT_HEIGHT = 200; }
The Swing classes are placed in the javax.swing package. The package name javax indicates a Java extension package, not a core package. • By default, a frame has a rather useless size of 0 × 0 pixels. We define a subclass Simple-Frame whose constructor sets the size to 300 × 200 pixels. • we define what should happen when the user closes the application’s frame. For this particular program, we want the program to exit. To select this behavior, we use the statement frame.setDefaultCloseOperation(JFrame.EXIT_ON_CLOSE); • In other programs with multiple frames, you would not want the program to exit just because the user closes one of the frames. By default, a frame is hidden when the user closes it, but the program does not terminate. • Simply constructing a frame does not automatically display it. Frames start their life invisible. That gives the programmer the chance to add components into the frame before showing it for the first time. To show the frame, the main method calls the setVisible method of the frame
Positioning a Frame • Most of the methods for working with the size and position of a frame come from the various superclasses of JFrame. • The setLocation and setBounds methods for setting the position of the frame • The setTitle method for changing the text in the title bar • The setResizable method, which takes a boolean to determine if a frame will be resizeable by the user
As the API notes indicate, the Component class (which is the ancestor of all GUI objects) and the Window class (which is the superclass of the Frame class) are where you need to look to find the methods to resize and reshape frames. • the setLocation method in the Component class is one way to reposition a component. If you make the call setLocation(x, y) • the top-left corner is located x pixels across and y pixels down, where (0, 0) is the top-left corner of the screen. Similarly, the setBounds method in Component lets you resize and relocate a component (in particular, a JFrame) in one step, as setBounds(x, y, width, height)
GUI-Based Input/Output with JOptionPane • Dialog boxes are windows in which programs display important messages to the user or obtain information from the user • Java’s JOptionPane class (package javax.swing) provides prebuilt dialog boxes for both input and output • These are displayed by invoking static JOptionPane methods. • Simple addition application that uses two input dialogs to obtain integers from the user and a message dialog to display the sum of the integers the user enters.
//Addition program that uses JOptionPane for input and output. • import javax.swing.JOptionPane; // program uses JOptionPane • public class Addition • { • public static void main( String[] args ) • { • String firstNumber = JOptionPane.showInputDialog( "Enter first integer" ); • String secondNumber = JOptionPane.showInputDialog( "Enter second integer" ); • int number1 = Integer.parseInt( firstNumber ); • int number2 = Integer.parseInt( secondNumber ); • int sum = number1 + number2; // add numbers • // display result in a JOptionPane message dialog • JOptionPane.showMessageDialog( null, "The sum is " + sum, "Sum of Two Integers", JOptionPane.PLAIN_MESSAGE ); • } // end method main • } // end class Addition
Line 2 imports class JOptionPane. Lines 8–9 declare the local String variable first-Number and assign it the result of the call to JOptionPane static method showInputDialog.This method displays an input dialog, usingthe method’s String argument ("Enter first integer") as a prompt. • The user types characters in the text field, then clicks OK or presses the Enter key to submit the String to the program. Unlike Scanner, which can be used to input values of several types from the user at the keyboard, an input dialog can input only Strings. If the user either types a non integer value or clicks the Cancel button in the input dialog, an exception will occur and the program will not operate correctly.
Converting Strings to int Values To perform the calculation, we convert the Strings that the user entered to intvalues.Recall that the Integer class’s static method parseInt converts its String argument to an int value. Lines 10–11assign the converted values to local variables number1 and number2, and line 12 sums these values. • Message Dialogs Lines 14 use JOptionPane static method showMessageDialog to display a message dialog containing the sum. The first argument helps the Java application determine where to position the dialog box. A dialog is typically displayed from a GUI application with its own window. The first argument refers to that window (known as the parent window) and causes the dialog to appear centered over the parent
If the first argument is null, the dialog box is displayed at the center of your screen. what if I want the dialogue box to appear somewhere else? The second argument is the message to display—in this case, the result of concatenating the String "The sum is " and the value of sum. The third argument—" Sum of Two Integers"—is the String that should appear in the title bar at the top of the dialog. • The fourth argument—JOptionPane.PLAIN_MESSAGE—is the type of message dialog to display. A PLAIN_MESSAGE dialog does not display an icon to the left of the message. Class JOptionPane provides several overloaded versions of methods showInputDialog and showMessageDialog, as well as methods that display other dialog types
JOptionPane Message Dialog Constants The constants that represent the message dialog types are shown in Fig. below. All message dialog types except PLAIN_MESSAGE display an icon to the left of the message. These icons provide a visual indication of the message’s importance to the user. A QUESTION_MESSAGE icon is the default icon for an input dialog box Message dialog type Icon Description ERROR_MESSAGE Indicates an error. INFORMATION_MESSAGE Indicates an informational message. WARNING_MESSAGE Warns of a potential problem. QUESTION_MESSAGE Poses a question. This dialog normally requires a response, such as clicking a Yes or a No button. PLAIN_MESSAGE A dialog that contains a message, but no icon. Fig. | JOptionPane static constants for message dialogs.
Overview of Swing Components Though it’s possible to perform input and output using the JOptionPane dialogs, most GUI applications require more elaborate user interfaces. The remainder of this chapter discusses many GUI components that enable application developers to create robust GUIs. The following fig. lists several basic Swing GUI components that we discuss. • JLabel Displays uneditable text and/or icons. • JTextField Typically receives input from the user. • JButton Triggers an event when clicked with the mouse. • JCheckBox Specifies an option that can be selected or not selected. • JComboBox A drop-down list of items from which the user can make a selection. • JList A list of items from which the user can make a selection by clicking on any • one of them. Multiple elements can be selected. • JPanel An area in which components can be placed and organized.
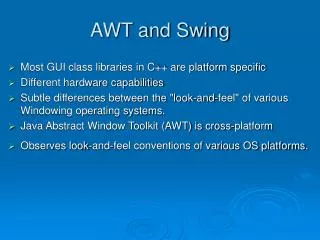
Most Swing components are lightweight components—they’re written, manipulated and displayed completely in Java. AWT components are heavyweight components, because they rely on the local platform’s windowing system to determine their functionality and their look-and-feel. • shows an inheritance hierarchy of classes from which lightweight Swing components inherit their common attributes and behaviors.
Fig.Commonsuperclasses of Swing components • Class Component (package java.awt) is a superclass that declares the common features of GUI components in packages java.awt and javax.swing. • Class JComponent (package javax.swing) is a subclass of Container. JComponent is the superclass of all lightweight Swing components and declares their common attributes and behaviors.
Displaying Text and Images in a window • Most windows you’ll create that can contain Swing GUI components are instances of class JFrame or a subclass of JFrame. • Jframe provides the basic attributes and behaviors of a window—a title bar at the top, and buttons to minimize, maximize and close the window. • Since an application’s GUI is typically specific to the application, most of our examples will consist of two classes—a subclass of JFrame that helps us demonstrate new GUI concepts and an application class in which main creates and displays the application’s primary window.
Labeling GUI Components • JLabel—a subclass of JComponent. A JLabel displays read-only text, an image, or both text and an image. • To learn the complete details of each GUIcomponent, visit its page in the online documentation. For class JLabel, visit download.oracle.com/javase/6/docs/api/javax/swing/JLabel.html
// LabelTest.java • import java.awt.FlowLayout; // specifies how components are arranged • import javax.swing.JFrame; // provides basic window features • import javax.swing.JLabel; // displays text and images • import javax.swing.SwingConstants; // common constants used with Swing • import javax.swing.Icon; // interface used to manipulate images • import javax.swing.ImageIcon; // loads images • public class LabelTest • { • public static void main( String[] args ) • { • LabelFramelabelFrame = new LabelFrame(); // create LabelFrame • labelFrame.setDefaultCloseOperation( JFrame.EXIT_ON_CLOSE ); • labelFrame.setSize( 260, 180 ); // set frame size • labelFrame.setVisible( true ); // display frame • } // end main • } // end class LabelTest
class LabelFrame extends JFrame • { • private JLabel label1; // JLabel with just text • private JLabel label2; // JLabel constructed with text and icon • private JLabel label3; // JLabel with added text and icon • // LabelFrame constructor adds JLabels to JFrame • public LabelFrame() • { • super( "Testing JLabel" ); • setLayout( new FlowLayout() ); // set frame layout • // JLabel constructor with a string argument • label1 = new JLabel( "Label with text" ); • label1.setToolTipText( "This is label1" ); • add( label1 ); // add label1 to JFrame • // JLabel constructor with string, Icon and alignment arguments • Icon bug = new ImageIcon( getClass().getResource( "bug1.png" ) ); • label2 = new JLabel( "Label with text and icon", bug, • SwingConstants.LEFT ); • label2.setToolTipText( "This is label2" ); • add( label2 ); // add label2 to JFrame
label3 = new JLabel(); // JLabel constructor no arguments • label3.setText( "Label with icon and text at bottom" ); • label3.setIcon( bug ); // add icon to JLabel • label3.setHorizontalTextPosition( SwingConstants.CENTER ); • label3.setVerticalTextPosition( SwingConstants.BOTTOM ); • label3.setToolTipText( "This is label3" ); • add( label3 ); // add label3 to JFrame • } // end LabelFrame constructor • } // end class LabelFrame
Typically, the JFrame subclass’s constructor builds the GUI that’s displayed in the window when the application executes. Line 25 invokes superclassJFrame’s constructor with the argument "Testing JLabel". JFrame’s constructor uses this String as the text in the window’s title bar. • Specifying the Layout • When building a GUI, you must attach each GUI component to a container, such as a window created with a JFrame. Also, you typically must decide where to position each GUI component— known as specifying the layout. Java provides several layout managers that can help you position components.
With the FlowLayout layout manager, components are placed on a container from left to right in the order in which they’re added. When no more components can fit on the current line, they continue to display left to right on the next line. If the container is resized, a Flow- Layout reflows the components, possibly with fewer or more rows based on the new container width. • Every container has a default layout, which we’re changing for LabelFrame to a FlowLayout (line 26).Method setLayoutis inherited into class LabelFrame indirectly from class Container.
The argument to the method must be an object of a class that implements the LayoutManager interface (e.g., FlowLayout). Line 26 creates a new FlowLayout object and passes its reference as the argument to setLayout. • Creating and Attaching label1 The JLabel displays this text on the screen as part of the application’s GUI. Line 29 uses method setToolTipText(inherited by JLabel from JComponent) to specify the tool tip that’s displayed when the user positions the mouse cursor over the JLabel in the GUI.
Line 30 attaches label1 to the LabelFrame by passing label1 to the add method, which is inherited indirectly from class Container. • The Icon Interface and Class ImageIcon An icon is normally specified with an Icon argument to a constructor or to the component’s setIconmethod. An Icon is an object of any class that implements interface Icon (package javax.swing). Class ImageIconsupports several image formats, including Graphics Interchange Format (GIF), Portable Network Graphics (PNG) and Joint Photographic Experts Group (JPEG). The file bug1.png contains the image to load and store in the ImageIcon object. This image is included in the directory for this example. The ImageIcon object is assigned to Icon reference bug.
Loading an Image Resource In line 32, the expression getClass().getResource("bug1.png") invokes method get- Class (inherited indirectly from class Object) to retrieve a reference to the Class object that represents the LabelFrame class declaration. That reference is then used to invoke Class method getResource, which returns the location of the image as a URL. The ImageIcon constructor uses the URL to locate the image, then loads it into memory. As we discussed , the JVM loads class declarations into memory, using a class loader. The class loader knows where each class it loads is located on disk. Method getResource uses the Class object’s class loader to determine the location of a resource, such as an image file. In this example, the image file is stored in the same location as the Label- Frame.class file. The techniques described here enable an application to load image files from locations that are relative to the class file’s location.
Creating and Attaching label2 • Lines 33 use another JLabel constructor to create a JLabel that displays the text "Label with text and icon" and the Icon bug . The last constructor argument indicates that the label’s contents are left justified, or left aligned (i.e., the icon and text are at the left side of the label’s area on the screen). Interface SwingConstants(package javax.swing) declares a set of common integer constants (such as SwingConstants.LEFT) that are used with many Swing components. By default, the text appears to the right of the image when a label contains both text and an image. The horizontal and vertical alignments of a JLabel can be set with methods setHorizontalAlignmentand setVerticalAlignment, respectively. Line 35 specifies the tool-tip text for label2, and line 36 adds label2 to the JFrame.
Creating and Attaching label3 • Class JLabel provides methods to change a label’s appearance after it’s been instantiated. Line 37 creates an empty JLabel with the no-argument constructor. Line 38 uses Jlabel method setTextto set the text displayed on the label. Method getTextcan be used to retrieve the current text displayed on a label. Line 39 uses JLabel method setIcon to specify the Icon to display on the label. Method getIconcan be used to retrieve the current Icon displayed on a label. Lines 40–41 use JLabel methods setHorizontalTextPositionand setVerticalTextPosition to specify the text position in the label. In this case, the text will be centered horizontally and will appear at the bottom of the label. Thus, the Icon
will appear above the text. The horizontal-position constants in SwingConstants are LEFT, CENTER and RIGHT (Fig. 14.8). The vertical-position constants in SwingConstants are TOP, CENTER and BOTTOM .Line 42 sets the tool-tip text for label3. Line 43 adds label3 to the Jframe. Constant Description Constant Description • Horizontal-position constants Vertical-position const. • LEFT Place text on the left TOP Place text at the top • CENTER Place text in the center CENTER Place text in the center • RIGHT Place text on the right BOTTOM Place text at the bottom
Creating and Displaying a LabelFrame Window • Line 12 invokes LabelFrame’ssetDefaultCloseOperationmethod (inherited from class JFrame) with constant JFrame.EXIT_ON_CLOSEas the argument to indicate that the program should terminate when the window is closed by the user. This line is important. Without it the application will not terminate when the user closes the window. Next, line 13 invokes LabelFrame’ssetSizemethod to specify the width and height of the window in pixels. Finally, line 14 invokes LabelFrame’ssetVisiblemethod with the argument true to display the window on the screen.
Text Fields and an Introduction to Event Handlingwith Nested Classes • when you write an e-mail in an e-mail application, clicking the Send button tells the application to send the e-mail to the specified e-mail addresses. GUIs are event driven. • When the user interacts with a GUI component, the interaction— known as an event—drives the program to perform a task. include clicking a button, typing in a text field, selecting an item from a menu, closing a window and moving the mouse. • The code that performs a task in response to an event is called an event handler, and the overall process of responding to events is known as event handling.
As an example lets consider two GUI componentsJTextFieldsand JPasswordFields • JTextFieldsand JPasswordFields (package javax.swing) Class JTextField extends class JTextComponent(package javax.swing.text), which provides many features common to Swing’s text-based components. • Class JPasswordField extends JTextField and adds methods that are specific to processing passwords. • Each of these components is a single-line area in which the user can enter text via the keyboard. • When the user types in a JTextField or a JPasswordField, then presses Enter, an event occurs. • In the following example When the user types in one of the text fields, then presses Enter, the application displays a message dialog box containing the text the user typed. • In this example, you press Enter in the JPasswordField, the password is revealed.
// TextFieldTest.java // Testing TextFieldFrame. • import javax.swing.JFrame; • import java.awt.FlowLayout; • import java.awt.event.ActionListener; • import java.awt.event.ActionEvent; • import javax.swing.JTextField; • import javax.swing.JPasswordField; • import javax.swing.JOptionPane; • public class TextFieldTest • { • public static void main( String[] args ) • { • TextFieldFrametextFieldFrame = new TextFieldFrame(); • textFieldFrame.setDefaultCloseOperation( JFrame.EXIT_ON_CLOSE ); • textFieldFrame.setSize( 350, 100 ); // set frame size • textFieldFrame.setVisible( true ); // display frame • } // end main • } //end class TextFieldTest
class TextFieldFrame extends JFrame • { • private JTextField textField1; // text field with set size • private JTextField textField2; // text field constructed with text • private JTextField textField3; // text field with text and size • private JPasswordFieldpasswordField; // password field with text • // TextFieldFrame constructor adds JTextFields to JFrame • public TextFieldFrame() • { • super( "Testing JTextField and JPasswordField" ); • setLayout( new FlowLayout() ); // set frame layout • // construct textfield with 10 columns • textField1 = new JTextField( 10 );
add( textField1 ); // add textField1 to JFrame • // construct textfield with default text • textField2 = new JTextField( "Enter text here" ); • add( textField2 ); // add textField2 to JFrame • // construct textfield with default text and 21 columns • textField3 = new JTextField( "Uneditable text field", 21 ); • textField3.setEditable( false ); // disable editing • add( textField3 ); // add textField3 to JFrame • // construct passwordfield with default text • passwordField = new JPasswordField( "Hidden text" ); • add( passwordField );
TextFieldHandler handler = new TextFieldHandler(); • textField1.addActionListener( handler ); • textField2.addActionListener( handler ); • textField3.addActionListener( handler ); • passwordField.addActionListener( handler ); • }//end of TextFieldFrame constructor • private class TextFieldHandler implements ActionListener • {
public void actionPerformed( ActionEvent event ) • { • String string = ""; // declare string to display • // user pressed Enter in JTextField textField1 • if(event.getSource() == textField1 ) • string = String.format( "textField1: %s",event.getActionCommand() • ); • // user pressed Enter in JTextField textField2 • else if( event.getSource() == textField2) • string = String.format( "textField2: %s",event.getActionCommand() • ); • // user pressed Enter in JTextField textField3 • else if(event.getSource() == textField3 ) • string = String.format( "textField3: %s",event.getActionCommand() • );
// user pressed Enter in JTextFieldpasswordField • else if(event.getSource() == passwordField ) • string = String.format( "passwordField: %s",event.getActionCommand() • ); • // display JTextField content • JOptionPane.showMessageDialog( null, string ); • } // end method actionPerformed • } // end private inner class TextFieldHandler • } // end class TextFieldFrame
Line 30 creates textField1 with 10 columns of text. A text column’s width in pixels is determined by the average width of a character in the text field’s current font. • Line 33 creates textField2 with the initial text "Enter text here" to display in the text field. The width of the field is determined by the width of the default text specified in the constructor • Line 36 creates textField3 and calls the JTextField constructor with two arguments— the default text "Uneditable text field" to display and the text field’s width in columns (21). Line 37 uses method setEditable (inherited by JTextField from class JTextComponent) to make the text field uneditable-i.e., the user cannot modify the text in the field.
Line 40 creates passwordField with the text "Hidden text" to display in the text field. The width of the field is determined by the width of the default text • Before an application can respond to an event for a particular GUI component, you must: 1. Create a class that represents the event handler and implements an appropriate interface—known as an event-listener interface. 2. Indicate that an object of the class from Step 1 should be notified when the event occurs—known as registering the event handler.
inner classes are frequently used to implement event handlers. • private inner class TextFieldHandler (lines 48–72). This class is private because it will be used only to create event handlers for the text fields in top-level class TextFieldFrame. As with other class members, inner classes can be declared public, protected or private. Since event handlers tend to be specific to the application in which they’re defined, they’re often implemented as private inner classes • GUI components can generate many events in response to user interactions. Each event is represented by a class and can be processed only by the appropriate type of event handler. Normally, a component’s supported events are described in the Java API documentation for that component’s class and its superclasses. • When the user presses Enter in a JTextField or JPasswordField, an ActionEvent (package java.awt.event) occurs. Such an event is processed by an object that implements the interface ActionListener(package java.awt.event). • Since JPasswordField is a subclass of JTextField, JPasswordField supports the same events.
Inner Classes An inner class is a class that is defined inside another class. Why would you want to do that? There are three reasons: • Inner class methods can access the data from the scope in which they are defined—including data that would otherwise be private. • Traditionally, a method could refer to the data fields of the object invoking the method. An inner class method gets to access both its own data fields and those of the outer object creating it. For this to work, an object of an inner class always gets an implicit reference to the object that created it. • Inner classes can access even private fields of their outer classes as if it is declared in the scope of the inner class. • Nested classes can be static or non-static. Non-static nested classes are called inner classes and are frequently used to implement event handlers. An inner-class object must be created by an object of the top-level class that contains the inner class. • Each inner-class(non-static) object implicitly has a reference to an object of its top-level class. The inner-class object is allowed to use this implicit reference to directly access all the variables and methods of the top-level class. A nested class that’s static does not require an object of its top-level class and does not implicitly have a reference to an object of the top-level class.
to handle the events in this example, inner class TextFieldHandler implements interface ActionListener and declares the only method in that interface— actionPerformed • line 42 creates a TextFieldHandler object and assigns it to variable handler. This object’s actionPerformed method will be called automatically when the user presses Enter in any of the GUI’s text fields.This is calledRegistering the Event Handler for Each Text Field • The application calls JTextField method addActionListener to register the event handler for each component. • Thismethod receives as its argument an ActionListener object, which can be an object of any class that implements ActionListener. • After lines 43–46 execute, the object handler listens for events. • If an event handler is not registered for a particular text field, the event that occurs when the user presses Enter in that text field is consumed—i.e., it’s simply ignored by the application.
Details of Class TextFieldHandler’sactionPerformed Method • The event source is the GUI component with which the user interacted. When the user presses Enter while one of the text fields or the password field has the focus, the system creates a unique ActionEvent object that contains information about the event that just occurred, such as the event source and the text in the text field. The system passes this ActionEvent object to the event listener’s actionPerformed method. • The compiler requires the string variable to be initialized in case none of the branches of the nested if lines executes.
ActionEvent method getSource returns a reference to the event source. The condition in line 54 asks, “Is the event source textField1?” This condition compares references with the == operator to determine if they refer to the same object. If they both refer to textField1, the user pressed Enter in textField1. Then, lines 55–56 create a String containing the message that line 70 displays in a message dialog . Line 55 uses ActionEvent method getActionCommand to obtain the text the user typed in the text field that generated the event
This application used a single object of class TextFieldHandler as the event listener for four text fields. Starting in next sections, you’ll see that it’s possible to declare several event-listener objects of the same type and register each object for a separate GUI component’s event. This technique enables us to eliminate the if…else logic used in this example’s event handler by providing separate event handlers for each component’s events.
Common GUI Event Types and Listener Interfaces • you learned that information about the event that occurs when the user presses Enter in a text field is stored in an ActionEvent object. Many different types of events can occur when the user interacts with a GUI. The event information is stored in an object of a class that extends AWTEvent (from package java.awt). The following fig.illustrates a hierarchy containing many event classes from the package java.awt.event. • These event types are used with both AWT and Swing components. Additional event types that are specific to Swing GUI components are declared in package javax.swing.event.