Download
1 / 80
800 likes | 2.03k Views
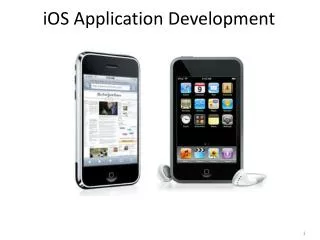
iOS Application Development. Purpose. 1) -- EDE project 2) -- EDE project -- EDE project Technical abilities: Objective C を用いたオブジェクト指向プログラミング (Object Oriented Programming by Objective C)

E N D
Purpose • 1) -- EDE project • 2) -- EDE project • -- EDE project • Technicalabilities: • Objective C を用いたオブジェクト指向プログラミング (Object Oriented Programming by Objective C) • iOSプログラミング入門 (Getting started with iOS programming) • エディタ、コンパイラ、デバッガなどが融合された統合開発環境-xcodeによる実践 (Experience in coding and debugging the source code in an Integrated Development Environment – xcode)
Purpose • 自律性(A-1, A-2)グループの目標を揚げ、その目標に向かい計画的かつ継続的に行動する • 協調性(B-3) チームの共通目標に向かい、全体の進捗に合わせ、常に他のメンバーとコミュニケーションとりながら作業を進める • コミュニケーション能力 (C-2) モデルの設計や共同開発を通し,自分の意見をメンバーに適切に伝え、他のメンバーの意見もしっかりと聞く • 問題解決能力 (G-1, G-2) 問題を分析し、モデル化を行い、課題を適切に設定する。また、与えられた制約条件の下での解決方法を複数検討し、相互評価を行い、最終的に1つの解決方法を実装する • 実践性(F-1,F-2) 課題を行うことで、モデリング能力・プログラミング能力・設計から検証までに関する実践的な能力を身につける • Objective C を用いたオブジェクト指向プログラミング • iOSプログラミング入門 • エディタ、コンパイラ、デバッガなどが融合された統合開発環境-xcodeによる実践 • モデリングからコーディング、そして検証までの実践
Information • Requirements: • CやOOPプログラミングの基本知識 (Basic knowledge of C and OOP programming) • ハードウェア (A Macintosh PC running Mac OS 10.5 or newer) • ソフトウェア (Xcode and iOS SDK with built-in iPhone simulator) • Communications and Materials: • Book: • 1) iOSプログラミング入門 - Objective-C + Xcode 4で学ぶ、iOSアプリ開発の基礎 • 2) iPhoneアプリケーションプログラミング • 3) はじめてのiPhone3プログラミング • The built-in documentation of Xcode • Recommended web sites: • Developer Forums: http://devforums.apple.com • http://developer.apple.com/jp/devcenter/ios/library/japanese.html • http://j-podcast.jp/iosdev/ • CS 193P iPhone Application Development - Stanford University • http://cs193p.stanford.edu/
Contents 1. Startup 1.1. Download and install 1.2. The first iOS app 2. Introduction to iOS 3. Objective C 4. Handling basic interaction 5. ViewController
1.1. Download and installation of xcode and iOS SDKs • Step1: Download the newest xcode and iOS SDKs by “iPhoneDeveloper University Program” • Email to: Toma sensei, request an invitation email • Step2: Log in to iPhone Program Portal • http://developer.apple.com/iphone/index.action • Download the xcode and iOS • Install the downloaded package
1.2. Your first iPhone application Step1: Click on the menu item: New Project Step2: On the next dialog window, choose Application on the left panel, select the View-based Application, Product as iPhone, and then click the button of Choose… Step3: Give the name of your project: HelloOkinawa and save it. (Option: Unfold and check the files on the left panel of the project.) Step4: Select the “Simulator - 4.0 | Debug - HelloOkinawa” from the left-top listbox, and then click “Build and Run” If no compile or link error occurs, the application will run normally in the iPhone simulator. Step5: Open the HelloOkinawaViewController.m, uncomment the method viewDidLoad, and then insert the following line below the last statement in viewDidLoad. NSLog(@"Hello, Okinawa"); Step6:Build and Run the project again. You will see the messages text on the Debugger Console. (Cannot open Debugger Console ?? )
Select the simulator Build and Run the application Terminate the application
Cのprintf関数に似ている、デバッガ・コンソールで表示するCのprintf関数に似ている、デバッガ・コンソールで表示する For example: NSLog(@”vari=%d”, i);
NIBファイル • ビューの構成とビューコントローラ関係を記述 • MacOSXでは、Foo.nib • iPhoneOSでは、Foo.xib ダブルクリックして Interface Builerを開く
選択 Libraryから LabelをViewにドラッグ InspectorのAttributeで TextをHello Worldに フォントサイズを調整 作業完了後に、ファイルを保存する もう一度buildして実行
Contents 1. Startup 2. Introduction to iOS 2.1. Where is iOS from? 2.2. UIKit class hierarchy 2.3. iOS Technology Layers 3. Objective C 4. Handling basic interaction 5. ViewController
2.1. Where is iOS from? Cocoa: an application environment for both the Mac OS X operating system and iOS iPhone/iPod touch Mac OS X
2.3. iOS Technology Layers Core OS OS X Kernel Power Mgmt Mach 3.0 Keychain BSD Certificates Sockets File System Security Bonjour
2.3. iOS Technology Layers Core Services Collections Core Location Address Book Net Services Networking Threading File AccessPreferences SQLiteURL utilities
2.3. iOS Technology Layers Media Core AudioJPG, PNG, TIFF OpenAL PDF Audio Mixing Quartz (2D) Audio Recording Core Animation Video Playback OpenGL ES
2.3. iOS Technology Layers Cocoa Touch Multi-Touch EventsAlerts Multi-Touch ControlsWeb View Accelerometer People Picker View Hierarchy Image Picker LocalizationCamera
Contents 1. Startup 2. Introduction to iOS 3. Objective C 3.1. OOP review 3.2. Class and instance 3.3. Property 3.4. Syntax 3.5. Inheritance 3.6. Data types 3.7. Definition and implementation of class 3.8. Reference Counting 4. Handling basic interaction 5. ViewController
Objective C https://developer.apple.com/jp/iphone/library/japanese.html Objective-C 2.0 プログラミング言語
3.1. OOP (Object-oriented programming) review • Class: A class defines the grouping of data and code (or action). It is the “type” of an object. • Instance: a specific allocation of a class in memory Instance variables typically hidden Access the instance variables by getter/setter method • Method: Behavior, operations (coding as subroutine, function) applied to instances • Instance Variable (or “ivar”): Attributes, data belonging to an instance UML: an instance UML: class diagram
3.2. declaration of class and instance Objective C Car.java
3.2. create an instance Car.java Objective C
3.3. Property Objective C Car.java
3.4. Syntax // インスタンスaCarのgetColorメソッドを実行 // getColorはpropertyの定義で自動的に実装 //メソッドも messageと呼ぶ //インスタンス(或はクラス)を receiverと呼ぶ Message syntax [receiver message] // インスタンスaCarのdrive:withDir:メソッドを実行 [receiver message: argument] [receiver message: arg1 andArg: arg2] // 第1行:インスタンスaCarのsetColorメソッドを実行 // 第2行:getColorとgetSpeedメソッドを実行 Dot syntax
3.5. Inheritance Memory management Superclass NSObject UIControl Generic behaviors Specific behaviors UIButton UITextField Subclass • Hierarchical relation between superclasses and subclasses. • Subclass inherits data and method of superclass. • Other characteristics such as overriding are same as those in Java
3.6. Data types id anInstance; // dynamically-typed object Dynamic and static typing Car *aCar; // statically-typed object myCar = nil; NULL object: nil if (myCar == nil)return; BOOL isRunning = YES; BOOL if (!isRunning)return; // selector: the method name (function pointer) SEL sel=@selector(disable_buttonB:); [buttonAperformSelctor:selwithObject:self]; Selector: SEL • Most of data types in C can be also used in Objective C. • For example: int, float, char
3.6. Data types NSString*aStr = @"Hello World!"; NSString*aStr1 = [NSStringstringWithFormat: @"Object: %@, speed=%d", aCar.color, aCar.speed]; NSString NSMutableString*newStr = [NSMutableStringstring]; [newStrappendString:@”-- tail"]; NSMutableString NSArray*ia = [NSArrayarrayWithObjects:aCar,nil]; Car*tCar = [iaobjectAtIndex:0]; floats = tCar.speed; NSArray NSMutableArray*ia = [NSMutableArrayarrayWithObjects:aCar, nil]; [iaaddObject:bCar]; [iaremoveObjectAtIndex:1]; NSMutableArray NSMutableDictionary*dic = [NSMutableDictionarydictionary]; [dicsetObject:aCarforKey:@"red-Car"]; Car*tCar = [dicvalueForKey:@"red-Car"]; NSDictionary NSMutableDictionary // num is a pointer NSNumber*num = [NSNumbernumberWithInt:2]; NSNumber
3.7. Definition and implementation of class Create an Object Memory management Car *aCar; aCar = [[Car alloc] init]; // or Car *aCar = [[Car alloc] init]; C Objective C Allocation mallocalloc Destruction freedealloc • (id)init{ • if (self = [super init]) { • // do something • } • return self; • } Destroy an Object // never call [aCardealloc] directly [aCarrelease]; • (void)dealloc { • [superdealloc];}
3.7. Definition and implementation of class Create an Object Car *aCar; aCar = [[Car alloc] initWithSpeed:30]; // or Car *aCar = [[Car alloc] initWithSpeed:30]; • (id)initWithSpeed:(int)speed { • if (self = [superinit]) { • self.speed = 20; • } • return self; • } • (id)init{ • if (self = [super init]) { • // do something • } • return self; • }
3.8. Reference Counting • Every object has a retain count, which is defined on NSObject • [anObjectretainCount] • The object is alive and valid when retain count > 0 • +allocand -copycreate objects with retain count == 1 • -retainincrements retain count • -releasedecrements retain count • When retain count == 0, -deallocmethod is invoked automatically, and the object is destroyed
3.8. Reference Counting – example Car *aCar = [[Car alloc] init]; A new object: aCar is generated. Retain count begins at 1 with +alloc [aCarretain]; The retain count increases to 2 with -retain [aCarrelease]; The retain count decreases to 1 with -release [aCarrelease]; The retain count decreases to 0 with -release, and –deallocis automatically called
3.8. Reference Counting - autorelease http://www.stanford.edu/class/cs193p/cgi-bin/ drupal/system/files/lectures/03_Custom%20Classes.pdf or goo.gl/l8rJN
Contents 1. Startup 2. Introduction to iOS 3. Objective C 4. Handling basic interaction 4.1. Entry of iOS App 4.2. Delegate 4.3. Model, View and Controller (MVC) 4.4. Example 5. ViewController
Knowledge of the first iPhone App • Entry of iOS APP • delegate • Model, View, Controller (MVC, モデル・ビュー・コントローラ) • Outlet, action (アウトレットとアクション)
4.1. Entry of iOS APP ここはいじらない Line 9: import the necessary .h file (similar to #include in standard C) Line 11: same as the main function in standard C Line 13: declare an instance of Class NSAutoreleasePool, allocate the memory and initialize it. (all of the instances in the pool can be released automatically) (クラスNSAutoreleasePoolのインスタンスを宣言し、メモリの割当と初期化をする。その後に宣言されるインスタンスはすべてpoolに管理される) Line 14: call the global function UIApplicationMain to create the application object and the application delegate and set up the event cycle. (アプリケーションのオブジェクトを生成し、HelloOkinawaAppDelegateのインスタンスに切り替えてApplicationを起動する) Line 15: release the pool Line 16: return
4.2. Delegate Delegate 宣言 UIApplicationのオブジェクトのmethodsはこのクラスで定義する UIApplicationのオブジェクトのmethod
4.3. Model, View, Controller (MVC) ユーザの入力 値の表示 値の表示 Interface Builderで作る プログラムとして書く View Model データベース ネットワーク 値の変更通知 (delegate) 値変更の要求 ユーザ入力の通知 ユーザ入力の処理 Controller Note: HelloOkinawaにModelがない
4.3. Controller viewのオブジェクトが表示される前に実行
4.3. MVC - view アウトレットUILabel - hello アウトレットUIButton – button_Pressed アクションIBAction - pressed ビューUIView
4.3. View: Outlet and Target (or action) HelloOkinawaViewController IBOutletUILabel*hello; IBOutletUIButton*button_Press; IBOutletUIImageView*car; IBOutletUISlider*speed_changer; IBOutletUILabel*speed_show; -(IBAction)pressed; -(IBAction)changingSpeed;
4.3. MVC - Controller #import <UIKit/UIKit.h> @interfaceAkagaiViewController: UIViewController { IBOutletUILabel*hello; IBOutletUIButton *button_Press; } @property(nonatomic, retain)UILabel *label; @property(nonatomic, retain)UIButton *button_Press; -(IBAction)pressed; @end AkagaiViewController.h AkagaiViewController.m • @implementationAkagaiViewController • @synthesize hello, button_Press; • - (void)viewDidLoad { • [superviewDidLoad]; • hello.text = @”View loaded"; • } • (IBAction)pressed { • NSLog(@”inaction:pressed"); • hello.text = @”Hello, baby!"; • } • - (void)dealloc { • [labelrelease]; • [button_Pressrelease]; • [superdealloc]; • } アウトレットを介してコントロールに 表示を行うコードを追加 プロパティをリリースするコードを追加
4.3. MVC: Link the view and controller Step1: open the HelloOkinawaViewController.xib Step2: Drag a “Round Rect Button” to the view, and change the text of the button Step3: Link the hello to “Hello, world!”, button_Pressed to the button of “Press”
4.3. MVC: Link the view and controller Step4: Link the action pressed to the button of “Press”, select “Touch Up Inside” Step5: Save it Step6: Run the view the debug log.