Download

1 / 39
390 likes | 474 Views
Logging in on Computers. You will need to click switch user and then other user. Enter your Campus Connect user name Enter your Campus Connect password Click the arrow that is next to where you entered your password. Navigating Blackboard. General Information.

E N D
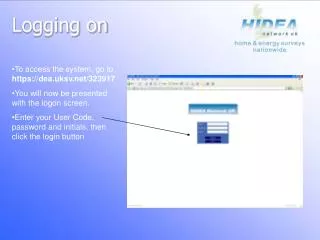
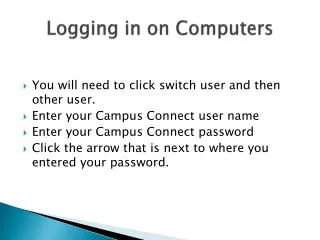
Logging in on Computers • You will need to click switch user and then other user. • Enter your Campus Connect user name • Enter your Campus Connect password • Click the arrow that is next to where you entered your password.
General Information • Every class you take, whether online or traditional, will have a link to it in Blackboard. • Blackboard is the platform Ivy Tech uses to give you access to class syllabi, assignments, and grades. There is also an email-like function in it for student/instructor communication. • You do not have to login to Campus Connect to use Blackboard. There is a link to access Blackboard directly on the Campus Connect login page. • You may also bookmark the Blackboard login page: https://online.ivytech.edu/
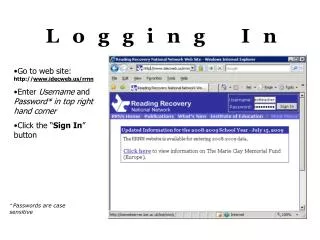
Logging in to Blackboard • This is the login page for Blackboard. You simply enter your Campus Connect username and password.
Finding Your Class in Blackboard • After signing in, you will see the links to your current classes. • Simply click on the link for the class in which you need to work. NOTE: You will not see your traditional classes until the first day that class is scheduled to meet. For online-only classes, you will see the link on the first day of the semester unless it starts at a later date.
Content Notice the content areas on the left side of the screen. Most classes are set up the same way, and most have the same content areas. Content in those areas will vary from class to class, but the following can serve as a general guide. • Announcements-Updates or news that the instructor wants to share with the class • Start Here-Contains the class syllabus which includes class information, resources to make sure your computer is ready for class, and help options with blackboard • Class Sessions-Assignments • Discussions-The discussion board • Resources-Other information the instructor feels is useful • My Grades-Your grades on individual assignments • Instructor-The instructor may have more contact information or personal information here • Communication & Tools- Links to collaboration, messages, and other important tools
Announcements • This is the Announcements page. It will be the first page you see when you open your class. Announcements are in chronological order and as you scroll down you may view older announcements.
Start Here • The Start Here page has steps to follow to find information about your class and the resources to prepare for it.
Class Sessions Class Sessions will show you what assignments you need to complete each week. When you need to submit an assignment, it will usually be under Class Sessions. To submit an assignment • Click Class Sessions • Click the session you’re working on now
Submitting an Assignment • Click on the BOLD underlined Assignment name. • Click View/Complete Assignment for the assignment you need to submit
Submitting an Assignment • Add any comments to the Comments box • Click Browse to upload your file • Choose the file you want to upload and click Open • To submit the assignment, click Submit
Using the Discussion Board Many courses require use of the Discussion Board. • Click Discussions to open the Discussion Board • Click the name of the Forum in which you need to work
Posting a New Thread • To post a new thread, click Create Thread in the upper left hand corner
Posting a New Thread • Add a Subject and your Message • Click Submit
Replying to a Thread Sometimes you will be required to respond to somebody else’s thread. • Click the Thread name to view the thread and all replies
Replying to a Thread • After you click on a thread, you can read it and reply to it by clicking Reply
Interactive Tools If enabled by your instructor, you may have interactive tools available to use as an outlet to express your ideas and opinions about the class and it’s content. Those tools include: • Journal-Allows you to post your personal reflections about the course content. Journals are an engagement tool between student and instructor or group and instructor. • Blog-Allows you to express your ideas about topics and have other users provide comments and feedback to the posts. Blogs are generally viewed as a One to Many conversation. • Wiki-Allows you to contribute and modify one or more pages of core related materials, providing a means of sharing and collaboration. Wikis are structured as websites.
Grade Book • Click Grades to view your grades for individual assignments
Student/Instructor Communication There is another useful area in Blackboard called Communication & Tools. • In this area, you have two methods of communicating with your instructor: • The message function • The email function • Your instructor will let you know the preferred method of communication.
Message vs. Email • If a student uses the Messages function, an email will be sent to the instructor’s Message inbox that is unique to that class. • If a student uses the Send Email function, the email goes to the instructor’s @ivytech.edu email account. Message Email Your instructor will let you know the preferred method of communication.
Sending a Message • Click Communication & Tools • Click Messages • Click Create Message
Sending a Message • Click To in order to add recipients to the message. The word (Instructor) will appear after your instructor’s name. • Select your recipients and press the arrow button.
Sending a Message • Add a Subject and write your message in the Body • If you need to attach anything, click Choose File to attach a document • Once you’re finished, click Submit.
Sending an Email on Blackboard • Click Communication & Tools • Click All Instructor Users to send an email to your instructor
Sending an Email on Blackboard • Add a Subject and type your message in the Message box • When you’re finished, click Submit
Blackboard IM Instantly connect with your classmates and instructors on Blackboard IM, the only instant messaging and collaboration system specifically designed to advance and promote learning. Use it today to whiteboard with study groups, ask an instructor a question, or video chat with classmates and colleagues. Getting started is simple: • Click on Communication & Tools • SelectBlackboard IM • Create an account • Download and install the software to begin
Blackboard 9.1 Mobile • Have you heard that Blackboard has as mobile app? The mobile app is free for Blackboard, Android, and i-devices and can be downloaded from the Device App store for your specific device. The app is available for all major wireless carriers.
Having Problems with Blackboard? Having technical problems with Blackboard? Is the link to your class not appearing in Blackboard? Please contact Curtis Blakely at extension 3410 if you are a Richmond or Connersville student. After normal working hours, please call the Help Desk at 877-489-8324 or submit a Help Desk ticket by following the link on the Campus Connect login page.
Student Schedule • Click on student schedule • It will ask for the term “Fall 2013” • Hit the submit button • It will show your current schedule for Fall 2013 • This will also show your C# in the upper right hand corner
Course Search • Click on Course Search • Enter the term “Fall 2013” and hit submit • Then you will select your classes from the drop the drop down boxes.
Financial Aid Verification and Requirements • Make sure you go through the Verification process to see if additional documents are required to complete the Verification Process. • You may need to supply W2s and taxes • You may to print off loan history Feel free to contact the Express Enrollment Center if you have additional questions 765-966-2656 or 800-659-4562, ext: 1202
Saving Files • Saving to your computer • Saving to a flash drive • Adding a file to your flash drive with contact information • Saving in RTF format • Attaching documents to email or BB