Download
1 / 30
310 likes | 401 Views
CS298: HCI Design Clinics. Paper Prototyping 03/01/10. Berkeley. university of california. Topics. Intro to Paper Prototyping Testing with Paper Prototypes From Paper to Video Prototypes. Paper Prototyping. Design. Prototype. Evaluate. Why Do We Prototype?.

E N D
CS298: HCI Design Clinics Paper Prototyping 03/01/10 Berkeley university of california
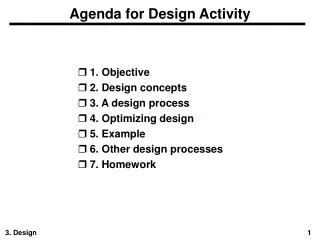
Topics • Intro to Paper Prototyping • Testing with Paper Prototypes • From Paper to Video Prototypes
Design Prototype Evaluate Why Do We Prototype? Get feedback on our design faster • Saves money Experiment with alternative designs Fix problems before code is written Keep the design centered on the user
Fidelity in Prototyping Fidelity refers to the level of detail High fidelity? • Prototypes look like the final product Low fidelity? • Artists renditions with many details missing
Hi-Fi Disadvantages Distort perceptions of the tester • Formal representation indicates “finished” nature • People comment on color, fonts, and alignment Discourages major changes • Testers don’t want to change a “finished” design • Designers don’t want to lose effort put into creating hi-fi design
Materials • Large, heavy, white paper (11 x 17) • 5x8 in. index cards • Post-it notes • Tape, stick glue, correction tape • Pens & markers (colors & sizes) • Transparencies (including colored) • Colorforms (toy stores) • Scissors, X-acto knives, etc.
Nielsen/Norman Video • I showed 10 minutes from the Nielsen Norman Group’s Paper Prototyping: A How-To Training Video • http://www.nngroup.com/reports/prototyping/
Constructing the Prototype Set a deadline • Don’t think too long - build it! Draw a window frame on large paper • Draw at a large size, but use correct aspect ratio Put different screen regions on cards • Anything that moves, changes, appears/disappears • Use greekingto indicate text if necessary Ready response for any user action • e.g., Have those pull-down menus already made Use photocopier to make many versions
Paper Prototype Testing SIMS 213 Project: Telebears redesign
Observer (or video camera) “Computer” User Interface elements Interface
Conducting a Test Three or Four testers (preferable) • Greeter - Puts users at ease & gets data • Facilitator - only team member who speaks • Gives instructions & encourages thoughts, opinions • Computer - knows application logic & controls it • Always simulates the response, w/o explanation • Observer(s) - Take notes & recommendations Typical session should be approximately 1 hour • Preparation, the test, debriefing
Conducting a Test (cont.) Greet • Get forms filled, assure confidentiality, etc. Test • Facilitator explains how test will work • Performs a simple task • Facilitator hands written tasks to the user • Must be clear & detailed • Facilitator keeps getting “output” from participant • “What are you thinking right now?”, “Think aloud” • Observers record what happens • Avoid strong reactions:, frowning, laughing, impatience – biases the test • Designers should not lead participants • Let users figure things out themselves as much as possible • Only answer questions if user remains stuck for a long time
Conducting a Test (cont.) Debrief • Fill out post-evaluation questionnaire • Ask questions about parts you saw problems on • Gather impressions • Give thanks
Preparing for a Test • Select your participants • Understand background of intended users • Use a questionnaire to get the people you need • Don’t use friends or family • Prepare scenarios that are • Typical of the product during actual use • Make prototype support these (small, yet broad) • Practice running the computer to avoid “bugs” • You need every menu and dialog for the tasks • All widgets the user might press • Remember “help” and “cancel” buttons • WOZ is different from pre-built/canned functionality
Tips • Rehearse your actions • Make a flowchart which is hidden from the user • Make list of legal words for a speech interface • Stay “in role” • You are a computer, and have no common sense, or ability to understand spoken English. • Facilitator can remind user of the rules/think-aloud approach if the user gets stuck
Advantages of Low-Fi Prototyping • Takes only a few hours • No expensive equipment needed • Can test multiple alternatives • Fast iterations • Number of iterations is tied to final quality • Can change the design as you test • If users are trying to use the interface in a way you didn’t design it – go with what they think! Adapt! • Especially useful for hard to implement features • Speech and handwriting recognition
Drawbacks of Lo-Fi Prototyping • Evolving the prototype requires redrawing • Can be slow (but reprogramming usually slower) • Lack support for “design memory” • Force manual translation to electronic format • Do not allow real-time end-user interaction
Summary • Informal prototypes allow you to design (and test!) before writing code. • Rapid evolution and elimination of many problems happens in this phase. • Paper+ink is the traditional tool
Forms of Video Prototypes Build on paper prototypes Use existing software & images of real settings Narration optional (but required for your assignment!) • Explain events while others move images/illustrate interaction With good storyboards, should be able to create video prototype in 1 hour
CSE440 - Autumn 2008 User Interface Design, Prototyping, and Evaluation 24
Creating a Video Prototype • Review field data about users & work practices • Review ideas from video brainstorm • Create use scenario in words • Develop storyboard of each action/event with annotations explaining the scene. Put each element on a card. • Shoot a video clip for each storyboard card • Avoid editing in the camera – just shoot in storyboard order • Hold last frame of a section/shot for 1s • 6) Use title cards to separate clips (keep it onscreen for 3s) • if you make an error, rewind to last title card & reshoot CSE440 - Autumn 2008 User Interface Design, Prototyping, and Evaluation 25
Cluster • Andy Hou and Kevin Chiu: Univ. of Washington
Tips & Tricks Add structure to better explain context begin with a title follow with an “establishing shot” create series of closeup & mid-range shots, interspersed with title cards place a final card with credits at the end Use colored paper title cards -- aids edit/search of video Stop-motion lets images appear & disappear based on interaction e.g., illustrate pop-up menu by recording clip of user pressing button, pause camera, add menu, restart camera Be careful about taking video out of the original design setting for ethical reasons (context matters) CSE440 - Autumn 2008 User Interface Design, Prototyping, and Evaluation 27
Your Turn… • Form teams (2-4 students) • You have 1 hour to create a stop-motion animated video prototype • Show&Tell at 5:45pm