Download
1 / 36
380 likes | 477 Views
ZIMS With Medical Release 2.0 R2. An overview of the Medical Module in ZIMS. Navigation. The Medical Module is found u nder the Start Menu. This will o nly display if access has been p rovided to you in your ZIMS Role. There are four modules: -Pharmacy Inventory -Medical Records

E N D
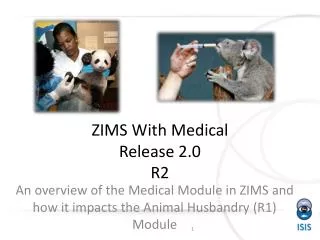
ZIMS With MedicalRelease 2.0R2 An overview of the Medical Module in ZIMS
Navigation The Medical Module is found under the Start Menu. This will only display if access has been provided to you in your ZIMS Role. There are four modules: -Pharmacy Inventory -Medical Records -Medical Reports -Dictionary
The Four Modules • Pharmacy Inventory • Your supply of drugs • Often track controlled substances • Tracks usage/availability • Medical Records • All the medical records on all the animals in your collection • Medical Reports • Anesthesia Summary • Samples/Tests/Results • Unresolved Medical Issues • Complete Medical History • Dictionary • Term • Treatment • Test
Medical Preferences Medical Preferences have been added to both Institution Preferences and My Preferences. They function the same way as they do in R1 in that My Preferences (how you select the application to function/display) will usually over ride what is selected in Institution Preferences.
Clinical Notes Preferences The preferences for Clinical Notes affect the defaults for how the screen opens. If you seldom make SOAP entries and usually make more free text entries you will want to change the default Ffom SOAP to Notes/Examinations/Report Entry.
Tests & Results Preferences Under Tests and Results Preferences allow you to select your desired measurement type of Standard International or Conventional US. You can also select a specific laboratory or your Institution as the default for who is doing the sample analysis. These can all be edited during the actual data entry.
ISIS Template Visibility Preferences ISIS will be maintaining some standard Test Panels and Favorite Samples Templates. By default these will display. Uncheck the box if you want only your locally created Test Panels or Favorite Samples to be seen. The remaining Preference, Calendar, is a place holder for future functionality.
Medical Records – the Dashboard When you first open the Medical Records module the most recent entries will display in the middle. The left hand side indicates how many of each type of record are included. Note how the icons allow you to easily spot different record types. You can easily find the 3 Tests & Results records (red) and the 2 Samples records (blue). The date range default is for the past 7 days.
Record Selection The left side controls the selection of the records you want to view. There are 7 active topics you can select from in this first release. The date range default when an animal record is selected is the life of the animal. Using the calendar icon you can adjust this to your desired date range.
List of Selected Records We have selected Treatments & Prescriptions from the left panel. Only this topic is now displayed with the most recent date at the top.
Record Preview Pane When a record is selected from the list, the lower center panel becomes a preview pane for the information recorded. To view the entire entry select the Maximize button.
Opening an Animal Medical Record To open a record for a specific animal or group type in the GAN, Local ID, or other identifier such as transponder into the search field. In addition, you can access the medical records directly from the R1 animal record.
Animal Record The animal will then appear in the left hand Dashboard. Only its records will display in the middle Dashboard and the information in the right hand panel will relate to that animal.
Right Side Panel - Top The top of the right side panel displays information that is sourced from the R1 (Animal Husbandry) module of ZIMS. The GAN is a hyperlink to the animal record. The Enclosure is a hyperlink to the Enclosure record. The Owner and Holder are hyperlinks to the Institution record. The Last Weight may be sourced from the R1 module or it may have been entered directly into the Medical (R2) module. The Unit of Measure will always be the UOM selected in your Preferences, regardless of what UOM was entered for the weight, and converted if required.
Right Side Panel – Health Status and BCS The rest of the information on the right side panel is data that is sourced only from the R2 module. The Health Status is the current health status, as of the date displayed, and is a hyperlink to the full health status history and the screen where you can add a new Status or edit this one. The Body Condition Score is as of the date displayed. It is a hyperlink to the full Body Condition score and the screen where you can add a new BCS or edit this one.
Right Side Panel – Active Problems The Active Problems are unresolved medical issues for this animal. Click on the left side bubble to see more details Click on the wheel icon to Edit the record, associate it with other records, resolve the problem, or delete the problem.
Right Side Panel – Active Treatments/Prescriptions Active Treatments and Prescriptions are those that are currently active or on-going for the animal. Clicking on the left hand bubble will bring up the details. Clicking on the wheel icon will allow you to Edit, Terminate, Clone or Delete the information. Cloning will copy the information but will allow editing if required.
Right Side Panel – Medical Alerts Medical Alerts are a special subtype of clinical note that contain critical information regarding the animal. These Alerts are different than the Animal Alerts in the R1 side as they usually indicate on-going Alerts for the care of the animal. Selecting the left side bubble is an active link to the full text of the Alert. Calendar Tasks are scheduled for a future release and will include upcoming calendar events such as medical procedures, sample collection or treatment.
Multiple Open Records You can keep multiple records open at the same time for ease of comparison. Your open records will display as a list on the left side of the dashboard. You can expand and collapse by using the arrows. Using the right side icons you can print the medical history of the animal, remove the animal from your list of open records, or filter the records by date.
Adding a Medical Record There are three ways to add a new medical record. If you do not already have an animal record open, from the left hand Dashboard select New and make your selection. You will then select the animal by typing in an identifier. It will then take you to the appropriate screen to add the medical record.
From the left hand record If you have an animal record open on the left hand Dashboard, selecting New and the required topic will open the screen with the Animal ID prefilled.
From the Main Dashboard From the Main Dashboard you can also highlight a record and select New and the required topic. The screen will open with the Animal ID prefilled.
Shortcut (Hot) Keys To save data entry time take advantage of the shortcut (hot) keys that are available for adding medical records.
R1 View in a R2 World! When you deploy R2 and your staff begins using it, some information on the R1 side may be impacted Some information entered into the medical module will also display in the husbandry module You will not be able to edit this information from the R1 module
Animal Care Staff Medical Summary In Clinical Notes there is the option to record a simple note as selected here, or to select the SOAP Entry (Subjective, Objective, Assessment and Plan) button and record a more detailed comment. The information recorded either as a SOAP entry or as a Note/Examination/Report Entry will display only in the R2 module. Any information recorded in the Animal Care Staff Medical Summary will display in the R1 module Notes/Observation grid, as well as within the R2 module.
R1 View of Medical Summary Below is the R1 view of the Animal Care Staff Medical Summary information from the previous slide. You can tell this note was entered on the R2 module as the title is Clinical Medical Summary Note. You cannot edit or delete this note. Those actions can only be done from the R2 module because it was entered there.
Animal Weights When recording an anesthesia or treatment event, the Veterinarian has the option to use the last weight recorded which is usually sourced from the R1 module weight grid. However, they have the option to record a new weight for the animal. If a new weight is recorded, this information is copied into the weight grid in the R1 animal record. If this is an estimated weight recorded during a Prescription it is NOT copied into the R1 module. This weight cannot be edited from the R1 module and can only be edited from within the R2 record. At this time there is no indication in the weight grid that the weight was sourced from an R2 entry.
R2 Display in Transaction Monitoring and Activity Report • Transaction Monitoring • All medical entries • Weights are not separated out as they are recorded during Anesthesia or Treatment • Activity Report • Weights recorded (including estimated weights) • Animal Care Staff Medical Summary note • Other medical entries are not displayed
Incomplete Accessions Allows your Veterinary staff to start entering medical data without actually accessioning an animal Similar to the “non-accessioned” animal functionality in MedARKS When it is time to actually accession the animal the Incomplete Accession information will be tied to the actual accessioned record
Starting an Incomplete Accession An Incomplete Accession is intended to allow the Veterinarian to create a temporary record so that medical information can be recorded. This is similar to a non-accessioned record in MedARKS. An Incomplete Accession is generally used when the person who does accessions is not available to create the permanent record. Incomplete Accessions are found under the Start menu and Accession. You will not select the entity type.
Creating an Incomplete Accession Minimal information is required for an Incomplete Accession. The taxonomy, sex, birth date and appropriate notes are the only information gathered. All of this can be edited when the permanent accession is created. An Incomplete Accession receives a temporary GAN. Note that this GAN ends with “IA”.
Recording Data in an IA In the R1 module (above) Incomplete Accessions are found to the right of the Pending Transactions tab. Most information that can be recorded in an accessioned animal can be recorded in an Incomplete Accession such as weights and identifiers. An IA cannot be put into an Enclosure or a Collection, Parent Information cannot be added and subsequent Transactions such as Dispositions or Deaths cannot be recorded. In the R2 module (left) the Veterinarian can find the Incomplete Accession record just as they can find a permanently accessioned record.
Associating an Incomplete Accession with an Actual Accession When a permanent accession is created, if the application finds any possible matches in Incomplete Accessions you will be asked if you wish to associate any of these records with your accession. Check the appropriate record and select “Associate With Incomplete Accession”.
Another Way If you don’t associate the permanent accession with the Incomplete Accession, the Incomplete Accession will remain in the grid. You can select it and choose to “Complete Selected”. You will be asked what animal the Incomplete Accession should be associated with.
If the Information is Different If the information for the permanent accession does not match the information recorded for the Incomplete Accession you will be asked which information you wish to keep. In this example the birth date was different. We chose to keep the accessioned animal’s information. Any data recorded in the Incomplete Accession record will be migrated into the permanent record. The GAN of the Incomplete Accession becomes an Old Accession Number in the Identifiers grid.