Download
1 / 52
520 likes | 595 Views
Technical Training: DCS-1130L. Wireless N Network Camera DCS-1130L. Agenda. Setting up of DCS-1130L Installation and mydlink Registration Remote Access Using mydlink Portal/Application Network and Wireless Setup Direct Recording to Network Storage Motion Detection and Email Alert

E N D
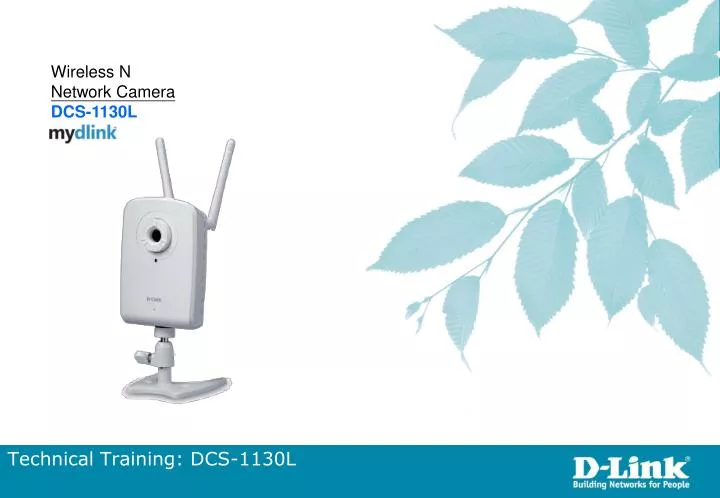
Technical Training: DCS-1130L Wireless N Network Camera DCS-1130L
Agenda • Setting up of DCS-1130L • Installation and mydlink Registration • Remote Access Using mydlink Portal/Application • Network and Wireless Setup • Direct Recording to Network Storage • Motion Detection and Email Alert • D-View Setup / Recording to Computer • Remote Access using DDNS Note: All configurations based on latest firmware version available on www.dlink.com.sg
Product Overview DCS-1130L
Product Overview • The DCS-1130L is a network camera that is simple to install and convenient to access, making it ideal for Home and SOHO users. The Camera Setup Wizard automatically configures the camera’s network settings, and mydlink.com access allows the user to view and manage their camera from anywhere over the Internet by using a web browser. The DCS‑1130L can record snapshots and video to a network storage drive constantly**, according to a schedule, or whenever motion is detected. ** not applicable for firmware version 1.05 onwards. DCS-1130L
Product Overview • 1 x LAN port (10/100Mbps) • 2 x 2dBi Omni-directional detachable antenna • 2.4GHz wireless b/g/n channels and WEP/WPA/WPA2 encryption • ¼ inch color VGA CMOS sensor • 1 Lux minimum illumination • 42o horizontal viewing angle • 16 x digital zoom • MPEG4/MJPEG simultaneous dual format compression • Video resolution up to 30 fps at 640 x 480 • Mydlink remote surveillance portal • ** Direct recording to network storage (Samba) ** not applicable for firmware version 1.05 onwards. • Support iPhone viewing (MJPEG) • Motion detection with email notification • DDNS
Setting up of DCS-1130L Installation and mydlink Registration
Setting up of DCS-1130L • Screw the wireless antennas onto the antenna connectors. • Screw the two camera base pieces together, and the camera base into the mounting point on either the back or the bottom of the camera and tighten the collar.
Setting up of DCS-1130L • Connect one end of the blue Ethernet cable to the Ethernet port on the back of the camera. Connect the other end of the cable to any of the available LAN port on the router. • Attach the power adapter to the power jack located on the back of the camera and connect the power adapter to a power outlet. Turn on the power and the Status LED on the front of the camera will turn on. The LED will turn a steady green once it receives network connectivity.
Setting up of DCS-1130L • Insert the setup CD into CD-ROM drive and run the setup wizard.
Setting up of DCS-1130L Note: You may want to take note of the camera’s IP address.
Setting up of DCS-1130L Note: Camera can only be register using CD-ROM Wizard Setup.
Setting up of DCS-1130L • Once finish the setup wizard, a activation email will be sent to your email. Login to your email account and click on the link to activate the mydlink account.
Setting up of DCS-1130L Remote Access Using mydlink Portal/Application
Setting up of DCS-1130L • Once your email account has been verified, go to http://sg.mydlink.com/ and login with your mydlink account.
Setting up of DCS-1130L • Install any plug-ins required to view the DCS-1130L camera.
Setting up of DCS-1130L • You will be able to view DCS-1130L through mydlink portal. • Note: • If the camera is connected behind a router without UPnP function, user will only be able to view the video feed for 60 seconds, and have to reconnect once the time expired.
Setting up of DCS-1130L • From iPhone/iPad, go to apps stall, search for “mydlink” and download the application “mydlink Lite”.
Setting up of DCS-1130L • Start the application and enter your mydlink account login information.
Setting up of DCS-1130L • Once login, you will see a list of mydlink enabled device that you have registered. Tab on the device to start viewing the video feed.
Setting up of DCS-1130L • If your camera is connected to a router without UPnP function, you will only be able to view the video feed for 60 seconds, and after which have to reconnect for every 60 seconds of viewing.
Setting up of DCS-1130L Network & Wireless Setup
Setting up of DCS-1130L • Use a web browser to access the camera’s web management interface. Login using “admin” as the user name and enter the password of the camera that was set during the CD-ROM Wizard setup.
Setting up of DCS-1130L • Go to “Setup” tab, “Network Setup” sub-tab. • Select “Static IP Address” and enter a IP address for the camera. Also, enter the DNS server IP address (use router’s IP address or any public DNS server) as it is needed to access mydlink service. Save Settings.
Setting up of DCS-1130L • Go to “Setup” tab, “Wireless Setup” sub-tab. • Check box to enable wireless for the camera. Click “Scan” to scan for surrounding wireless networks, choose the SSID corresponding to your router and enter the password for your wireless network. Save Settings.
Setting up of DCS-1130L Direct Recording to Network Storage Note: NOT applicable for firmware version 1.05 and above
Setting up of DCS-1130L • It is recommended to create a separate user account on the DNS-320 for DCS-1130L recording.
Setting up of DCS-1130L • From the camera’s management interface, go to “Setup” tab, “Recording” sub-tab. • Check box to enable recording function. Enter camera’s network storage access account information and click “Test” to check if account info is correct. • Note: “Samba status” will only be available after saving settings
Setting up of DCS-1130L • Choose a video profile for recording. • Note: Default settings will base on full storage volume available on the network storage. Account quota configurations may have to be done on the network storage. • Choose a recording method. Choose “Continuous” for 24/7 recording. • Save settings and it will start the recording. Access the DNS-320 and check the recording folder for the recordings.
Setting up of DCS-1130L Motion Detection and Email Alert
Setting up of DCS-1130L • Go to “Setup” tab, “Motion Detection” sub-tab. • Check the box to enable motion detection function. • Drag on the display area for the motion detection window area, and set the level of sensitivity. • Save Settings
Setting up of DCS-1130L • On the “Live Video” tab, whenever there is motion in the window area, the motion detection icon on the left side of the page will blink.
Setting up of DCS-1130L • Go to “Setup” tab, “Snapshot” sub-tab. • Check box to enable snapshot function. • Check box to send snapshots base on motion detection events. • Check box to send to Email. Enter email and SMTP information. • Click on “Test” to check if camera is able to connect to SMTP server. • Save Settings
Setting up of DCS-1130L • A test email will be sent to the recipient email with a snapshot.
Setting up of DCS-1130L • Note: ONLY firmware version 1.05 and above is able to support SSL features. • SMTP server using SSL protocol: • Yahoo mail (plus.smtp.mail.yahoo.com) • Gmail • Hotmail/Live mail • AOL mail • Other mail servers that requires TLS/SSL security (port 465/587): • SMTP server that still support conventional SMTP protocol: • Yahoo mail (smtp.yahoo.com) • Other mail servers that does not requires TLS/SSL security (port 25)
Setting up of DCS-1130L D-View Setup / Recording to Computer
Setting up of DCS-1130L • Install the D-View Cam from the CD-Rom and double click the program on the desktop. • Login to D-View Cam and click on follow by “System Settings”. • At the “Camera” tab select “Insert” follow by enter the Camera settings:
Setting up of DCS-1130L • All the camera will be able to view over here after the setup.
Setting up of DCS-1130L Recording • At the Menu select to set the record schedules. • Click on “Configure” to set the mode for recording. (Time or Motion Detection).
Setting up of DCS-1130L Recording • Next at the menu select • Click on “Start Recording Schedule” to start record.
Setting up of DCS-1130L Play Back • Lastly at the menu select • Click on the date and time that wish to watch the play back.
Setting up of DCS-1130L Remote Access using DDNS
Setting up of DCS-1130L • Get the DDNS account from www.dlinkddns.com or www.dyndns.com. • At the tab “Setup” “Network Setup”, set the port that wish to access. (Default is HTTP port 80). • Next tab “Setup” “Dynamics DNS”, to enter the DDNS account details
Setting up of DCS-1130L DVG-N5402SP • Login to the web GUI and enter username: admin/password: password. • Click on tab “Advanced” “Firewall and DMZ” “Virtual Server”, add the DCS-1130L settings
Setting up of DCS-1130L DVG-N5402SP • Connect to other network and enter “DDNS hostname:WAN Port” (ex. dcs1130l.dyndns-free.com:8000) to access the camera remotely.
Setting up of DCS-1130L HG256s • Login to the web GUI username: admin / password: admin. • Select “Advanced” “NAT” “Port Mapping” and set the camera settings