Download
1 / 15
160 likes | 551 Views
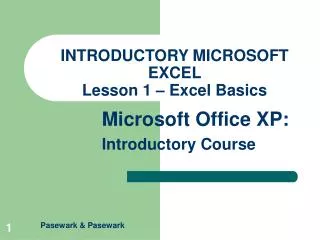
INTRODUCTORY MICROSOFT EXCEL Lesson 1 – Excel Basics. Objectives. Define the terms spreadsheet and worksheet . Identify the parts of the worksheet. Move the highlight in the worksheet. Select cells and enter data in the worksheet. Edit cells. Find and replace data.

E N D
Objectives • Define the terms spreadsheet and worksheet. • Identify the parts of the worksheet. • Move the highlight in the worksheet. • Select cells and enter data in the worksheet. • Edit cells. • Find and replace data. • Zoom in and out in a worksheet. • Save a worksheet. • Print a worksheet.
Active cell Cell Column Formula bar Highlight Name box Range Row Spreadsheet Workbook Worksheet Terms Used in This Lesson
Define Spreadsheet and Worksheet • Spreadsheet - grid of rows and columns containing numbers, text, and formulas. • The purpose of a spreadsheet is to solve problems that involve numbers.
Define Spreadsheet and Worksheet • Worksheet – a computerized spreadsheet. • Workbook – collection of related worksheets.
See Figure 1-2 in student book, Excel opening screen Identify the Parts of the Worksheet • Title bar • Menu bar • Standard toolbar • Formatting toolbar • Formula bar • Columns • Rows • Highlight • Status box
Move the Highlight in the Worksheet • The fastest way to move to an off-screen cell is to choose Go To on the Edit menu • Pressing the shortcut key F5 will also access the Go To dialog box.
Select Cells and Enter Data • Enter data by keying text or numbers in a cell and pressing Enter. • If you choose not to enter the data you have keyed, press Esc and the keyed data will not be entered. • Click the Undo button on the Standard toolbar to reverse the last entry.
Edit Cells • Data is edited in the Formula bar by pressing F2 and making changes at the insertion point. • To replace cell contents, key the new data, and press Enter. • To clear an active cell press Delete.
Find and Replace Data • The Find command locates specific words or numbers in a worksheet. • Replace substitutes new data for data found.
Zoom In and Out of a Worksheet • The view of your worksheet may be magnified or reduced by using the Zoom button on the Standard toolbar. • You may key your desired magnification percentage directly in the Zoom box.
Summary • The purpose of a spreadsheet is to solve problems involving numbers. • A worksheet consists of columns and rows intersecting to form cells, which are identified by cell references. • You can move to different cells of the worksheet by clicking on the cell with the mouse pointer, using a series of keystrokes, or by scrolling with the mouse.
Summary • Both text and numerical data may be entered in the worksheet. • You can alter data by editing, replacing, or deleting. • You can search for specific characters in a worksheet and replace data with other characters.
Summary • The Zoom box enlarges or reduces the view of a worksheet on the screen. • Changes in a worksheet are saved using the Save command on the File menu. • A worksheet may be printed to provide a hard copy.