Download
1 / 41
410 likes | 508 Views
Basics of Digital Photography . SAY HI. to Deepaul.

E N D
SAYHI to Deepaul Through my photographs, I share my love for nature, travel, friends and people. I got my first digital camera in the year 2004 and it took long 6 years to own a DSLR. I started capturing the life within the image. My preference is to shoot in natural light, and an eclectic range of images always provoke the shutter finger. DSLR Camera : Canon Rebel XS , Lens Pack : Canon 17mm – 85mm EFS f4 - 5.6, 75mm – 300mm EF f 4-5.6 , 50mm f 1.8 Prime Lens, Tripod
Digital Photography Gear CAMERAS Point & Shoot / DSLR / Mobile You do your research, and you can spend much less than expected and still get a camera which produce good results. LENS PACK / Filters Standard / Wide/ Zoom /Telephoto / Prime/ Fisheye Lens may come with or without Anti-Blur Anti-Shake, Image Stabilization Vibration Reduction TRI-PODS,CARRY CASES,MEMORY CARD * All other equipment and accessories are optional. Price isn’t the best indicator.
The Do-it-all Setting Photography Modes
AUTO MODE All digital cameras usually have an Auto mode, the camera decides for you the best shutter speed/aperture settings. SPORTS MODE Sports/Action Photography tells the camera to default its settings toward capturing images faster .This is done by: Increasing Shutter Speed, Increasing ISO POTRAIT MODE This mode is not well suited for full-length portraits or groups of people Portrait mode tells the camera to default to a: •Small Depth of Field (Large Aperture)– f1.8
NIGHT MODE This preset slows down the shutter speed to allow a lot of light into the camera. Both the foreground and background of the image are properly exposed. LANDSCAPE MODE Primary function is to allow a large depth of field. Landscape mode tells the camera to default to a large Depth of Field (Small Aperture)–f16. MACRO MODE This setting works with your camera lens to allow it to focus from a very short distance. Depth of Field becomes very Small (Large Aperture)– f1.8 •Does not have a lot of alternative uses.
The Photographic Triangle Aperture, Shutter Speed, and ISO Understanding EXIF Data & More
F 1.8 , Focal Length : 50 MM , Lens : Canon 50 MM Prime Mode : Aperture Priority
F 16 , Focal Length : 17 MM , Lens : 17 85 MM Mode : Shutter Priority - Panning with the cam
Panning the camera to get the car focused and background blur
The Photographic Triangle Aperture, Shutter Speed, and ISO
EXIF [ Exchangeable Image File ] Data stores information like camera model, exposure, aperture, ISO, what camera mode was used ..... To interpret this EXIF data, you will need an EXIF viewer. Your image processing program should provide that functionality within the program. For beginners, reading an images EXIF data can be a very useful learning tool.
HISTOGRAM The image below shows two unprocessed shots taken within seconds of one another, with their associated histograms. The shot on the left is underexposed and the shot on the right is exposed so that the histogram is pushed up to the right hand side, as far as practically possible wihout losing any highlight detail.
Balanced Histogram A more balance Histogram depicts a graph with the pixel representations spread across the graph and tapering off on both ends, such as in this image.
Over exposed Image Many images we capture might tend to be over or under-exposed. It’s easy to tell when a shot is way overexposed because most of the detail in the image in blown out. In scenic images, a loss of detail often occurs with clouds and the sky in the background, such as with photo below.
Under exposed Image When the Histogram is bunched up toward the left (pure black), it indicates that areas of the photo are underexposed, and that details are clipped in dark and shadow areas.
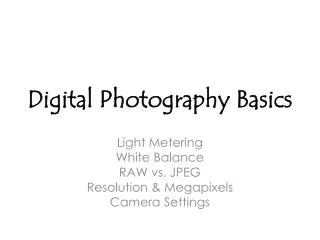
WHITE BALANCE: • The ability to adjust colours based on white as a reference colour to give as true a white as possible • All other colours are corrected accordingly • Auto WB (AWB): the camera determines and selects the correct colour temperature for white.
METERING: How the camera measures the amount of light available to expose a picture • Centre-Weighted: Readings are taken at various part of the picture, with a special emphasis for the centre. • Spot: Readings are taken at a specific point. • Each camera manufacturer has its own variations (Evaluative Metering)
Setting and Using Your Camera on Manual Mode
The Three-Step Process to Shooting in Manual Mode STEP 1: Set the appropriate White Balance STEP 2: Set the desired ISO STEP 3: Set Shutter Speed OR Aperture – Which is MORE important? i. set desired shutter speed ( 1/250) ii. set desired aperture UNTIL exposure level indicator levels off at zero.( In the image its + 1) iii. Adjust the value to bring EV to zero
Remember the fun you had as a child, just playing with your friends, not a care in the world and wide eyed at every new discovery? Well, it’s time to do it again if you love photography, though hopefully without grazing your knee or ruining your favorite shirt!
You are smarter than your camera. That’s it. That’s all you need to believe in yourself. Light Painting :Min ISO, EV value negative, slower shutter speed with tripod
Shooting Techniques On any camera
PHOTOGRAPHY TECHNIQUES Lighting and Exposure Nothing can ruin a good photo more than lighting. A photo with too much or too little lighting can interfere with the exposure process and then produce a photo too dark or do bright. So always choose the proper setting for exposure and always properly light your subject. Focus Blur or clarity. Your pick. Most of the times clarity wins over blurriness. Focusing is something they you will have to toy around with, changing your distance away from the object, or changing the zoom, can help you get in focus. When focusing an image, always use the view-finder, never wing-it. You want to have your image as clear as possible, and always try it from different angles
PHOTOGRAPHY TECHNIQUES Position Position can change an image dramatically. When shooting an image, remember the following: 2/3 or 1/3, not 1/2That means that you should not place the horizon at the direct center of a photo, but instead place it at the 1/3 or 2/3 mark of the page. It looks more natural and inviting. Also, getting a short from a low or high position can create a different feel. So change your position and create a new image. Use of your tri-pod To use your tri-pod, screw on your camera to the thread. Now locate your subject and tighten the head of the tri-pod to hold the camera in place. Adjust the height accordingly. The use of your tri-pod is simple yet it produces marvelous images. Just see for yourself
Placing the object in the frame : 1/3 for the chopper and 2/3 for the sky
PHOTOGRAPHY MYTHS Megapixel Myth : How much do you need? • Often, cameras are categorized by the number of Megapixels they can capture . • As if that resolution figure is the only measure of the camera’s value. • This value can be quite misleading. For megapixels you should keep in mind the following things What you plan to do with the photos you take: 8 x 10” Photo Prints or. 20 x 30” Posters •Do most of the photos you take end up as your wallpaper on networking sites
PHOTOGRAPHY MYTHS ZOOM: Optical vs. Digital Zoom • An optical zoom uses the optics (lens) of the digital camera to move you closer to your subject. • A digital zoom simply enlarges the existing image digitally. It is not really zoom, in the strictest definition of the term. • Enlarging the image digitally reduces picture quality, and should therefore usually be avoided . • Some manufacturers label their lenses with the "total zoom" by multiplying the optical with the digital. Ignore It. •When comparing digital cameras: Go for higher optical zoom. Digital zoom can always be achieved later in an image editing software.
LETS TRY Make a Light Painting with your camera Click a Portrait Photograph with maximum aperture Adjust ISO Manually Click a Photograph with Manual Mode and Manual Focus
FOLLOWME Light Painting :Min ISO, EV value negative, slower shutter speed with tripod facebook.com/deepaul.rocker twitter.com/deepaulrocker linkedin.com/in/paulabraham deepaul@live.in + 91 9895309519
Use point focus and minimum aperture to shoot a portrait focused in the eye
FOLLOWME facebook.com/deepaul.rocker twitter.com/deepaulrocker linkedin.com/in/paulabraham deepaul@live.in + 91 9895309519