Download
1 / 81
810 likes | 979 Views
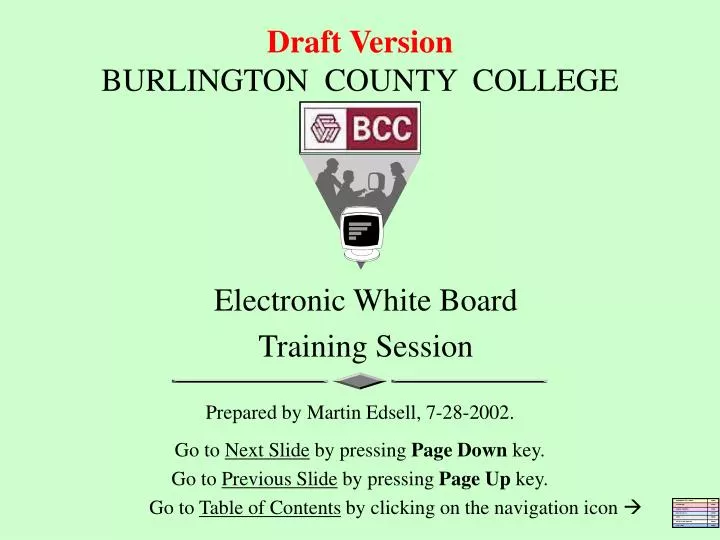
Draft Version BURLINGTON COUNTY COLLEGE. Electronic White Board Training Session. Prepared by Martin Edsell, 7-28-2002. Go to Next Slide by pressing Page Down key. Go to Previous Slide by pressing Page Up key. Go to Table of Contents by clicking on the navigation icon .

E N D
Draft VersionBURLINGTON COUNTY COLLEGE Electronic White Board Training Session Prepared by Martin Edsell, 7-28-2002. Go to Next Slide by pressing Page Down key. Go to Previous Slide by pressing Page Up key. Go to Table of Contents by clicking on the navigation icon
Table of ContentsClick on one of the links below to go to the beginning of that section.Click on navigation icon (lower right of any slide) to return to this page. (c) Burlington County College 2002
Introduction • This presentation is the property of Burlington County College and is designed for in-house staff training on the use of an Electronic White Board. • The presentation consists of approximately 80 PowerPoint slides, containing graphics, sound, and text. • The presentation takes approximately 30-45 minutes to view. • Use of MS-PowerPoint 2000 is recommended (for animated graphics), as well as the use of speakers/headphones. • Best viewed at 800 x 600 or higher resolution. • Go to next slide by pressing Page Down key. • Go to previous slide by pressing Page Up key. (c) Burlington County College 2002
Introduction (continued) • A complete set of these slides, along with a companion tutorial, is available for viewing and/or download from the following website: staff.bcc.edu/ETC/EWB • For assistance, please contact Martin Hoffman in Parker-311A, Ext. 7782, email: mhoffman@bcc.edu • Copies of this slide presentation and the companion tutorial are also available on CD-ROM discs, which can be borrowed from Martin Hoffman or from the BCC Libraries at Pemberton and Mt. Laurel. (c) Burlington County College 2002
Overview: Interactive Presentation Manager (IPM) A digital electronic white board and pen, connected to a PC and an LCD projector, creating a 77” diagonal interactive projection screen. Interactive Products Division Numonics Corporation ISO 9001 Certified (c) Burlington County College 2002
Interactive Presentation Manager (1 of 3) • Can be used like a regular white board to write class notes, draw diagrams, etc. • Can also be used to run a computer, allowing the presenter to control the computer environment with the pen while remaining in front of the audience. • All computer functions are transferred from the PC to the IPM’s electronic pen. • IPM allows you to develop and delivermultimedia presentationseasily, using the customizable Softkeys (located on either side of the white board). (c) Burlington County College 2002
Interactive Presentation Manager (2 of 3) • The Softkey Editor allows you to directly link Softkeys to any program or file available on the computer. • With one touch of the multimedia pen, you can play audio/video files, launch applications, and open documents. • You can also annotate screens and save them for later distribution or use in a slide presentation. For example, many of the screens you see in this presentation were saved from IPM. (c) Burlington County College 2002
Interactive Presentation Manager (3 of 3) • Allows you to: • write class notes on the electronic white board • launch and control various applications, such as Word Excel C++ I. E. & Netscape • capture/re-use information • save/email/print screens • create & run slide shows "Snapshot" (c) Burlington County College 2002
How to Set Up the Interactive Presentation Manager (IPM) • First attach all cables to the white board, the LCD projector & the computer: serial/power cable to the COM port of computer, with other end of cable to underside of pen tray on IPM. • Then plug in IPM board. • Then turn on LCD projector. • Then turn on computer. • Attach electronic pen and recharge cable to IPM jack (adjacent to serial cable on underside of pen tray). • Then calibrate the pen (the pen needs to line up with the on-screen cursor). (c) Burlington County College 2002
Calibration • Whenever the IPM’s mouse cursor does not line up with the pen tip, you must calibrate the IPM pen. • Calibration should always be the first thing you do when using the board. • To calibrate the IPM pen: • first click the <Calibrate> Softkey (# 20): • then click the <Calibrate> button (2nd from left on the bottom of the screen): • then follow the onscreen instructions, clicking all four corner markers in order. (c) Burlington County College 2002
Calibration (continued) Once the pen has been calibrated, you can: • use the Virtual White Board (Softkey # 19) • launch applications • create/load/save documents • print documents (requires a printer) • browse the WWW (requires I.S.P.) • get On-line Help (Softkey # 18) (c) Burlington County College 2002
Electronic Pen • The pen is battery operated (can be used with the recharging cord). • If the pen is idle for a period of time it goes into “sleep mode”-- to use the pen again, tap the screen. • The pen functions like a mouse • (“hover” over the board = point) • The pen has 2 parts, the white tip switch & the red side button: • white tip switch = left mouse button (used to click, double-click, and drag) • red button (side of pen) = right mouse button (used to right-click) • white tip switch = electronically write on board • white tip switch = select a Softkey • use pen tip or the red side button, NOT both at the same time (c) Burlington County College 2002
Mouse / Pen Actions Five basic actions can be performed using a mouse or the pen: • Point Roll the mouse around on the tabletop (or let pen “hover” over board). Used to move the pointer to a particular position on the screen. • ClickPress and release the left mouse button (or pen tip) once quickly while the pointer is positioned on an icon, menu item, or object. Used to select commands and text, or to reposition the Insert-bar (I-bar) text cursor. • Double-clickPress and release the left mouse button (or pen tip) twice in rapid succession. Used to select and execute an application on the desktop. • DragPress and hold the left mouse button (or pen tip) while sliding the mouse (pen) on the desk (board). Used to move objects, or to select text. • Right-click Press and release the right mouse button (or pen’s red side button) once. Used to make a shortcut menu appear, or to “drop” a Presentation Tool that was previously selected. (c) Burlington County College 2002
Shapes of the Mouse CursorThe appearance and function of the mouse cursor varies, depending on what you are pointing at on your screen: Pointing arrow Used to select an item by pointing at and clicking on it. (appears when pointing at icons, buttons, scroll arrows, etc.) Insert-bar Used to modify and edit text, and to position the text cursor in text boxes. (appears as a blinking “I” on text editing screens) Wait Hourglass Used to indicate that you should wait while Windows processes the command. (appears after clicking on an icon) Resize arrow Used to change the size of a window by dragging its border. (appears when you point at the border of a window) (c) Burlington County College 2002
Shapes of the Mouse Cursor(continued) Move arrow Used to move an object by dragging it. (appears when pointing at a window border or on a selected object) Hand Used in Help or Web browser windows to jump to links, terms, or definitions. (appears when pointing at hyperlinks - underlined terms/topics) Crosshair Used to draw a box or an ellipse while clicking and dragging. (appears when you have selected certain drawing tools) (c) Burlington County College 2002
Softkeys • Identical strips of 20 icons on both the left & right sides of the electronic white board. • Used to activate the IPM Presentation Tools(with an electronic pen). • Softkeys # 1-17: • have symbols or numbers on them, • can be re-defined using the Softkey Editor, • you can save an unlimited number of Softkey definitions, • “hover” over a Softkey with pen to get a tool tip. • Softkey # 18 = Online Help • Softkey # 19 = Virtual White Board (VWB) • Softkey # 20 = Calibrate Pen (c) Burlington County College 2002
Default Softkey Settings Highlighter (c) Burlington County College 2002
Presentation Tools • Select a Presentation Tool by clicking on a Softkey. • Deselect (or “drop”) a Presentation Tool by: • hovering over the board & right-clicking (red pen switch) • or clicking on Softkey # 3 (Stop/Escape). • Presentation Tools allow you to customize your presentation: • change background & pen color, size, or width • highlight and/or spotlight material • zoom (double sized image, useful for visual disabilities) • slowly reveal material, one line at a time from top • activate sound and video files • take “Snapshots” of screens, including your annotations • show previously saved snapshots as slides (c) Burlington County College 2002
Softkey Presentation Tools # 1, 2, 3 # 1: Next Slide – advances to next slide (same as Page Down key) # 2: Previous Slide – advances to previous slide (same as Page Up key) # 3: End Slide Show – (same as Esc key) (c) Burlington County College 2002
Softkey Presentation Tools # 4 & 5 # 4. Annotation Pen - Red # 5. Annotation Pen – Black • You can write notes & diagrams, underline, etc. on any VWB screen, and on top of any Windows screen. • You can change color, size, and width of the pen. • Note: the selected annotation pen must be configured to retain annotations in order for your written notes to remain on the screen (for example, before taking a “Snapshot” of the screen). (c) Burlington County College 2002
Softkey Presentation Tools # 6, 7, 11 & 12 # 6: Highlighter - you can change color & width # 7: Rubberstamp - places an arrow on the screen wherever you click # 11: Spotlight - darkens the screen except for a spotlighted oval area # 12: Zoom - doubles the screen image size Highlighter (c) Burlington County College 2002
Softkey Presentation Tools # 8, 9 & 10 # 8: Eraser - selectively erases notes/highlights # 9: Clear Screen - erases all annnotations at once # 10: Reveal - reveals screen one line at a time from the top as you drag pen down the screen (c) Burlington County College 2002
Softkey Presentation Tool # 13 # 13: Applause - can be set up to play sound or video files • Look for files with extensions: *.wav, or *.mov • In Windows-98 look under: • C:\Windows\Media\ • C:\Program Files\Plus!\Themes\ • In Windows-2000 look under: • C:\WINNT\ • C:\WINNT\Adobe\* • C:\Program Files\NetMeeting\ • C:\ Program Files\Windows NT\Pinball\ • C:\WINNT\Media\Microsoft Office 2000\ • C:\Program Files\Common Files\Network Associates\Alert Manager\ • C:\Program Files\Microsoft Visual Studio\MSDN98\98VSa\1033\ Samples\VB98\MCI\ (c) Burlington County College 2002
Softkey Presentation Tool # 14 # 14: Virtual Keyboard – will appear on VWB screen. Allows you to key in information to an application using the electronic pen. (c) Burlington County College 2002
Softkey Presentation Tool # 14Virtual Keyboard(continued) The Virtual Keyboard can be used to type information, instead of having to walk back to the computer in the room. The example here shows using the keyboard in Excel. (c) Burlington County College 2002
Softkey # 15 "Snapshot" # 15: Snapshot - allows you to save a picture of a screen, including any notes that you have written. • Saving a snapshot is not the same as saving text. When you save a snapshot, you can later insert this graphic into Word, Excel, etc., but you cannot edit it like text. • Also if you want your written annotations to be saved along with your screen (when you take a snapshot), then be sure the pen is set to “retain annotations”. • Do this by selecting <Start>, <Programs>, <Interactive Program Manager>, <Softkey Editor>. Then <Define> Softkey # 4 or # 5. Then select <Annotation Pen> from the Presentation Tools dropdown menu. Then check the box labeled “Retain Annotations”. (c) Burlington County College 2002
Softkey # 15: Snapshot (continued) • The default setting for Snapshot will capture the entire screen. • To take a snapshot of just part of the screen: • First, using the Softkey Editor, redefine the <Snapshot> Softkey (so that it will save just the part of the screen that you select). • Next annotate your page, if desired. • Lastly, click on the <Snapshot> Softkey (#15), then drag the pen over the area you want to capture. (Drag from upper left to lower right, and do not lift the pen from the board until the entire area you want is selected.) (c) Burlington County College 2002
Softkey # 18 # 18: On-line Help – allows you to find information about Presentation Tools and other topics. Click on one of the Help buttons to get information on that topic. (c) Burlington County College 2002
Other Presentation Tools • Remember, you can use the Softkey Editor to change the default settings for Softkeys # 1-17, to customize them to your liking. • Here are a few other Presentation Tools that can be “attached” to a particular Softkey by using the Softkey Editor: • Clock • Countdown Timer • Subliminal Message • Ticker Tape (c) Burlington County College 2002
Softkey Editor (1 of 6) To define or redefine a Softkey: • Start by clicking on <Start>, <Programs>, <Interactive Program Manager>, <Softkey Editor> • or by double-clicking on the Softkey Editor icon in the system tray at the bottom right of your screen: (c) Burlington County College 2002
Softkey Editor (2 of 6) • Then click <Define> for the Softkey you want to change: (c) Burlington County College 2002
Softkey Editor (3 of 6) • After clicking <Define> for the particular Softkey you want to change, a “Special Commands” menu will appear: (c) Burlington County College 2002
Softkey Editor (4 of 6) • In the Special Commands menu, select the Presentation Tool, Keyboard Command, Application, or File that you want to change by clicking on the appropriate radio button: <Select>, <Run>, <Open>, etc. • After clicking <OK>, specify the desired properties for the Tool, Command, Application, or File that you have selected. (c) Burlington County College 2002
Softkey Editor (5 of 6) • After specifying the desired properties that your Presentation Tool, Keyboard Command, or File is to have, you must then save the Softkeys to activate them. • click on <Save>, type in a filename, and then click on <Save> again (automatically given an *.sky extension) (c) Burlington County College 2002
Softkey Editor (6 of 6) • You can open a previously saved Softkey file: • first, in the Softkey Editor window, click on <Open> • then, from the “Open Softkey Definition File” dialog box, select the Softkey file (*.sky) that you want. • lastly click on <Open> Pick <Open> from the Softkey Editor to open the location where Softkey files are saved. (c) Burlington County College 2002
Basic Softkey Information • Note: The following Softkeys do not work when you are in the Virtual White Board: • Annotation Pen (Softkeys # 4 & 5) • Highlighter (Softkey # 6) • Eraser (Softkey # 8) • Reason: You already have pens, highlighters, and eraser when you are in Virtual White Board. (c) Burlington County College 2002
Virtual White Board (VWB) • use “electronic” ink to write notes and highlight screens • take “snapshots” of screens, then save/print/email them • you can save 255 bitmap snapshots per session, and up to 999 sessions total • copy-and-paste both notes and screens for re-use in other documents/programs • use Softkeys to control the slide presentation • (not to be confused with a Volkswagen Beetle) • Launch VWB by clicking on Softkey # 19 • Includes Presentation Tools: (c) Burlington County College 2002
When you launch VWB, this is what you see: This is the default “white” screen. (c) Burlington County College 2002
VWB Notepad Background “Notepad” is one of ten alternate backgrounds you can pick. (c) Burlington County College 2002
VWB Precision Graph Paper Background This is another sample background. (c) Burlington County College 2002
To Select a Different VWB Background • Click on <Format> • Then click on <Options> • Then click on the <Page> tab • Then click arrow for <Presets> • Then select the background you want • Lastly click <OK> (c) Burlington County College 2002
Selecting a VWB Background(continued) (c) Burlington County College 2002
To Select a Pen Color in VWB (c) Burlington County College 2002
To Select the Highlighter in VWB (c) Burlington County College 2002
To Change Pen Width in VWB (c) Burlington County College 2002
To Select the Eraser in VWB (c) Burlington County College 2002
Advance/Reverse Slides & Undo in VWB Note: “Undo” button is the same as in other MS applications. (c) Burlington County College 2002
Printing Your VWB Notes If you have an attached printer, you can print notes by using the standard “print” button on the toolbar. (c) Burlington County College 2002
Printing Alternative in VWB Select <File>, <Print> for the current VWB page, or <File>, <Print All> for the entire session. (c) Burlington County College 2002
Print Without VWB Background Sometimes you may wish to disable background printing, to save on toner cartridges. (c) Burlington County College 2002