Download
1 / 46
520 likes | 925 Views
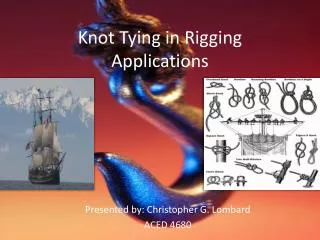
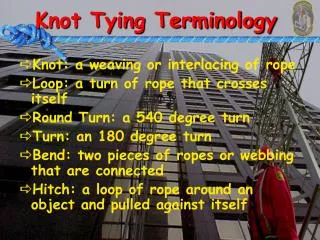
Knot Tying Terminology. Knot: a weaving or interlacing of rope Loop: a turn of rope that crosses itself Round Turn: a 540 degree turn Turn: an 180 degree turn Bend: two pieces of ropes or webbing that are connected Hitch: a loop of rope around an object and pulled against itself.

E N D
Knot Tying Terminology • Knot: a weaving or interlacing of rope • Loop: a turn of rope that crosses itself • Round Turn: a 540 degree turn • Turn: an 180 degree turn • Bend: two pieces of ropes or webbing that are connected • Hitch: a loop of rope around an object and pulled against itself
Terminology • Bight: a rope that is bent back and does not cross over itself • Working End: the end used to tie off to an object • Running End: the end that is free • Standing Part: all of the rope that is not attached to the anchor and used for work, such as hoisting or pulling
Turns Ends, Bight, Loop Terminology
Constructing a Knot Three Rules • Dress • Set • Safety
Overhand Knot • A safety or keeper knot to secure loose ends Overhand Knot Loose
Half Hitch • To keep another knot drawn up or to keep the main rope taut
Water Knot / Ring Bend • To attach two pieces of webbing
Clove Hitch • To anchor rope or webbing around bars, poles, and handles • Method 1: • Note: minimum 1 m tag end (running end)
Clove Hitch • Method 2: • Note: minimum 1 m tag end (running end)
Munter Hitch • A two directional friction hitch • Do not load open carabiners.
Three Wrap Prussik • To cinch one rope of smaller diameter to another rope of larger diameter
Figure-Eight Stopper • To stop the running end of the rope from moving through a friction device or rope bag, and to identify the end of the rope quickly
Figure-Eight on a Bight • A secured loop to create an anchor knot
Figure-Eight Bend • To join two ropes together
Figure-Eight Follow Through • Anchor knot used to tie around an object
Double-Loop Figure-Eight • Anchor knot used to create a bigger surface area for load bearing
Running Loop Figure-Eight • To create a loop which can tighten upon itself
In-Line Figure-Eight • To create a loop mid-line in the rope • Note: one directional knot
In-Line Butterfly knot • To create a loop mid-line in the rope • Note: multi-directional knot
Double Fisherman’s Knot • To join two ropes together
Overhand Slip Knot • To safely tie off a rope with the capability of quick release • Note: The aerial stretcher evolution uses a Munter, overhand slip, and overhand keeper
Handcuff Knot • Provide rescuers with the ability to package a patient in order to remove the individual from the dangerous environment • Note: Used as last resort; may cause injury
Hasty Harness To provide rescuers with the ability to package a patient in order to move him or her • Method I: Chalk Line • Method II: Standing
Tie the ends of the webbing together with a water knot. Place webbing on ground around the patient. Step 1 Chalk Line: Method I
Move the webbing at the patient’s head behind the patient’s shoulders and back. Move the webbing at the patient’s feet under the patient’s legs to mid-thigh. Step 2 Chalk Line: Method I
Pull the webbing between the patient’s legs and lay it on the torso. Pull the side sections of the webbing up onto the patient’s torso and over the top of the webbing pulled between the legs. Step 3 Chalk Line: Method I
Lay the chest loops over the leg loops. Step 4 Chalk Line: Method I
Pull the leg loops through the chest loops to form two handholds. Note: The location of the webbing is high on the back and mid-chest. Step 5 Chalk Line: Method I
Tie the ends of webbing together with a water knot. Double up the webbing and drape it over the patient’s shoulder. Reach between the patient’s legs and pull the webbing up to the torso. Step 1 Standing: Method II
Move the leg loops up to the patient’s torso. The rescuer places both arms through the leg loops. The rescuer reaches around the torso and grabs the two loops behind the patient’s back, one in each hand. Step 2 Standing: Method II
Pull the torso loops through the centre of the leg loops to form two handholds. Note: The location of the webbing is high on the back and mid-chest. Step 3 Standing: Method II
Self-Rescue Kit Aluminum Carabiner and Webbing • To provide a firefighter with the knowledge, skill, and equipment to aid the firefighter in rescue situations • Webbing is flat rope
Self-Rescue Kit Keep a Firefighter Alive • Tow a fallen firefighter • Carry a fallen firefighter • Create a harness for a firefighter • Create a rope to slide down • Lower a firefighter (Munter hitch)
Self-Rescue Kit Secure an Unstable Situation • Secure a tool • Animal control • Secure egress (tying doors open)
Self-Rescue Kit Protecting the Public • Carry a victim • Secure a victim in a harness • Create a rope to pull up a victim • Perform a reaching assist for a patient in the water • Secure a combative patient • Package a patient • Keep people back (fire line)
Tool Application Ladders • Large loop, figure eight on a bight • One third from top between the beams • Loop to tip of ladder • Loop over beams • Pull main rope to tighten • Tip away from building
Tool Application Object with Handle • Figure-eight stopper • Running end through handle • Trace figure eight, figure-eight follow through • Safety knot
Tool Application Pike Pole • Clove hitch on handle • Two half hitches toward tip • Tip up
Tool Application Axe / Sledge Hammer • Figure eight on a bight • Safety knot • Loop over handle • Bend rope over axe head • Two half hitches on handle
Tool Application Tarp • Figure eight on a bight • Safety knot • Pull standing part through loop of figure eight on a bight • Form big loop and place around tarp
Tool Application Crow Bar • Clove hitch on handle • Two half hitches toward tip • Tip up
Tool Application Hose and Nozzle • Bend hose and nozzle back 2 meters • Nozzle on hose • Clove hitch around nozzle and hose • Two half hitches toward bend in hose
Tool Application Tight Line (Modified Truckers) • Mid-line (in-line) knot • Working end around anchor • Working end into the loop of an in-line knot • Pull tight • Overhand slip knot around all rope • Safety knot
Tool Application Two Ropes Together (Figure-Eight Bend) • Figure-eight stopper • Trace the figure-eight stopper with working end of second rope • Safety knot on both ropes
Tool Application Two Ropes Together (Double Fisherman) • Tie a double fisherman knot