Download
1 / 66
660 likes | 901 Views
Microsoft PowerPoint 2013. Chapter 2 Enhancing a Presentation with Pictures, Shapes, and WordArt. Objectives. Search for and download an online theme Insert and format pictures Insert and size a shape Apply effects to a shape Add text to a shape Change the text font. Objectives.

E N D
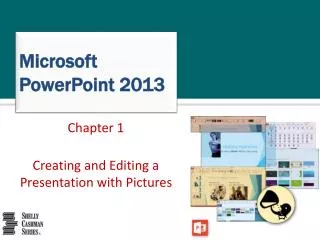
MicrosoftPowerPoint 2013 Chapter 2 Enhancing a Presentation with Pictures, Shapes, and WordArt
Objectives • Search for and download an online theme • Insert and format pictures • Insert and size a shape • Apply effects to a shape • Add text to a shape • Change the text font Enhancing a Presentation with Pictures, Shapes, and WordArt
Objectives • Insert and format WordArt • Insert a picture to create a background • Format slide backgrounds • Find and replace text and check spelling • Add and print speaker notes Enhancing a Presentation with Pictures, Shapes, and WordArt
Project – Presentation with Pictures, Shapes, and WordArt Enhancing a Presentation with Pictures, Shapes, and WordArt
Roadmap • Download a theme and select slides for the presentation • Insert and format pictures for the slides • Insert and format shapes on one slide • Insert and format WordArt by changing the shape, fill, and outline • Format slide backgrounds with a gradient, texture, and picture fill • Review and revise slides by finding a synonym and checking spelling Enhancing a Presentation with Pictures, Shapes, and WordArt
Searching for and Downloading an Online Theme • Press and hold or point to the desired category in the Suggested searches list • Tap or click the desired category to search for themes • Scroll to and then tap or click the desired theme to display a theme preview dialog box with a thumbnail view of the theme • Tap or click the Create button to download the theme and open a presentation with the theme in PowerPoint Enhancing a Presentation with Pictures, Shapes, and WordArt
Searching for and Downloading an Online Theme Enhancing a Presentation with Pictures, Shapes, and WordArt
Deleting a Slide • Tap or click the slide thumbnail in the Thumbnail pane for the slide to delete • Swipe horizontally across each additional slide thumbnail to delete, or press and hold the SHIFT key and then click the thumbnail for the last slide in the series to delete • Press and hold or right-click any selected slide to display the shortcut menu • Tap Delete or click Delete Slide to delete the selected slides from the presentation Enhancing a Presentation with Pictures, Shapes, and WordArt
Deleting a Slide Enhancing a Presentation with Pictures, Shapes, and WordArt
Inserting a Picture into a Slide without a Content Placeholder • Click INSERT on the ribbon to display the INSERT tab • Tap or click the Pictures button (INSERT tab | Images group) to display the Insert Picture dialog box • Navigate to the location containing the picture • Tap or click the desired picture to select the file name • Tap or click the Insert button to insert the illustration • If necessary, drag the picture to the desired location on the slide Enhancing a Presentation with Pictures, Shapes, and WordArt
Inserting a Picture into a Slide without a Content Placeholder Enhancing a Presentation with Pictures, Shapes, and WordArt
Changing a Picture • Press and hold or right-click the picture to display the shortcut menu • Tap or click Change Picture to display the Insert Picture dialog box • Tap or click the Browse button in the From a file area to display the Insert Pictures dialog box • Navigate to the location containing the new picture, and then tap or click the new picture to select the file name • Tap or click the Insert button to insert the picture Enhancing a Presentation with Pictures, Shapes, and WordArt
Changing a Picture Enhancing a Presentation with Pictures, Shapes, and WordArt
Correcting a Picture • With the desired picture selected and the PICTURE TOOLS FORMAT tab active, tap or click the Corrections button to display the Corrections gallery • Tap or click the desired correction to apply the correction to the picture Enhancing a Presentation with Pictures, Shapes, and WordArt
Correcting a Picture Enhancing a Presentation with Pictures, Shapes, and WordArt
Applying a Picture Style • With the picture selected, tap or click the PICTURE TOOLS FORMAT tab and then tap or click the More button in the Picture Styles gallery to expand the gallery • Tap or click the desired picture style to apply the style to the selected picture Enhancing a Presentation with Pictures, Shapes, and WordArt
Applying a Picture Style Enhancing a Presentation with Pictures, Shapes, and WordArt
Adding a Picture Border • With the picture selected, tap or click the Picture Border arrow on the PICTURE TOOLS FORMAT tab to display the Picture Border gallery • Point to Weight on the Picture Border gallery to display the Weight list • Tap or click the desired line weight to add the line weight to the picture Enhancing a Presentation with Pictures, Shapes, and WordArt
Adding a Picture Border Enhancing a Presentation with Pictures, Shapes, and WordArt
Changing a Picture Border Color • With the photo selected, tap or click the Picture Border button on the PICTURE TOOLS FORMAT tab to display the Picture Border gallery • Tap or click the desired color to change the picture border color Enhancing a Presentation with Pictures, Shapes, and WordArt
Changing a Picture Border Color Enhancing a Presentation with Pictures, Shapes, and WordArt
Applying Picture Effects • With the picture selected, tap or click the Picture Effects button on the PICTURE TOOLS FORMAT tab to display the Picture Effects menu • Point to the desired command in the Picture Effects menu to display the associated gallery • Tap or click the desired picture effect to apply it Enhancing a Presentation with Pictures, Shapes, and WordArt
Applying Picture Effects Enhancing a Presentation with Pictures, Shapes, and WordArt
Adding a Shape • Tap or click the Shapes More button on the HOME tab to display the Shapes gallery • Tap or click the desired shape in the Shapes gallery • Position the mouse pointer where you wish to insert the shape, and then tap or click the slide to insert the shape Enhancing a Presentation with Pictures, Shapes, and WordArt
Adding a Shape Enhancing a Presentation with Pictures, Shapes, and WordArt
Resizing a Shape • With the shape selected, drag a corner sizing handle on the picture diagonally to the desired size • Release the mouse button to resize the shape Enhancing a Presentation with Pictures, Shapes, and WordArt
Applying a Shape Style • Tap or click the shape to select it, and then tap or click the Quick Styles button on the HOME tab • Tap or click the desired shape style to apply the selected style to the shape Enhancing a Presentation with Pictures, Shapes, and WordArt
Applying a Shape Style Enhancing a Presentation with Pictures, Shapes, and WordArt
Adding Text to a Shape • Tap or click the shape to select it and then type the desired text Enhancing a Presentation with Pictures, Shapes, and WordArt
Changing the Font • With the shape selected, position the insertion point in the text to select, and then drag the selection handles to select the text • Tap or click the Font arrow on the mini toolbar to display the Font gallery • Scroll to the desired font in the Font gallery • Tap or click the desired font Enhancing a Presentation with Pictures, Shapes, and WordArt
Changing the Font Enhancing a Presentation with Pictures, Shapes, and WordArt
Formatting Text Using the Format Painter • With the text selected with the format you wish to copy, double-tap or double-click the Format Painter button on the HOME tab • Move the mouse pointer off the ribbon • Select the text to which you wish to copy the formatting • Tap the Format Painter button or press the ESC key to turn off the Format Painter feature Enhancing a Presentation with Pictures, Shapes, and WordArt
Formatting Text Using the Format Painter Enhancing a Presentation with Pictures, Shapes, and WordArt
Copying and Pasting a Shape • With the shape selected, tap or click the Copy button on the HOME tab • Tap or click the Paste button on the HOME tab to insert a duplicate shape Enhancing a Presentation with Pictures, Shapes, and WordArt
Inserting WordArt • Display the INSERT tab • Tap or click the WordArt button to display the WordArt gallery • Tap or click the desired WordArt style to insert the WordArt object • Type the desired text in the WordArt text box Enhancing a Presentation with Pictures, Shapes, and WordArt
Inserting WordArt Enhancing a Presentation with Pictures, Shapes, and WordArt
Change the WordArt Shape • With the WordArt selected, tap or click the Text Effects button on the DRAWING TOOLS FORMAT tab to display the Text Effects menu • Point to the desired group in the Text Effects menu to display the associated gallery • Tap or click the desired shape in the gallery to change the WordArt shape Enhancing a Presentation with Pictures, Shapes, and WordArt
Change the WordArt Shape Enhancing a Presentation with Pictures, Shapes, and WordArt
Applying a WordArt Text Fill • With the WordArt text selected, tap or click the Text Fill button arrow on the DRAWING TOOLS FORMAT tab to display the Text Fill gallery • Point to Texture in the Text Fill gallery to display the Texture gallery • Tap or click the desired texture to apply this texture as the fill for the WordArt object Enhancing a Presentation with Pictures, Shapes, and WordArt
Applying a WordArt Text Fill Enhancing a Presentation with Pictures, Shapes, and WordArt
Changing the Weight of the WordArt Outline • With the WordArt selected, click the Text Outline arrow on the DRAWING TOOLS FORMAT tab to display the Text Outline gallery • Point to Weight in the gallery to display the Weight list • Tap or click the desired weight to apply this line weight to the WordArt text outline Enhancing a Presentation with Pictures, Shapes, and WordArt
Changing the Weight of the WordArt Outline Enhancing a Presentation with Pictures, Shapes, and WordArt
Changing the Color of the WordArt Outline • With the WordArt selected, display the Text Outline gallery • Tap or click the desired color to apply this color to the WordArt outline Enhancing a Presentation with Pictures, Shapes, and WordArt
Changing the Color of the WordArt Outline Enhancing a Presentation with Pictures, Shapes, and WordArt
Inserting a Picture to Create a Background • Display the DESIGN tab and then click the Format Background button • With the Fill pane displayingand ‘Picture or texture fill’ selected,tap or click the File button to display the Insert Picture dialog box • Navigate to the location of the picture • Tap or click the desired picture to select it, and then tap or click the Insert button to insert the picture Enhancing a Presentation with Pictures, Shapes, and WordArt
Inserting a Picture to Create a Background Enhancing a Presentation with Pictures, Shapes, and WordArt
Formatting the Background Picture Fill Transparency • Tap or click the Transparency slider in the Format Background dialog box and drag it to the desired transparency setting Enhancing a Presentation with Pictures, Shapes, and WordArt
Inserting a Texture Fill • Tap or click the Format Background button on the DESIGN tab to display the Format Background task pane • Tap or click the Texture arrow to display the Texture gallery • Tap or click the desired texture Enhancing a Presentation with Pictures, Shapes, and WordArt
Inserting a Texture Fill Enhancing a Presentation with Pictures, Shapes, and WordArt
Formatting the Background Texture Fill Transparency • Display the slide with the texture fill • Drag the Transparency slider to change the transparency Enhancing a Presentation with Pictures, Shapes, and WordArt